Software Settings
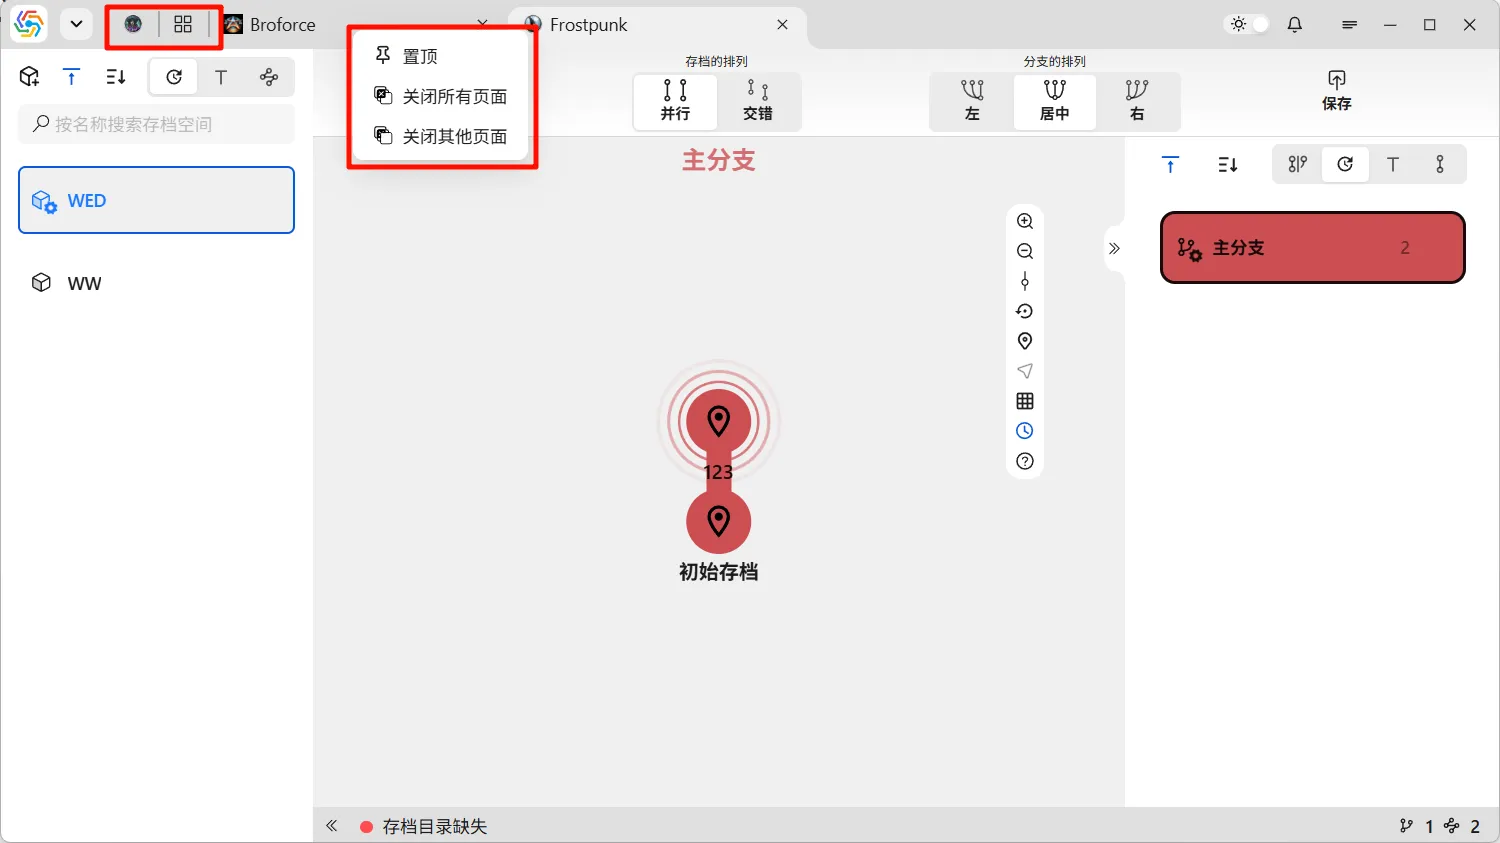
This software uses a multi-tab interaction interface similar to Chrome, with all tabs located at the top of the interface. Right-clicking on a tab opens the tab menu, allowing operations such as pinning and closing tabs:
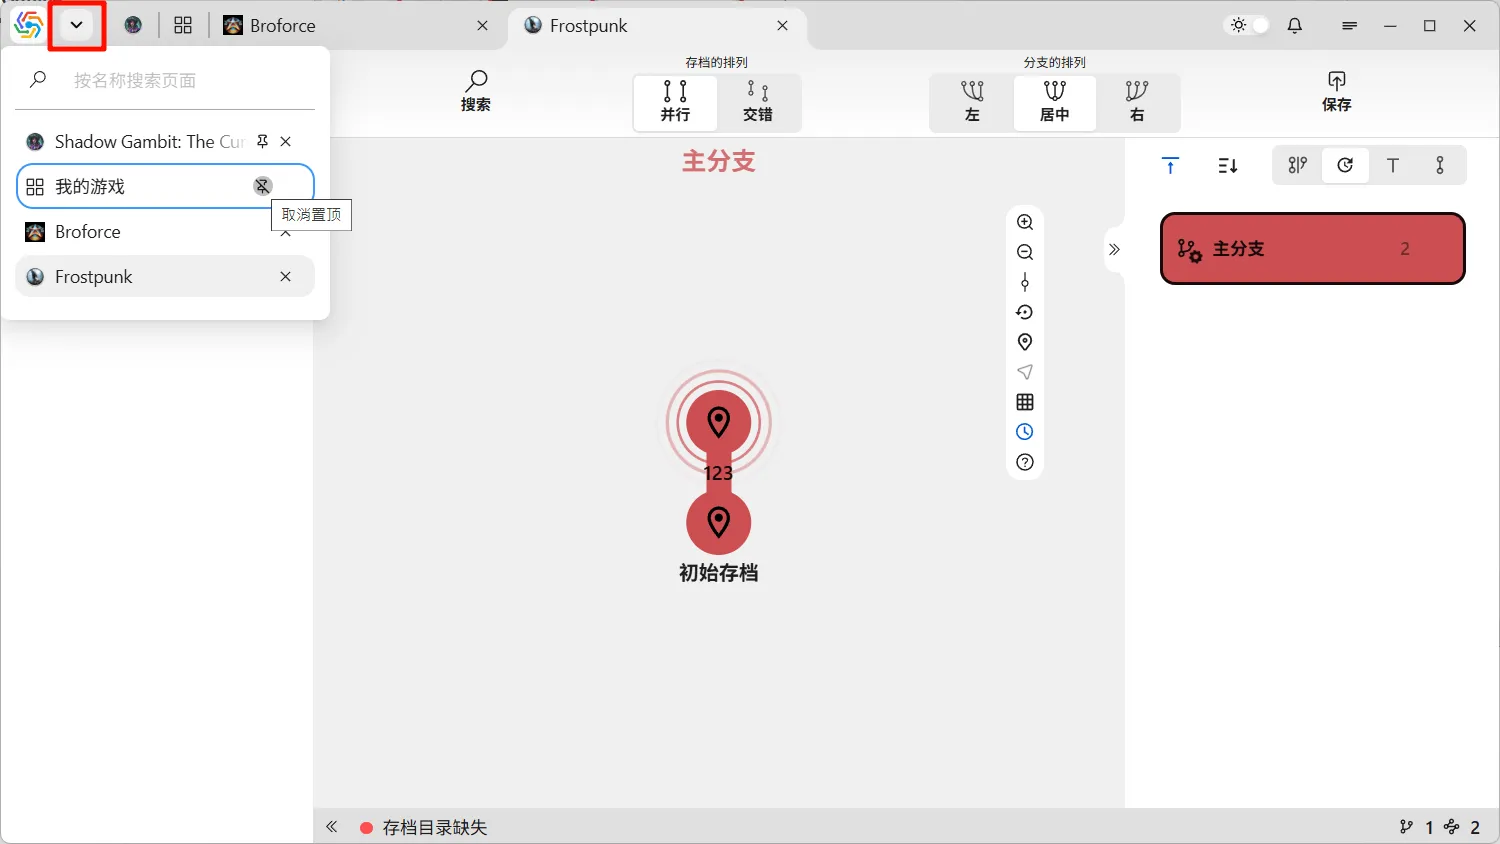
The button on the far left of the tabs is the Tab Manager, which allows for unified operations like pinning, unpinning, and closing all tabs, and supports searching for tabs:
Task Center
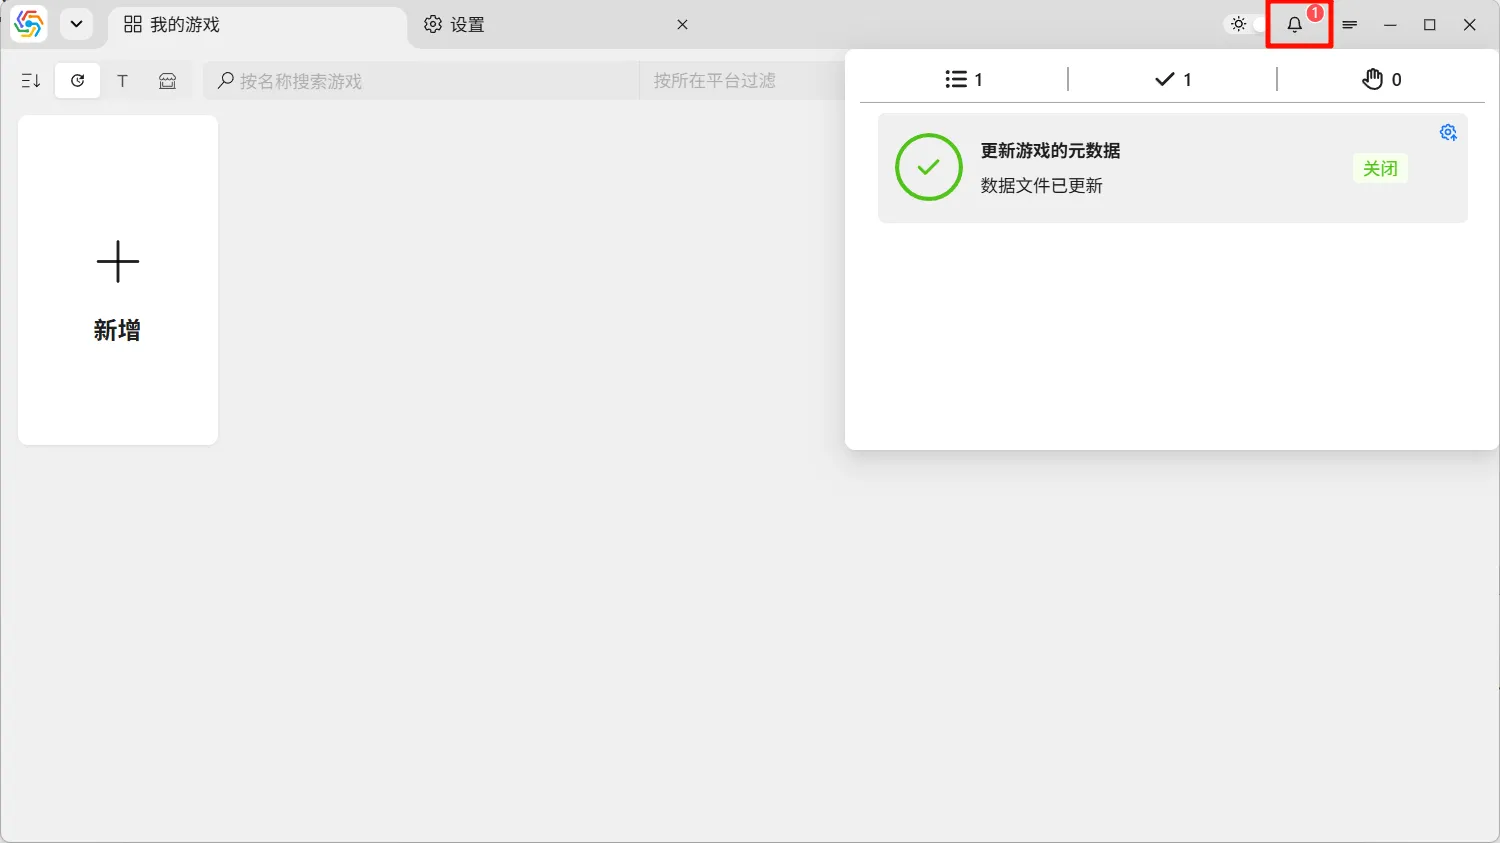
Section titled “Task Center”The bell icon on the top right of the software interface is the Task Center, primarily used for managing background tasks. Background tasks have three states: Running, Completed, and Awaiting Intervention. Completed and Awaiting Intervention tasks will notify the user:
Settings Page
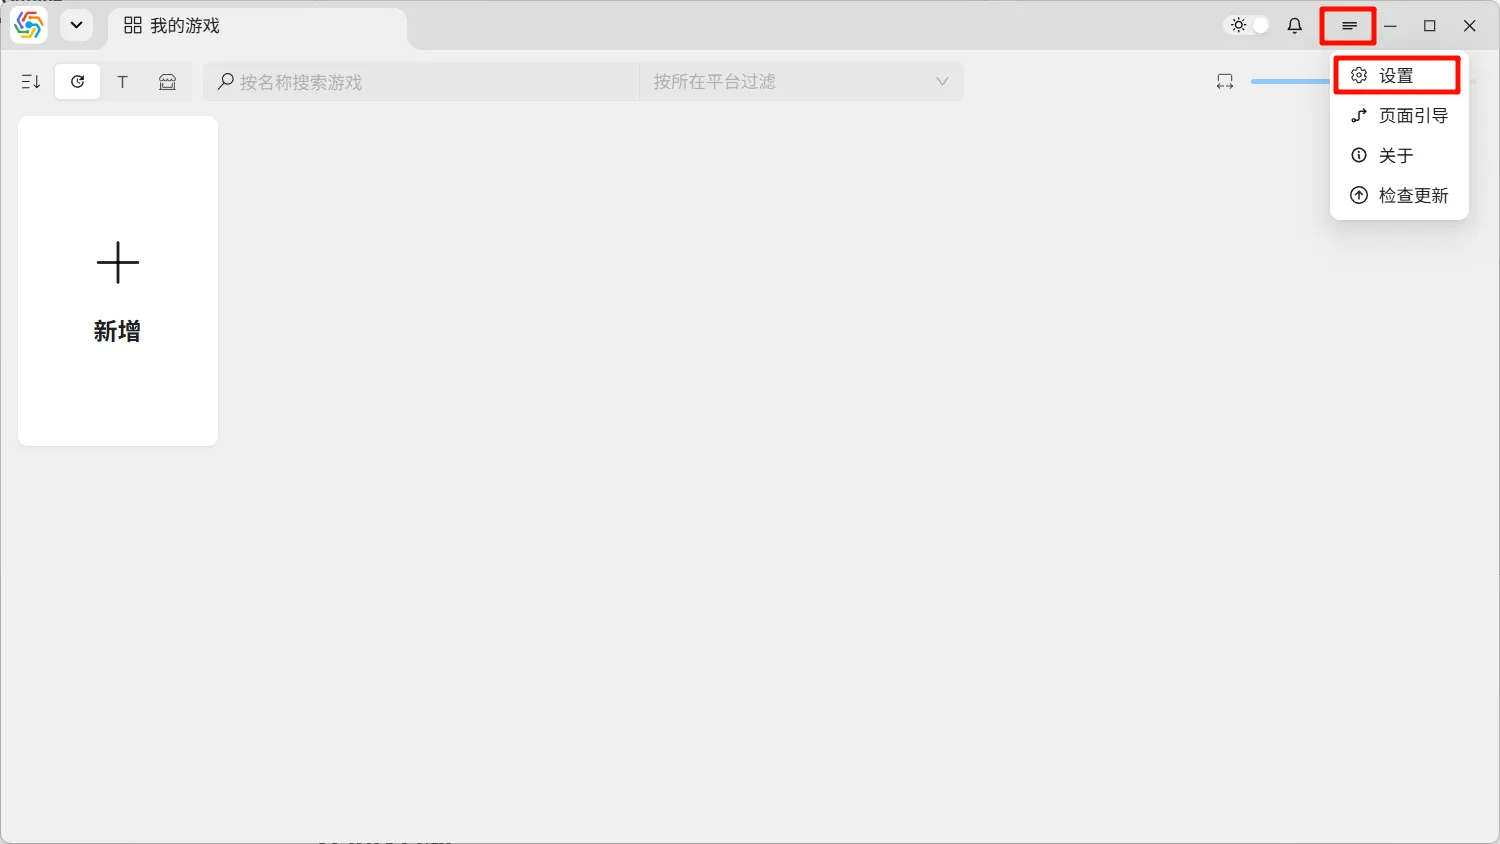
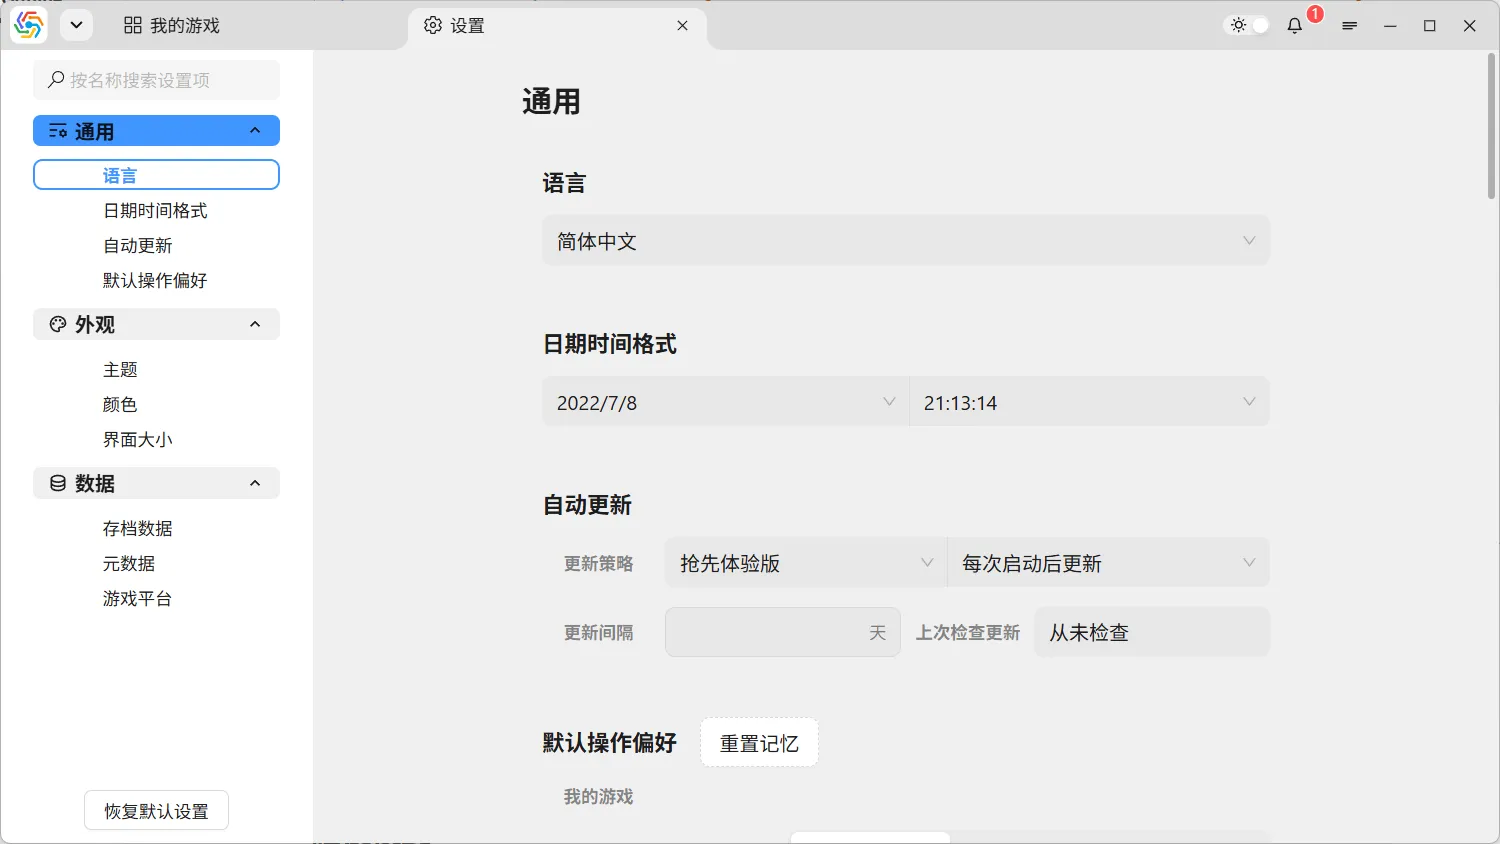
Section titled “Settings Page”All software settings are located on the Settings page, accessed from the menu bar in the top right corner:
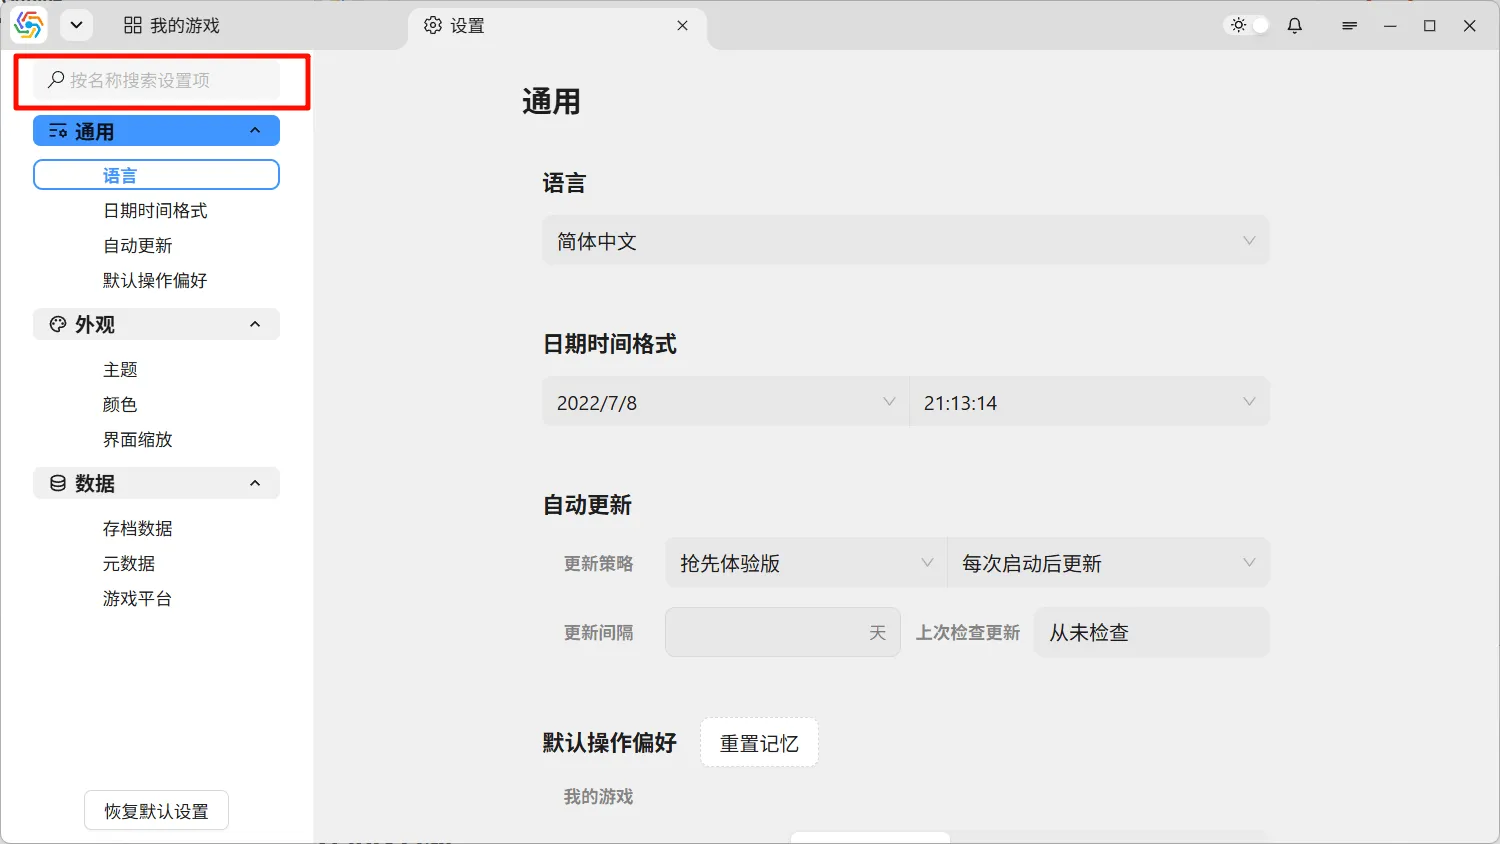
The left side of the Settings page is a navigation bar for settings options. You can search for settings items by keyword at the top:
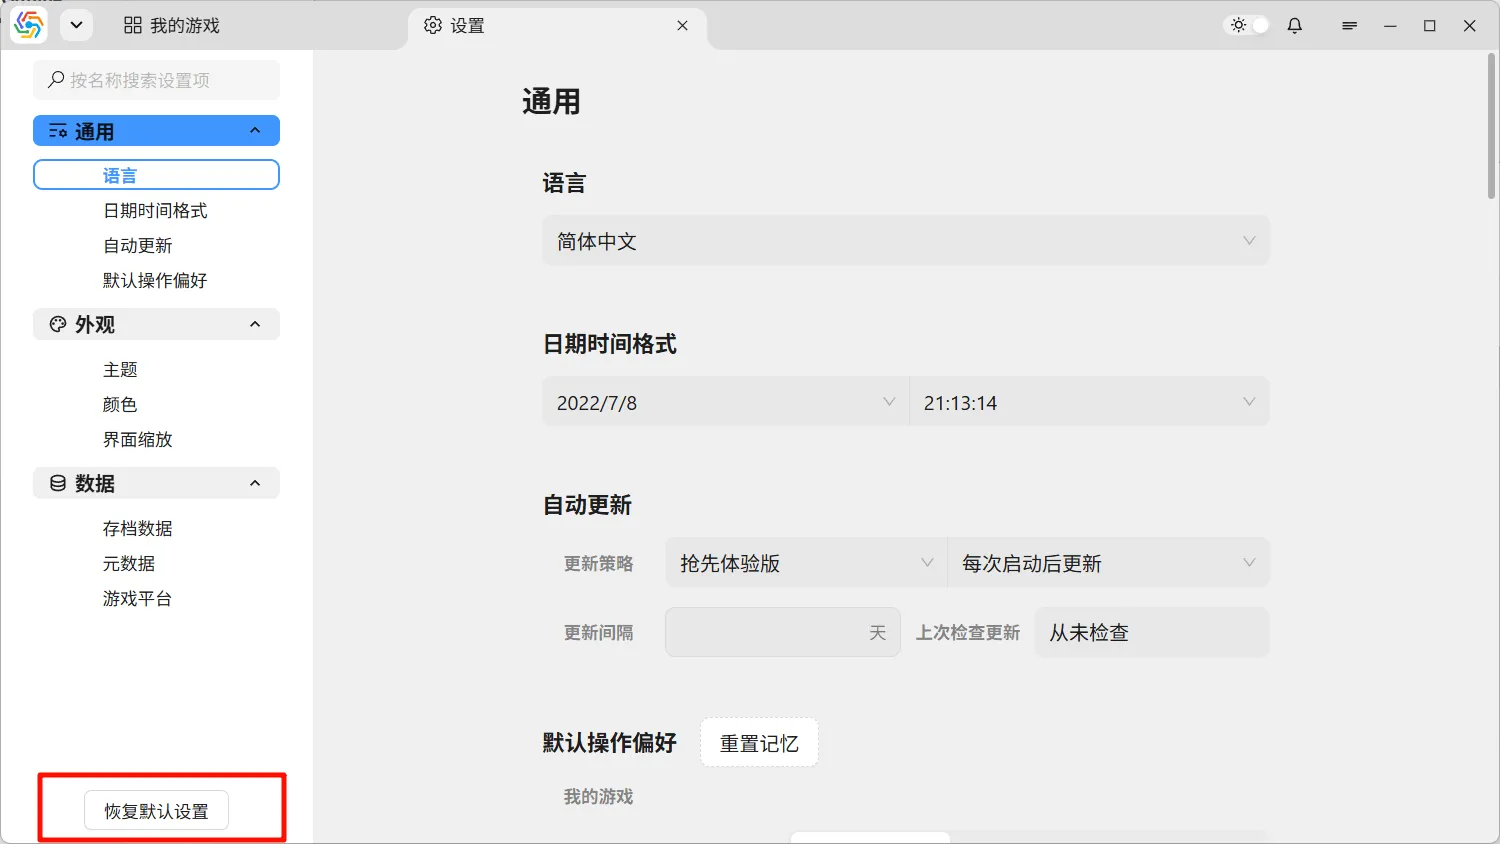
At the bottom of the navigation bar, you can restore all default settings with one click (excluding critical settings such as interface language, save data directory, metadata file directory, and Rclone executable path):
Interface Appearance
Section titled “Interface Appearance”Interface Language
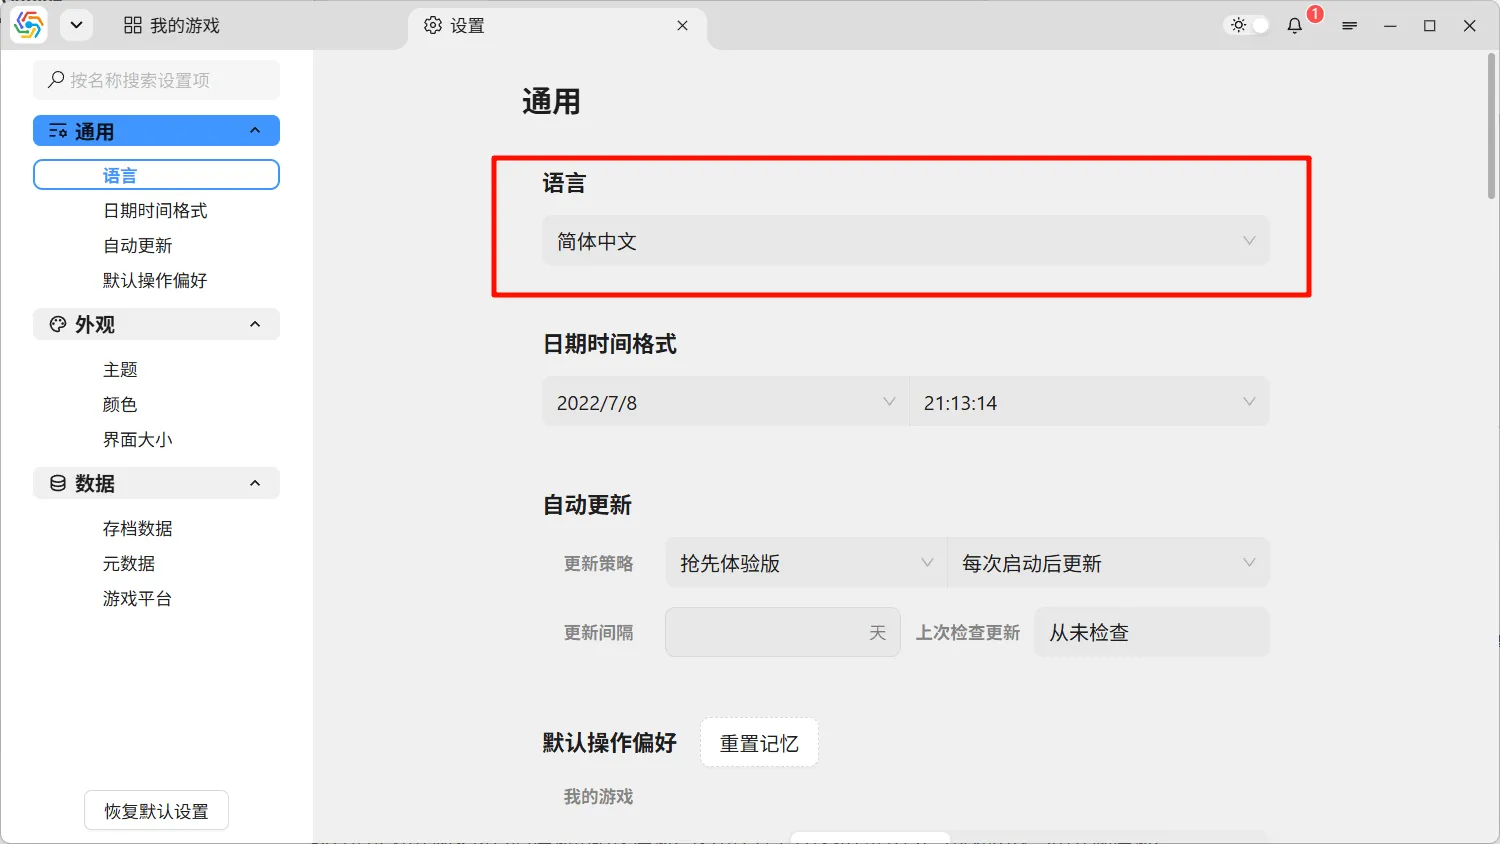
Section titled “Interface Language”You can adjust the software’s display language in the settings page under General ----> Language. The language switch takes effect immediately, but some interfaces, such as pop-ups within rich text editors, may require re-entering the interface to take effect:
Date Time Format
Section titled “Date Time Format”The software displays a large amount of time information, such as save times and game update times. To accommodate different user habits, the date and time format switches along with the interface language. If the format is not as expected, you can adjust it yourself in the settings interface under General ----> Date Time Format:
Dark Mode
Section titled “Dark Mode”The overall appearance of the software supports Day Mode and Dark Mode. You can quickly switch the current appearance using the toggle next to the Task Center button:
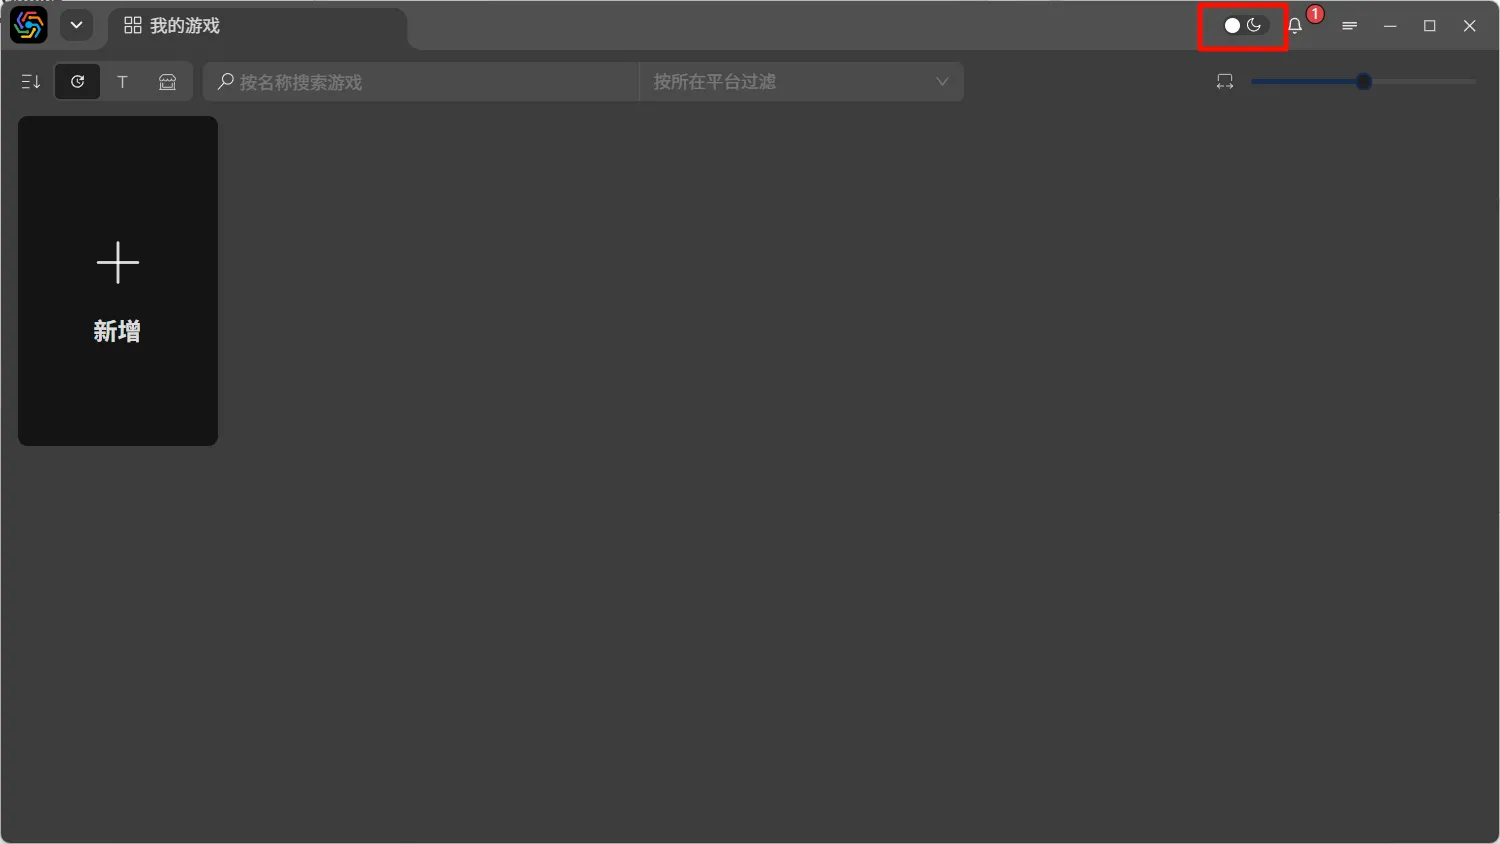
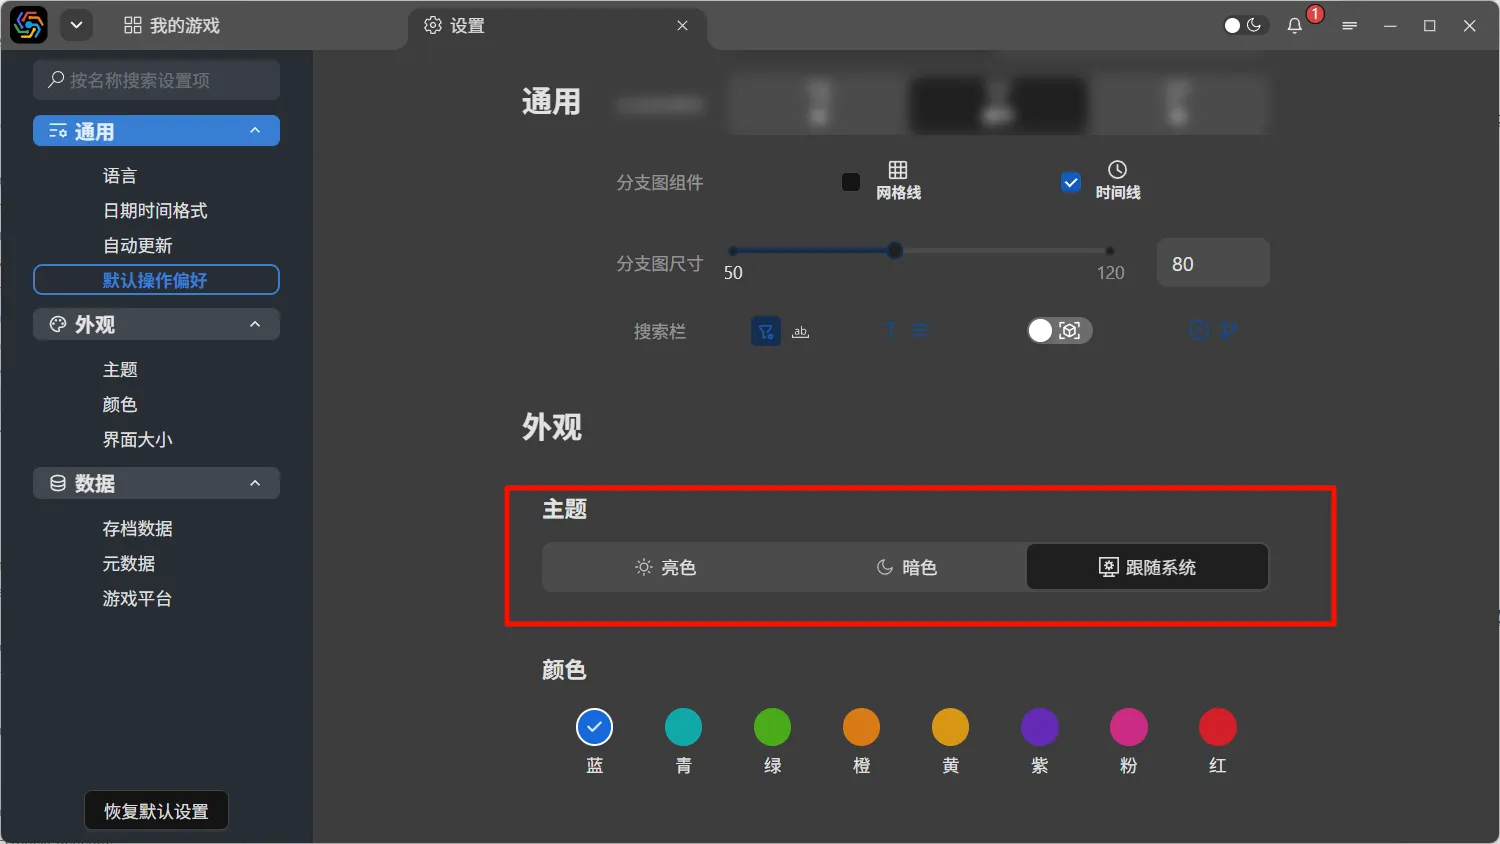
However, this toggle is only for temporary switching; the appearance will revert to the original after the software restarts. To permanently change the interface’s appearance, go to the settings interface and select the desired appearance mode under Appearance ----> Theme:
Accent Color
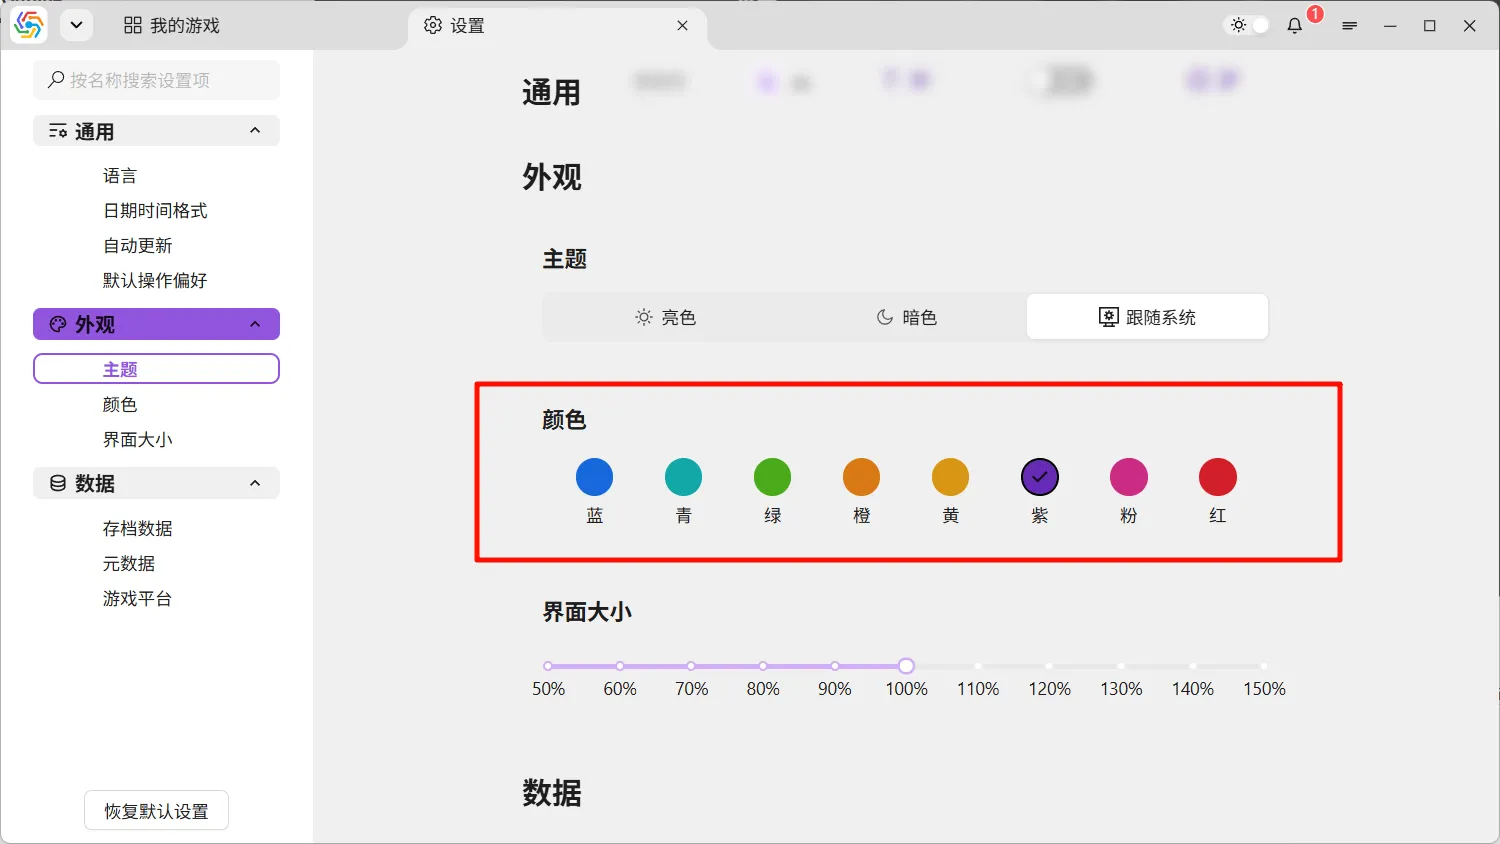
Section titled “Accent Color”Most interactive elements in the software interface can have their accent color set, such as the fill color of buttons or the highlight color when the mouse hovers over an element. You can choose your desired accent color in the settings interface under Appearance ----> Color:
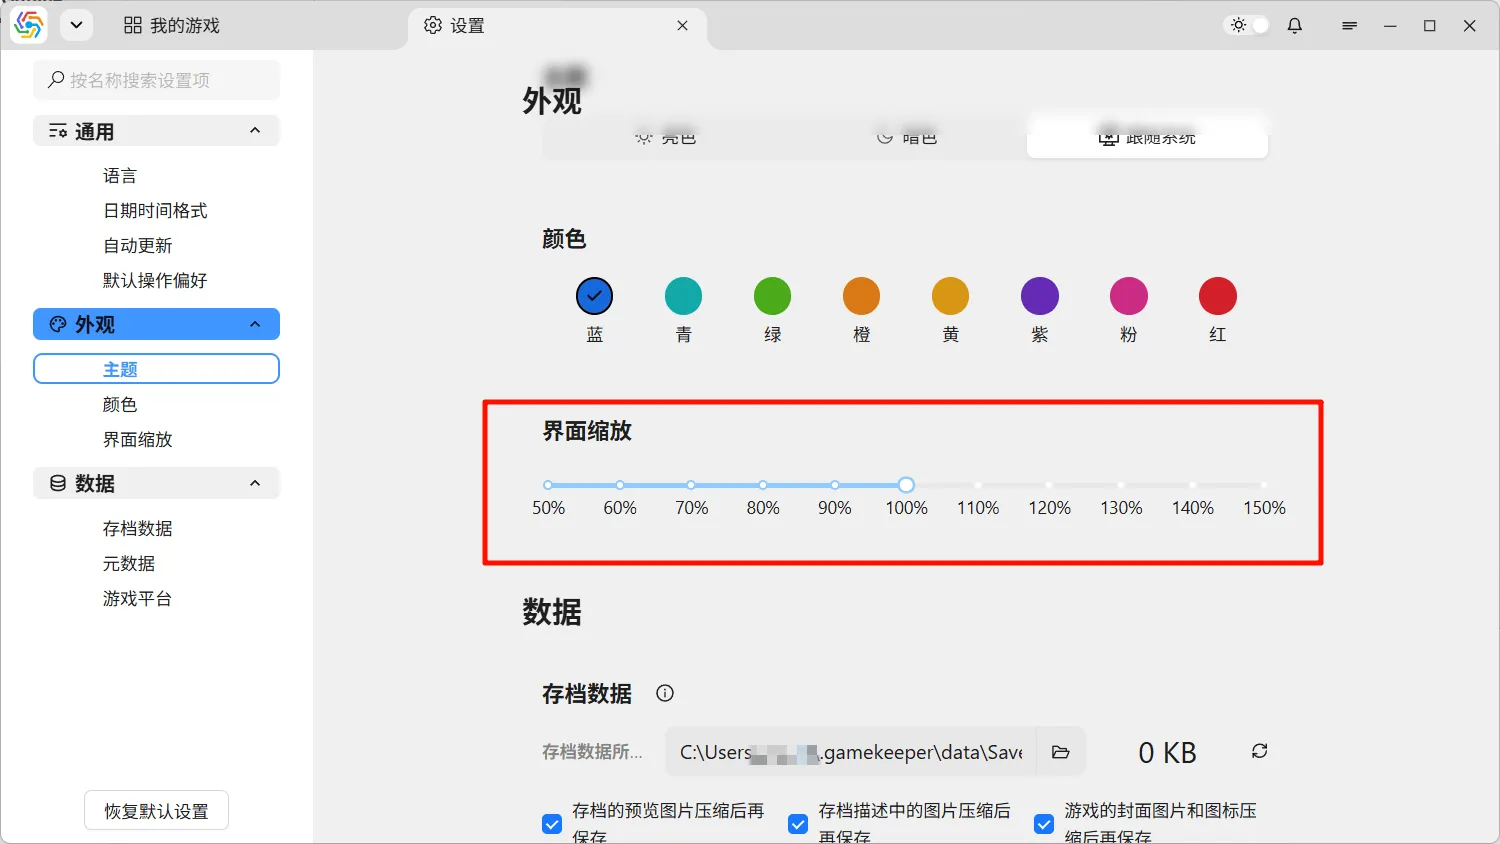
Interface Zoom
Section titled “Interface Zoom”You can zoom the software interface in or out in the settings interface under Appearance ----> Interface Zoom:
Shortcuts
Section titled “Shortcuts”You can set global shortcuts for the software in the settings interface under General ----> Shortcuts. Currently, there are two main shortcuts:
Show/Hide Main Interface
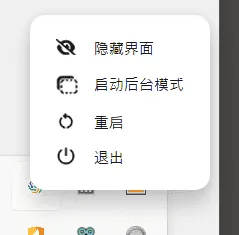
Section titled “Show/Hide Main Interface”Quickly toggle the visibility of the main interface. The same operation can also be performed from the software’s tray menu:
Start/Exit Background Mode
Section titled “Start/Exit Background Mode”When the software enters background mode, the interface rendering process is completely shut down, and the software runs entirely in the background. This mode significantly reduces memory usage and performance consumption, making it suitable for use while gaming. Exiting background mode will re-render the interface. The same operation can also be performed from the software’s tray menu:
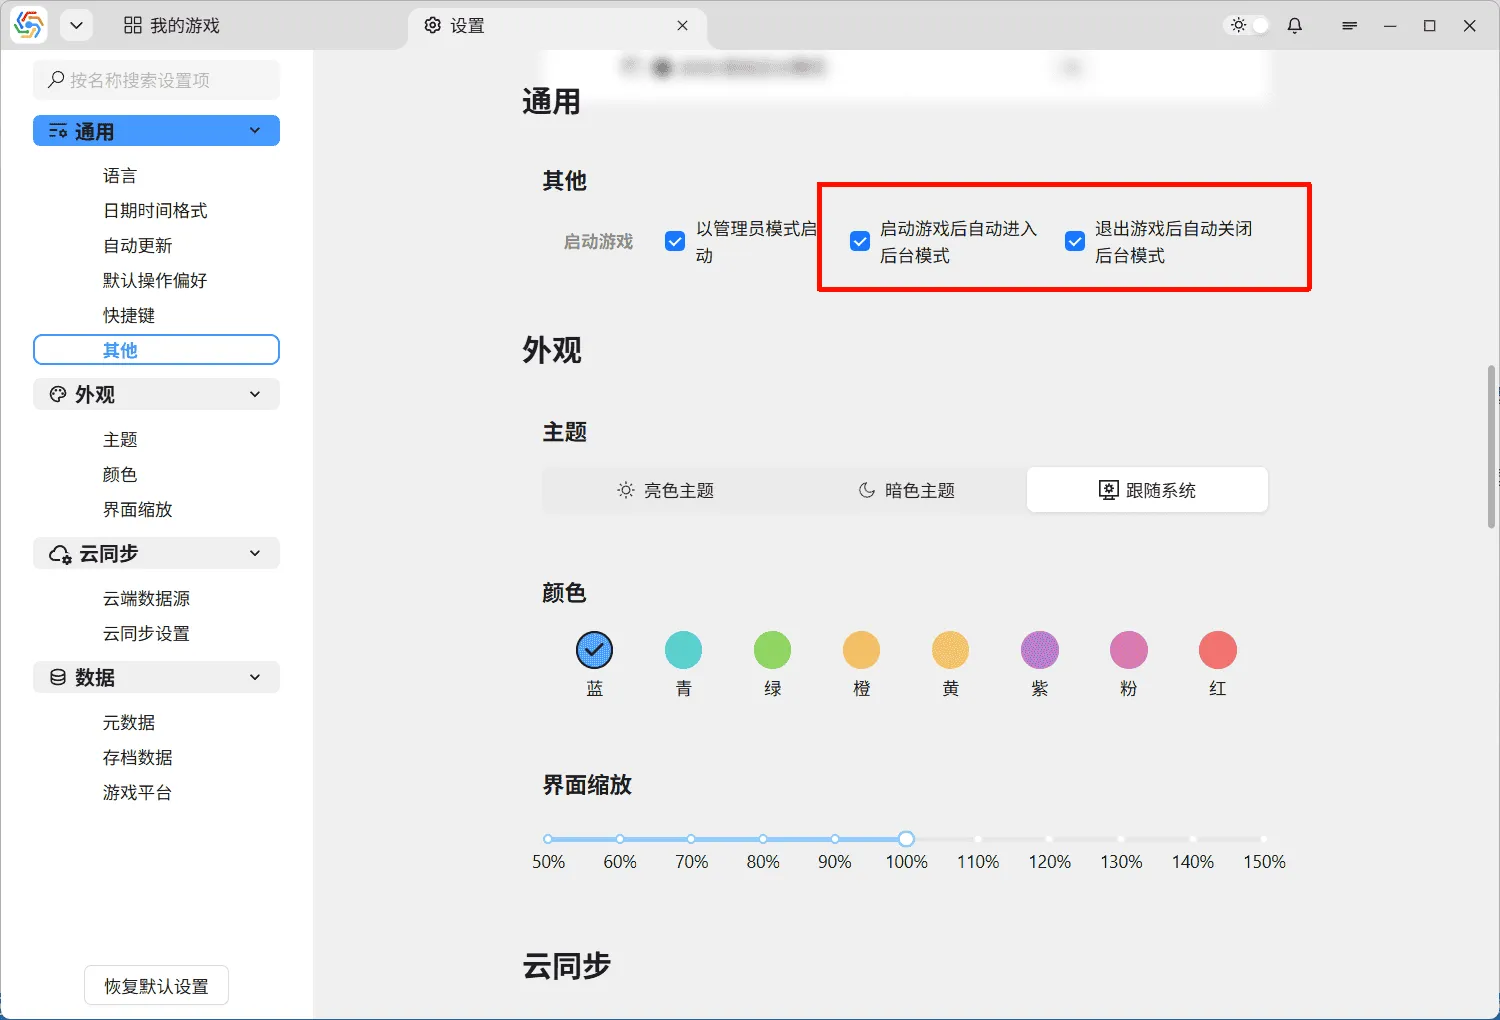
You can set the software to automatically enable background mode when launching a game (via the Launch Game function) and automatically exit background mode after exiting the game, in the General ----> Other options:
Cloud Sync
Section titled “Cloud Sync”Cloud Data Sources
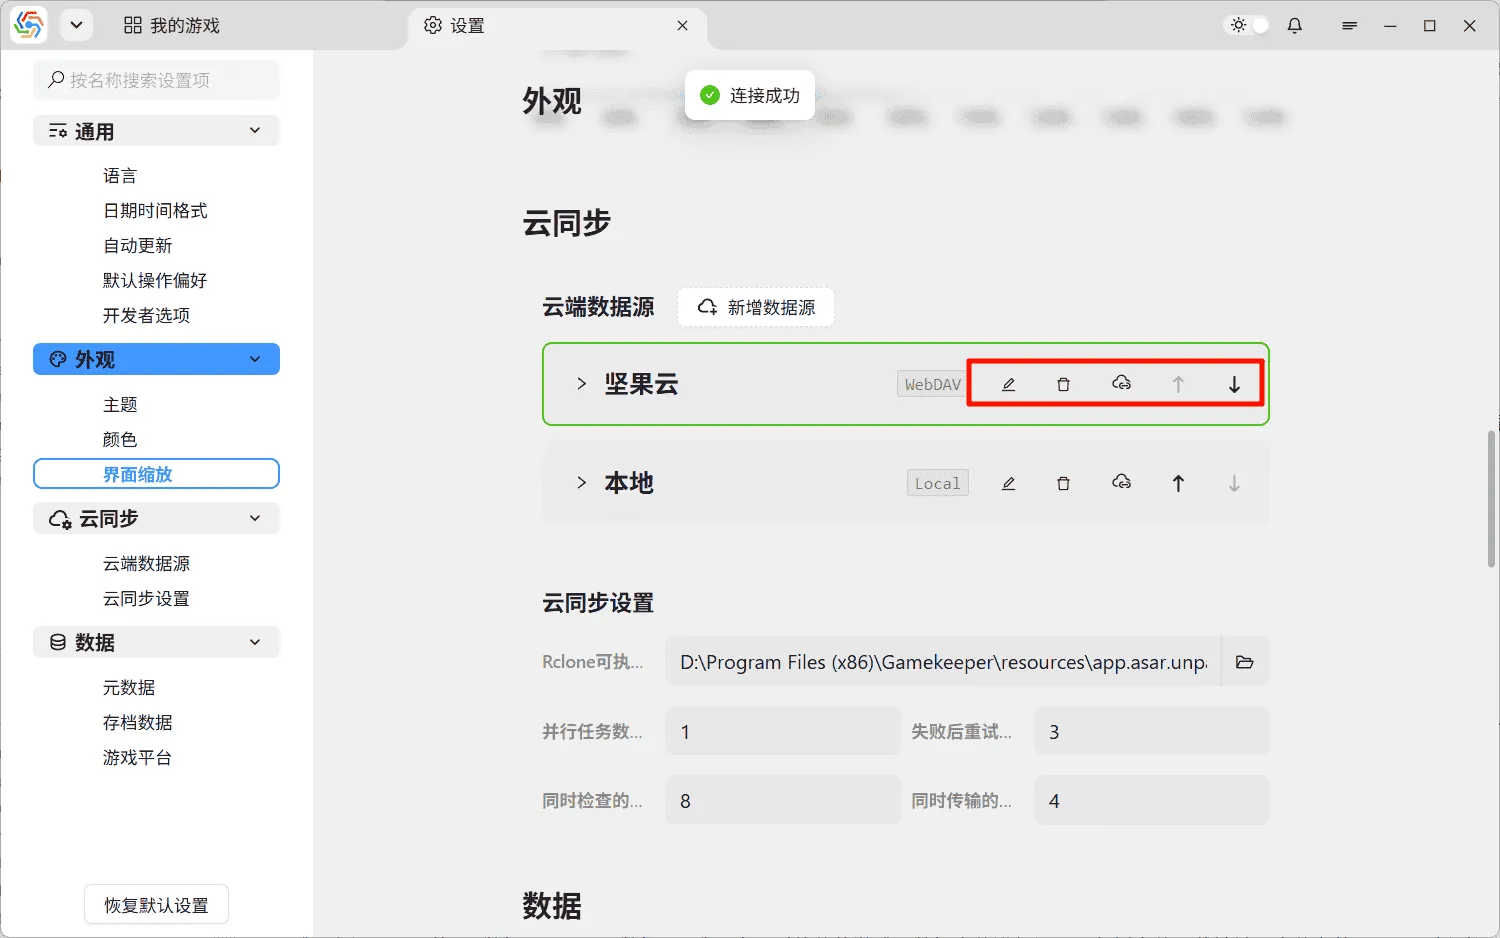
Section titled “Cloud Data Sources”In the settings page under Cloud Sync ----> Cloud Data Sources, you can manage all cloud storage services used for cloud synchronization. These cloud storage services can be selected for each game’s information entry interface to provide data cloud synchronization services for that game.
Clicking the “Add Data Source” button allows you to add a new data source. Select the corresponding storage type, fill in the relevant connection information, and give the data source a unique name:

The buttons in the top right of the data source panel are used to manage the data source, allowing for editing, deletion, connectivity testing, and order adjustment. The result of the connectivity test is reflected in the color of the panel border:
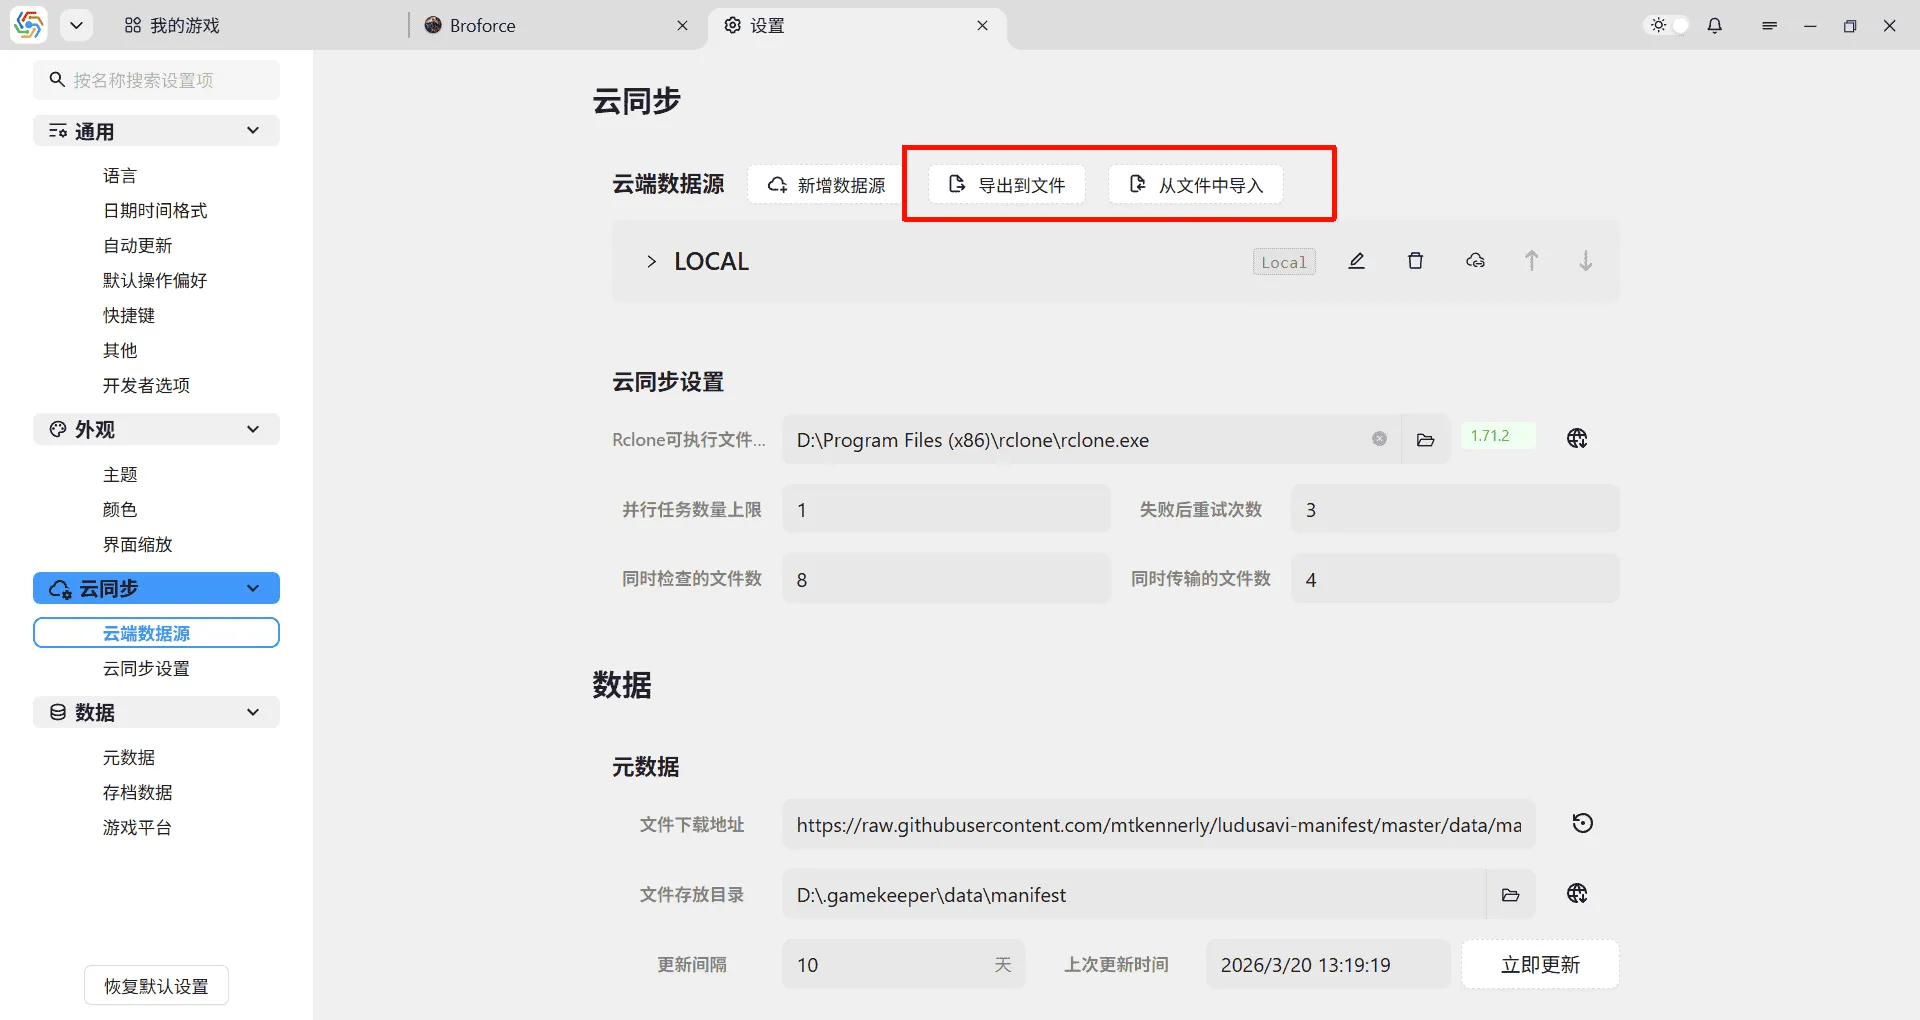
When users switch devices, they can export data sources from the old device and then import them on the new device:
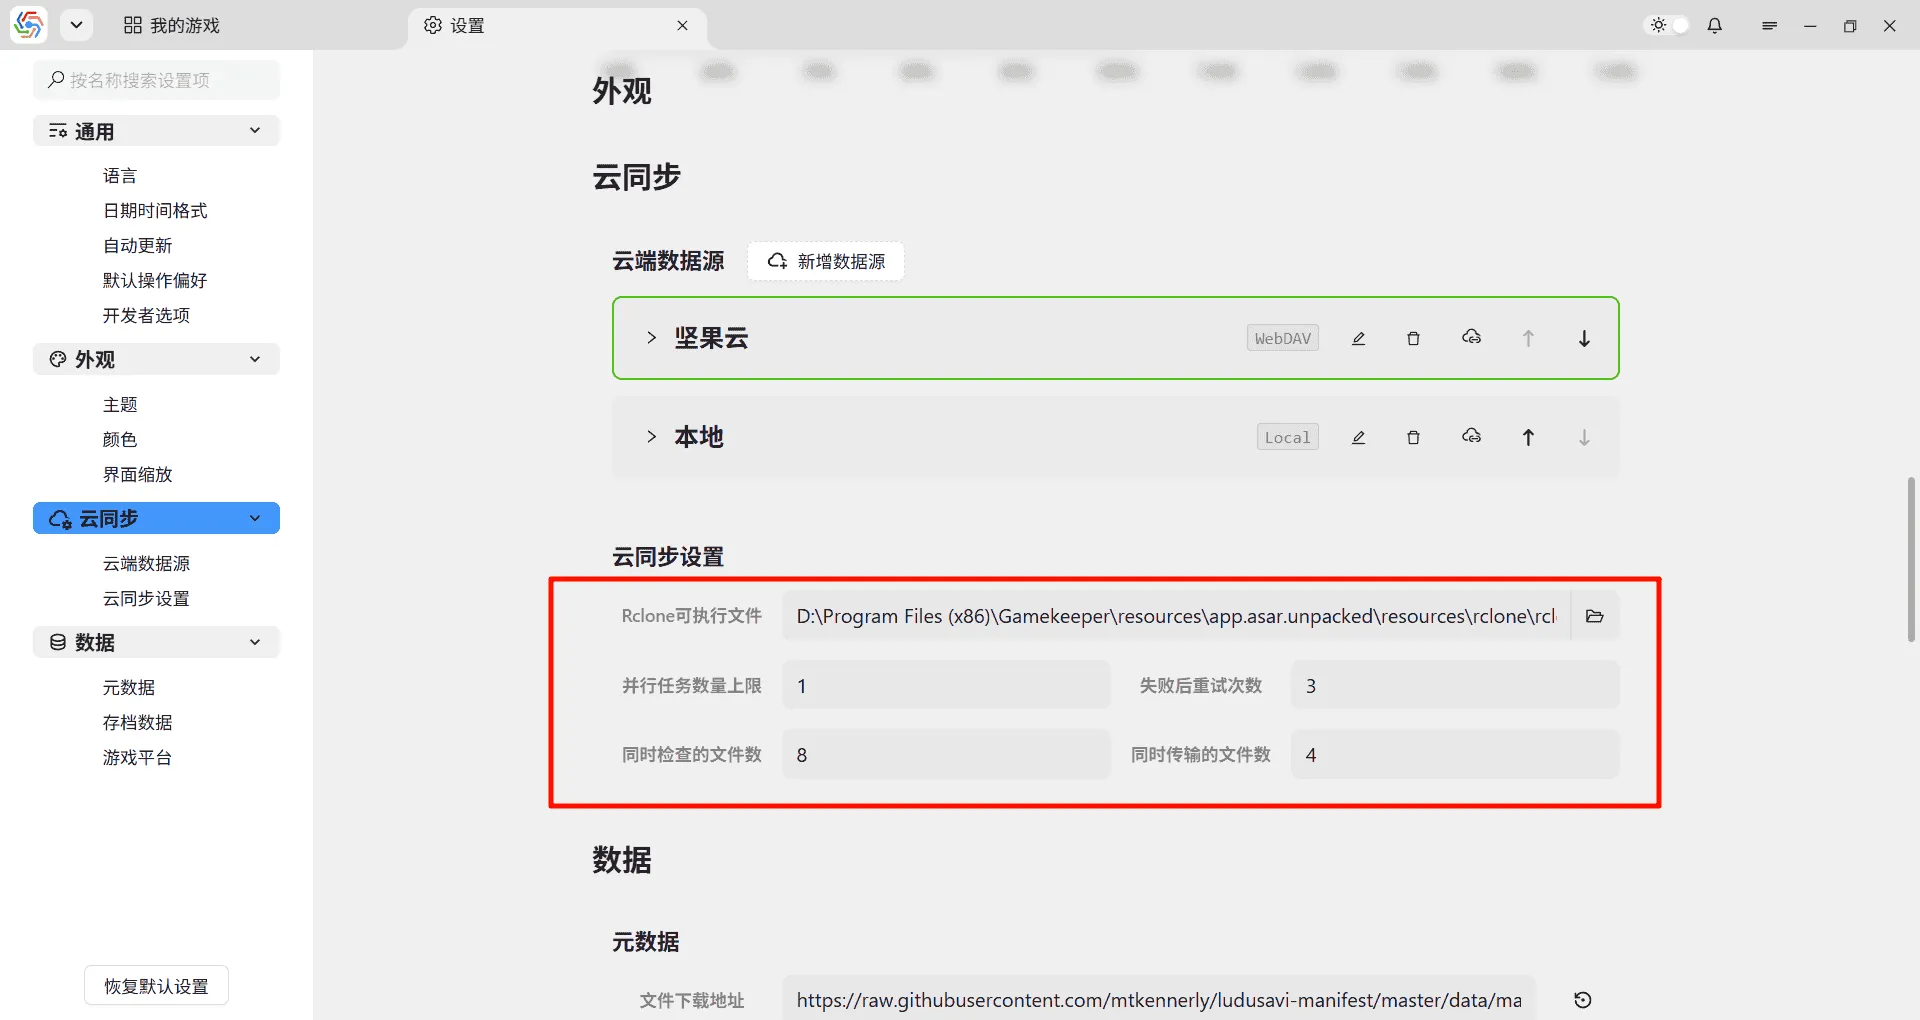
Cloud Sync Settings
Section titled “Cloud Sync Settings”Cloud Sync settings are used to adjust settings related to cloud synchronization in the software. The main settings are as follows:
- Rclone Executable Path: The software’s cloud sync feature relies on Rclone. Refer to Setting the Rclone Executable Path for details.
- Maximum Parallel Tasks: The software supports cloud sync tasks for multiple games running simultaneously, but there is a limit to the number of tasks. Running too many tasks concurrently can lead to high memory usage and easily trigger rate limiting by cloud storage providers.
- Retry Count on Failure: During cloud sync tasks, each file transfer failure will be retried. This option controls the number of retries.
- Files to Check Concurrently: Controls the number of files whose status is checked simultaneously during cloud sync. Setting it to Files to Transfer Concurrently * 2 is optimal.
- Files to Transfer Concurrently: Controls the number of files being transferred simultaneously during cloud sync. The upper limit is 32. The theoretical optimal performance is CPU Cores * 1.5. Both this and the “Files to Check Concurrently” setting need to consider issues like excessive memory usage and cloud storage provider rate limiting.
Data Management
Section titled “Data Management”Metadata
Section titled “Metadata”In the settings page under Data ----> Metadata, you can configure the software’s game metadata files, including file download addresses, storage directories, and update intervals:

Save Data
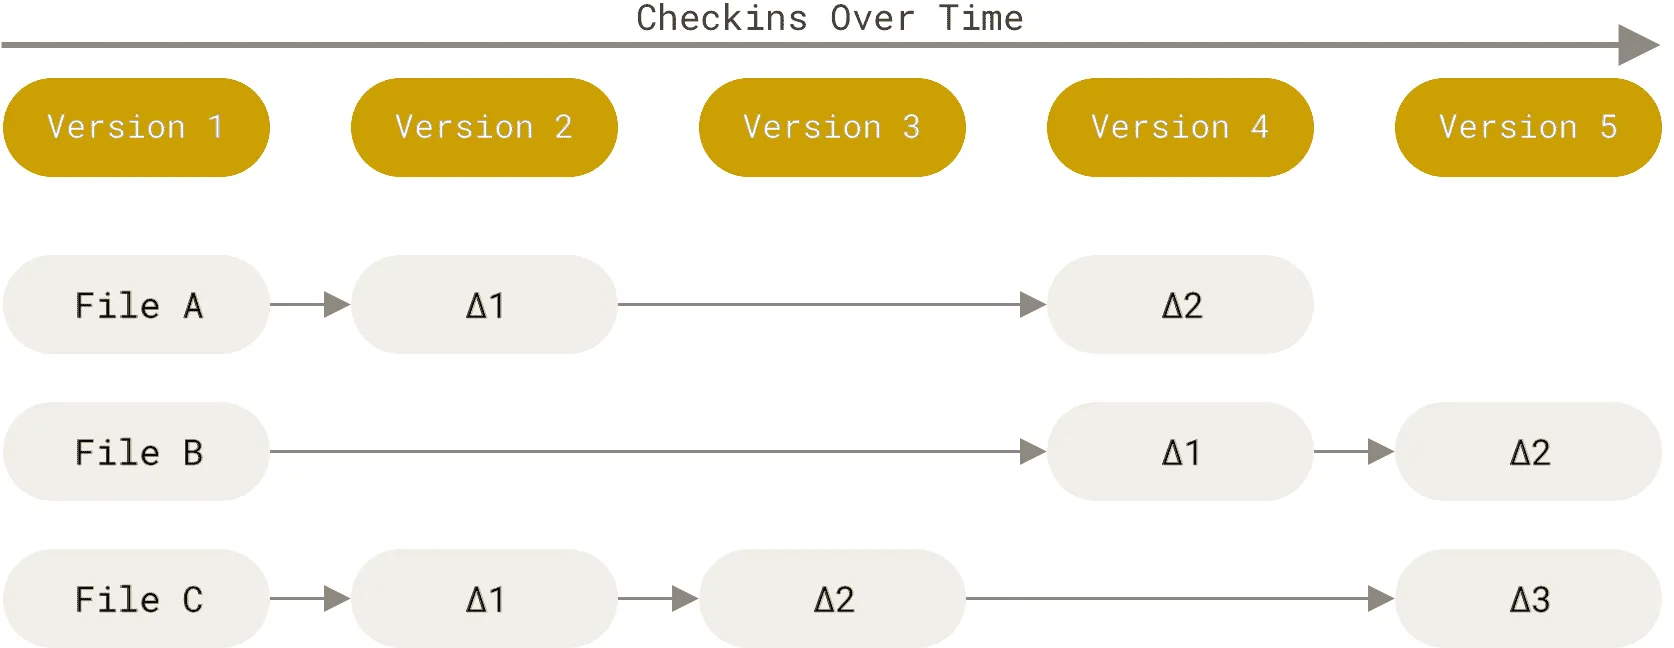
Section titled “Save Data”The software stores all save data in a fixed folder, including game covers, icons, preview files, database files, and save files. The save files are stored using a delta storage model, which only saves the data that has changed relative to the previous save. This minimizes the size of save files. When saving, you should consider the size of preview files, images in save descriptions, game covers, and game icons to avoid issues like slow cloud sync or excessive data consumption due to storing large images or videos.
The software defaults to limiting the size of uploaded images and videos (maximum 10MB for images, 100MB for videos) and performs necessary compression on images. These settings can be adjusted on the settings page under Data ----> Save Data:

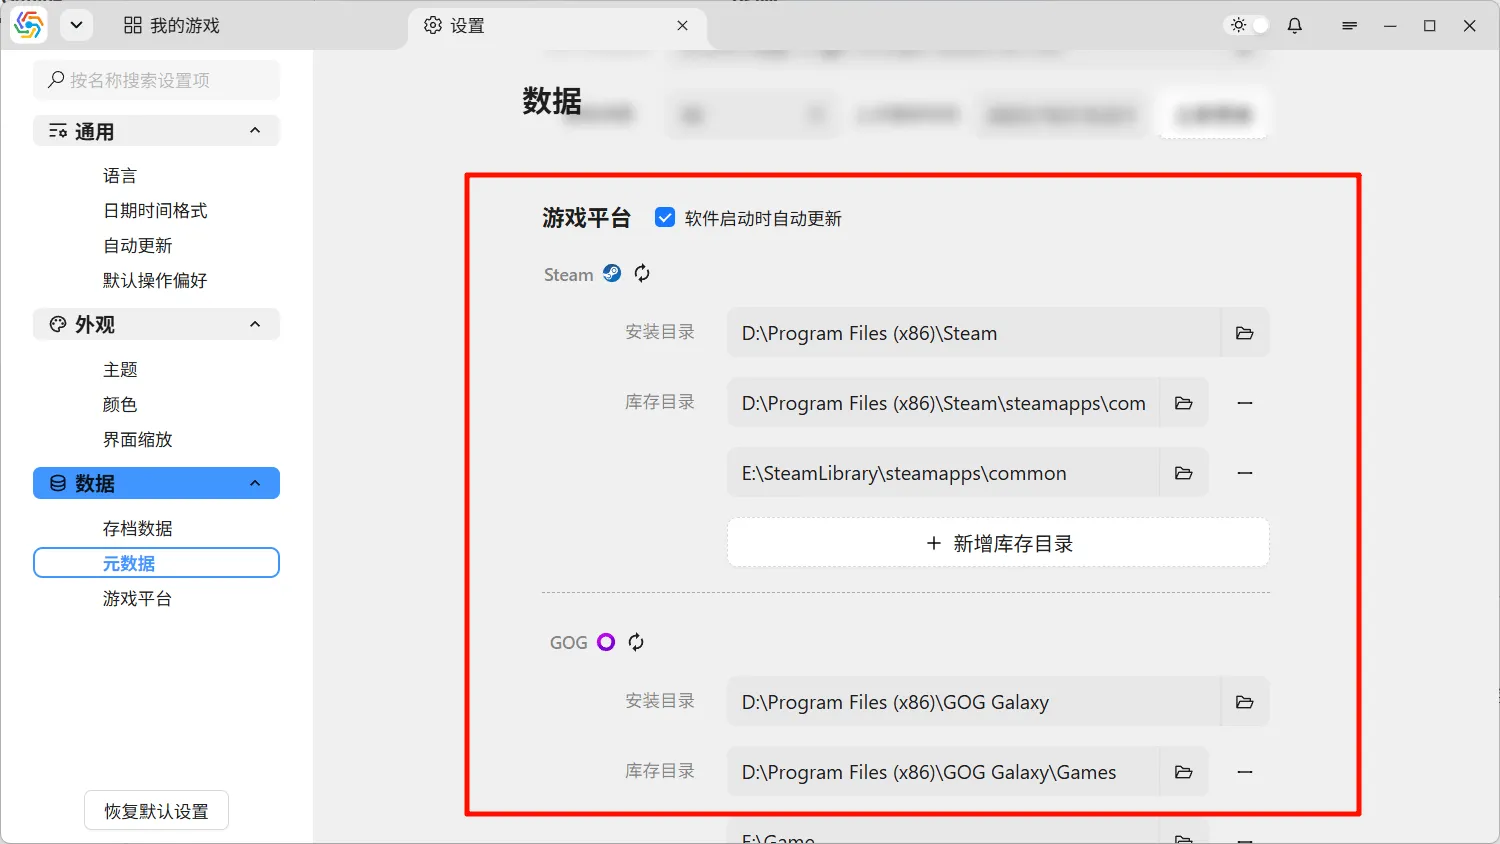
Game Platforms
Section titled “Game Platforms”The software currently supports automatic recognition of games from four platforms: Steam, GOG Galaxy, Epic Game Store, and XBOX PC. This relies on correctly setting up the installation information for each game platform in the software, primarily including the installation location and common game library directories. The software can automatically retrieve this information, but you may need to manually adjust it where recognition is inaccurate:
Operational Preferences
Section titled “Operational Preferences”Various default operational settings exist within the software, such as the default save sorting method and default game card size. If these default settings do not match your operational habits, you can choose to adjust them in the settings page under General ----> Default Operational Preferences:
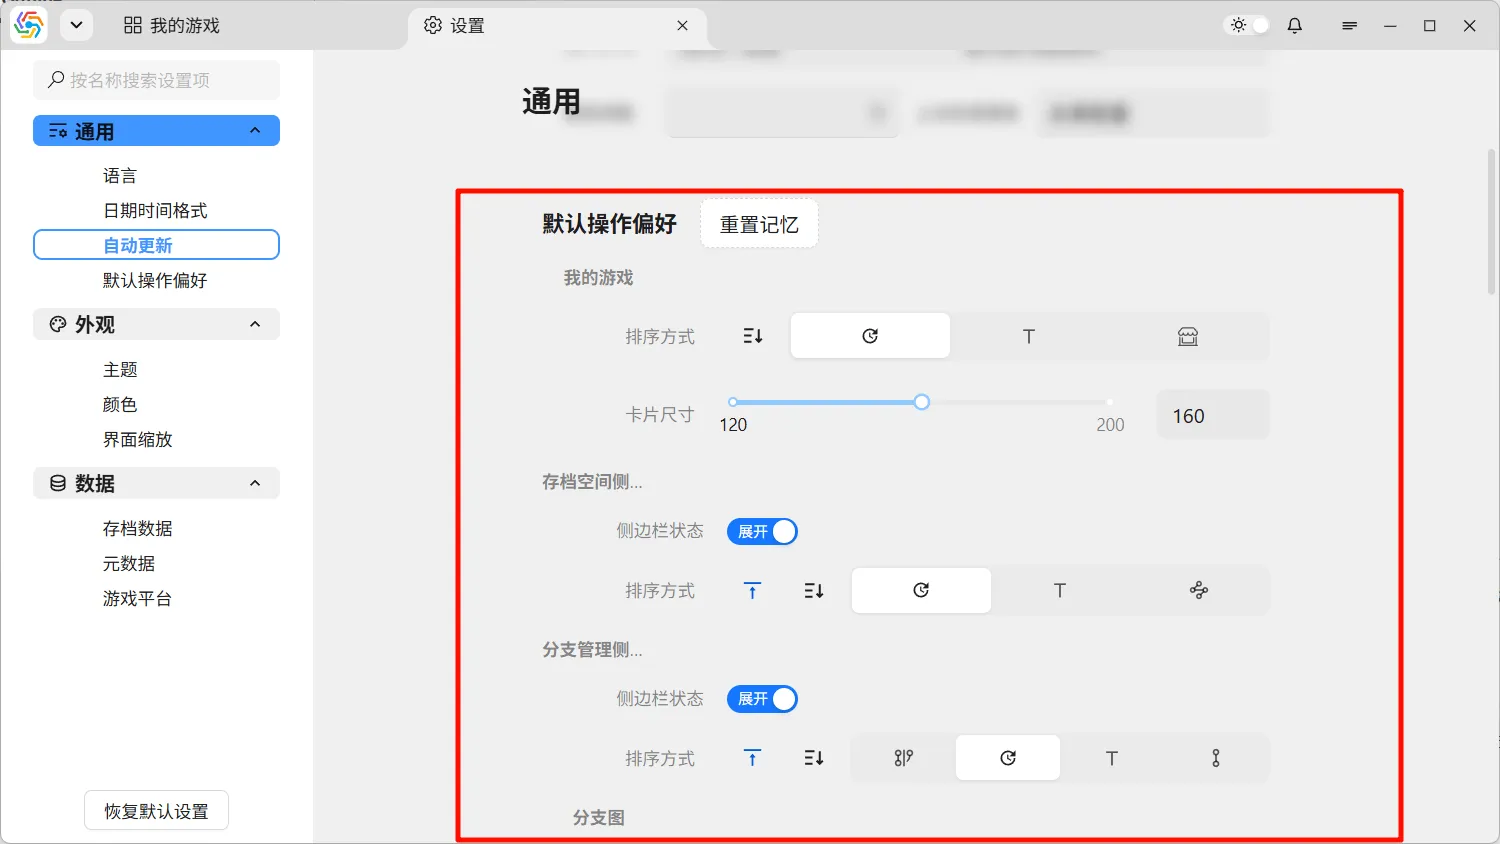
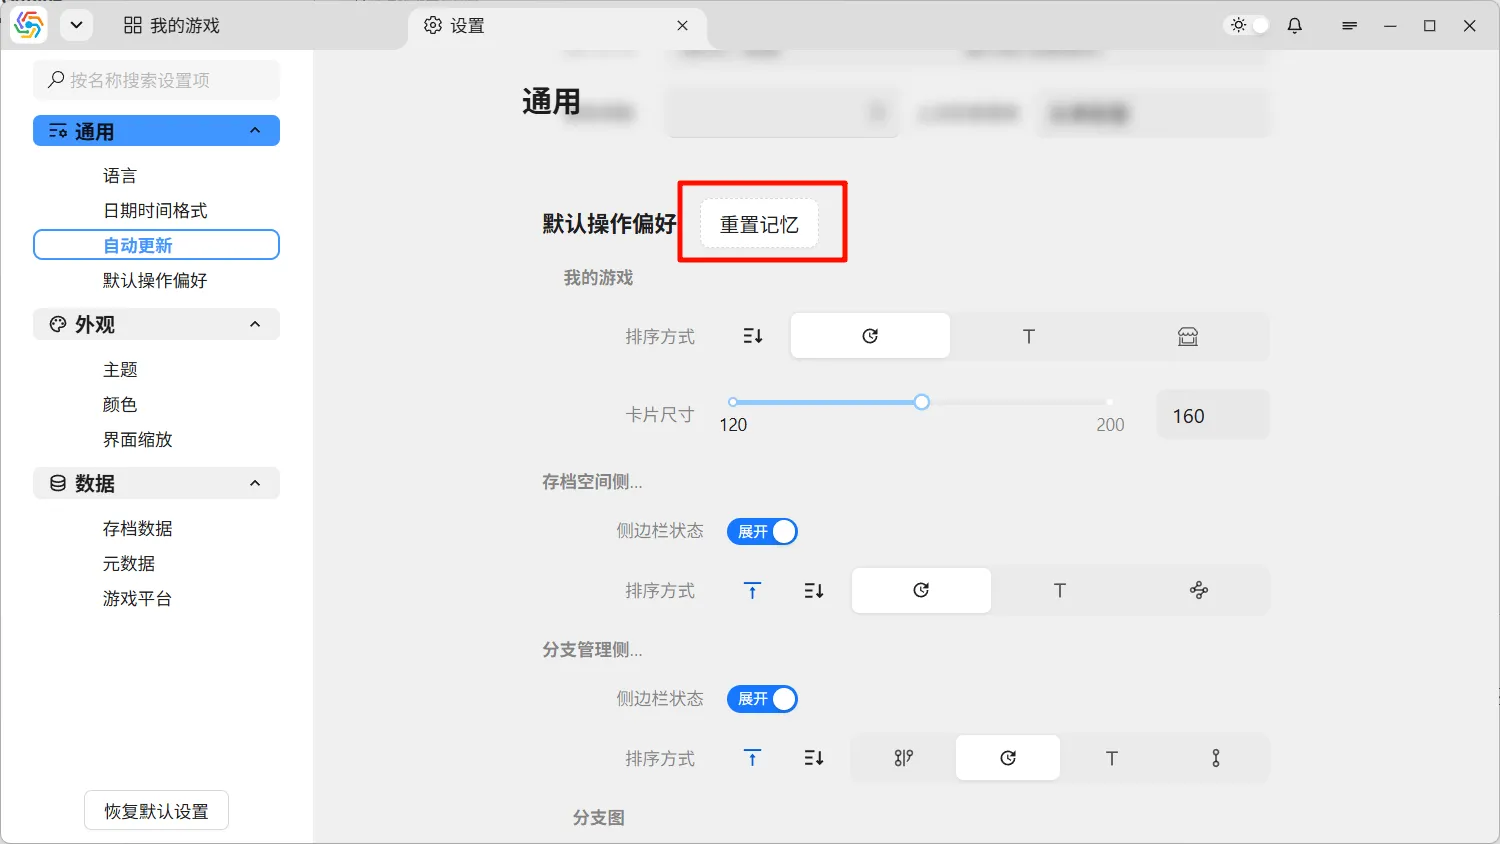
Many confirmation dialogs appear during software operations. You can enable Remember selection, do not remind me next time in the bottom left to avoid frequent pop-ups, such as the prompt when closing the software (close or minimize). If the selections remembered by these dialogs do not meet your expectations, you can use the Reset Memory button next to the title of the Default Operational Preferences setting item to reset them all:
Software Update
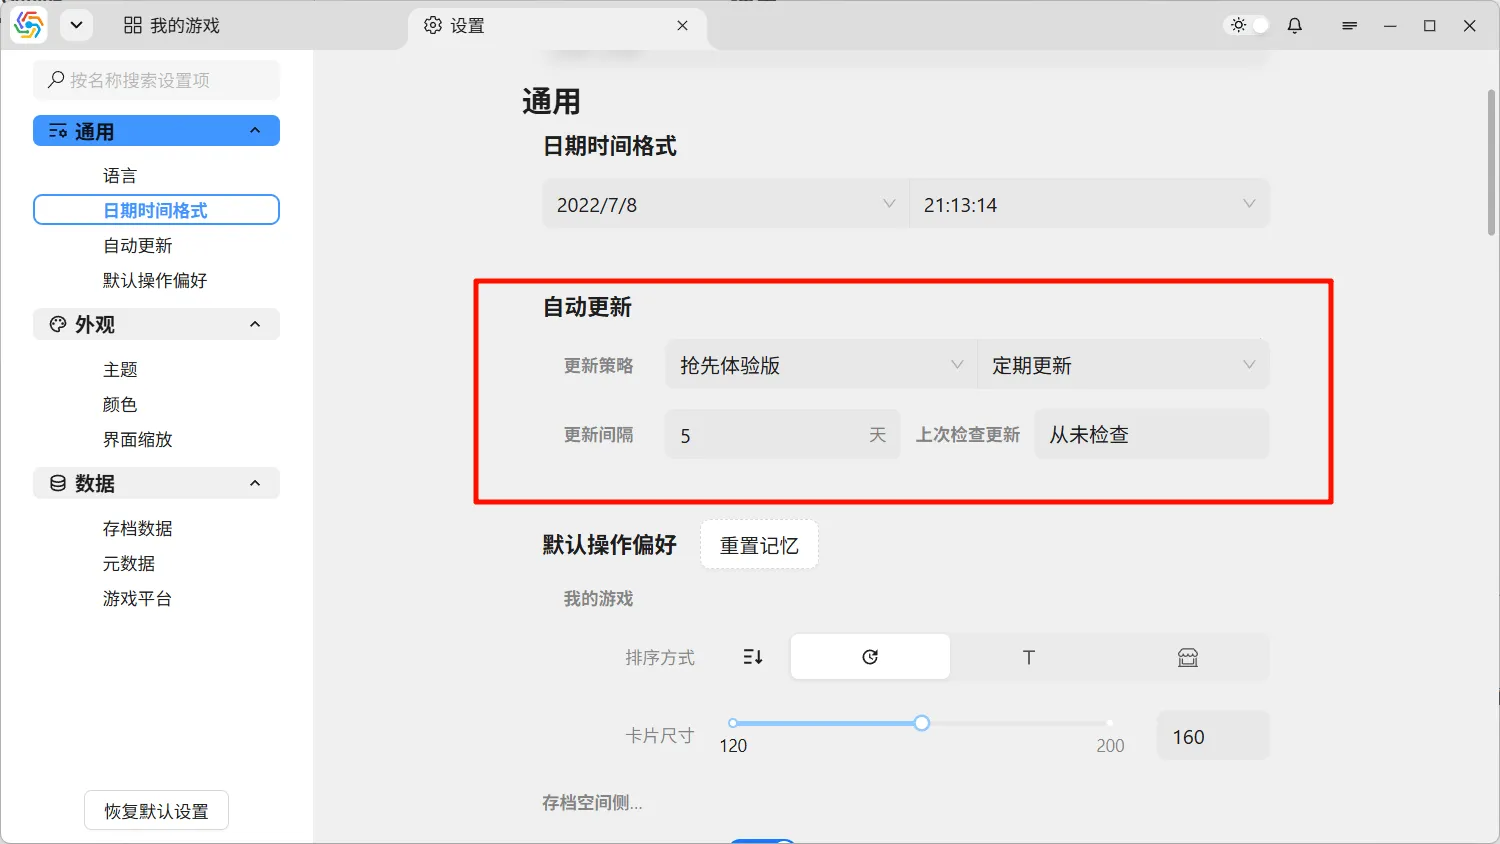
Section titled “Software Update”The software automatically checks for available updates upon startup. If an update is available, you will be prompted to update the software. You can configure the software’s update strategy in the settings page under General ----> Auto Update:
Update Channel
Section titled “Update Channel”There are three types of update channels for the software:
- Alpha Channel: Commonly known as alpha testing versions. New features are released first in this version. Releases are frequent but have not undergone extensive testing, making the features less stable. Users who want to experience new features the fastest can choose this version.
- Beta Channel: Commonly known as beta testing versions. Released after a period of testing from the alpha version, they are relatively more stable than alpha versions.
- Stable Channel: The stable version is a stable release after extensive testing, with a longer release cycle and almost no critical bugs during use.
The default update channel is set to the version corresponding to the installation package you initially downloaded. You can check the current software version in the About interface from the menu bar and select your desired software update channel in the settings page:
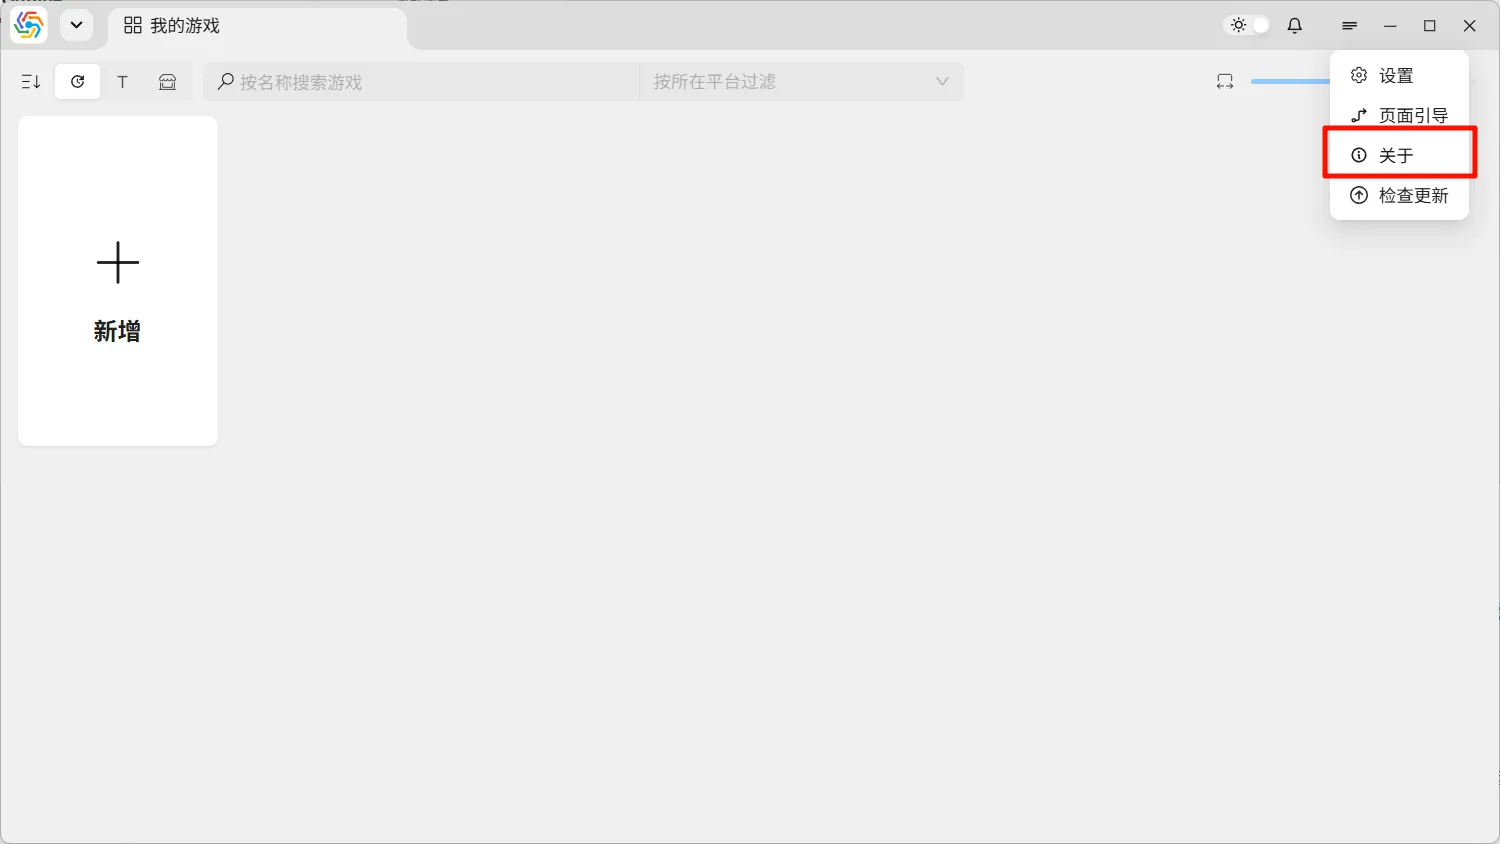
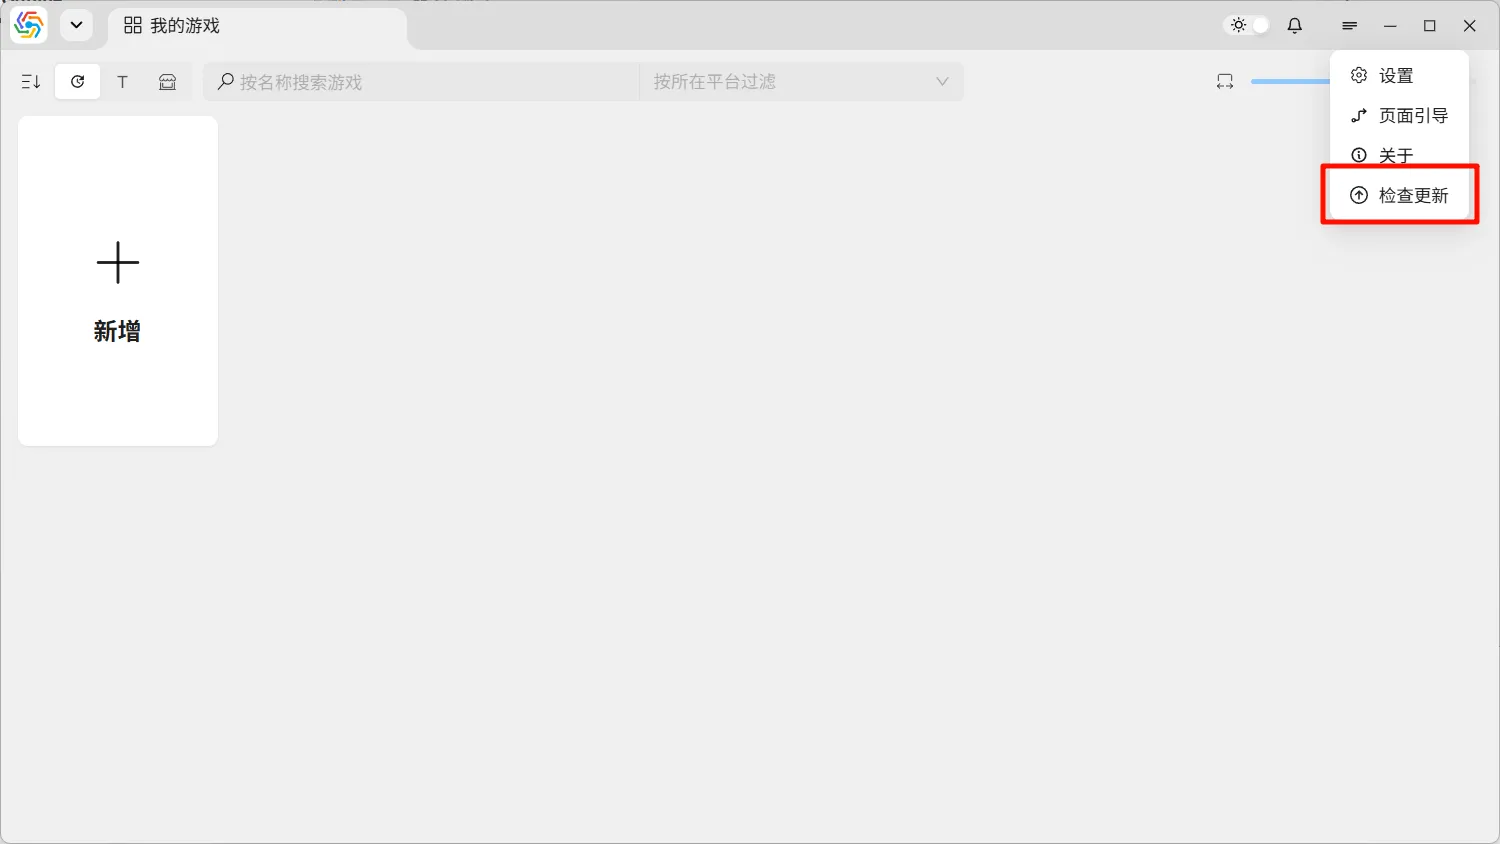
Manual Update Check
Section titled “Manual Update Check”You can manually check if the software needs an update from the software’s menu bar:
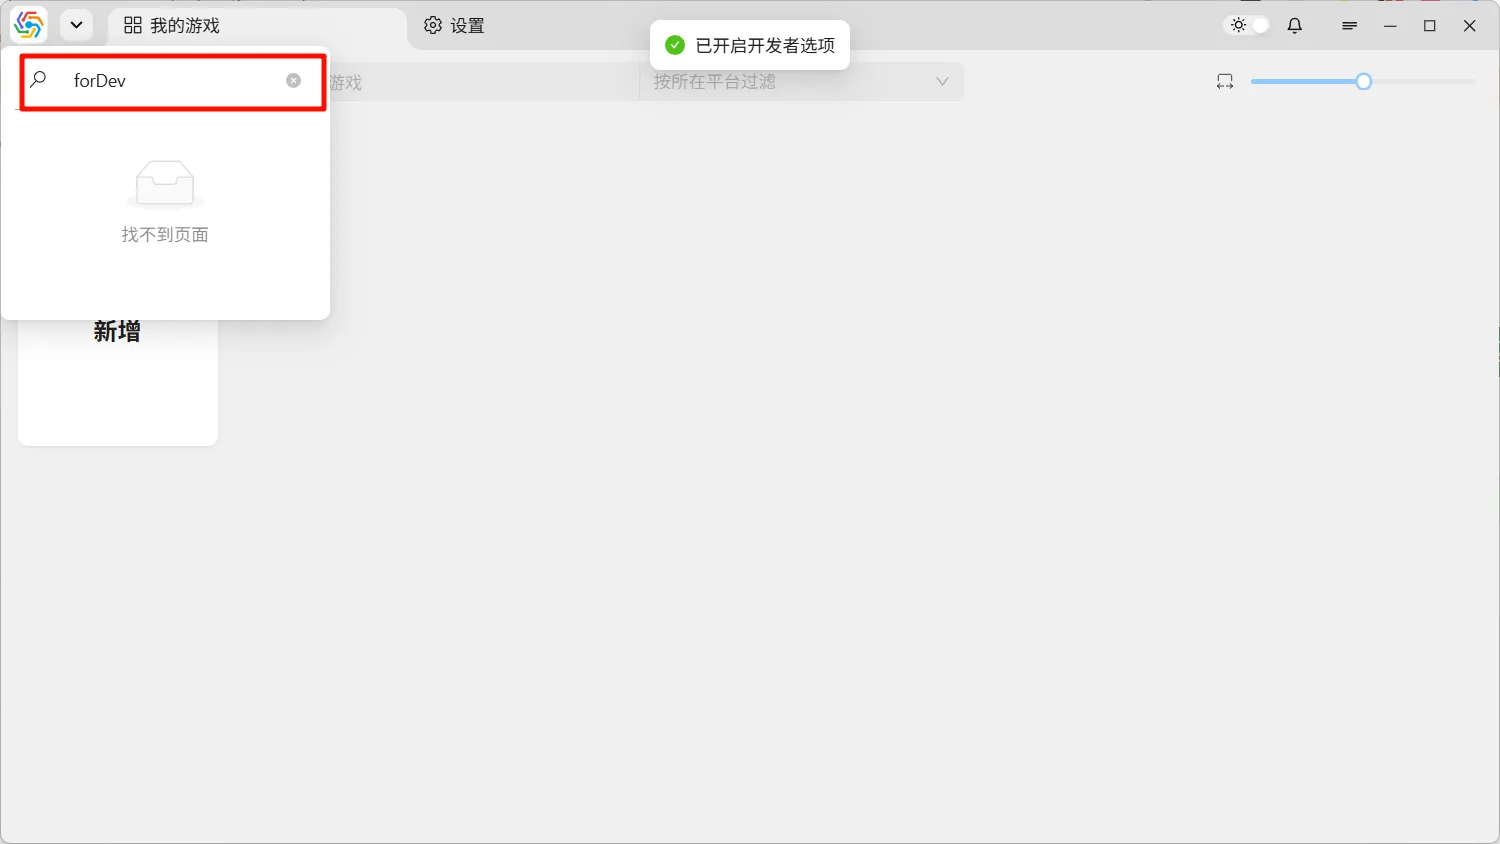
Developer Options
Section titled “Developer Options”Developer Options help in diagnosing software issues, assisting software translators in finding text locations, and more. Open Developer Options by typing forDev in the search bar of the software’s tab manager. Then, find General ----> Developer Options in the settings page to operate them: