Game Management
Add New Game
Section titled “Add New Game”Library Folders
Section titled “Library Folders”Once the game’s metadata file is prepared, the software will search for the game’s installation directory, launch file, etc., in the local file system based on the game’s metadata information in subsequent operations. Obviously, the software cannot perform a full scan of all local disks, so you also need to set up the game’s library folders, which are your commonly used game installation directories. The software will only search within these library folders.
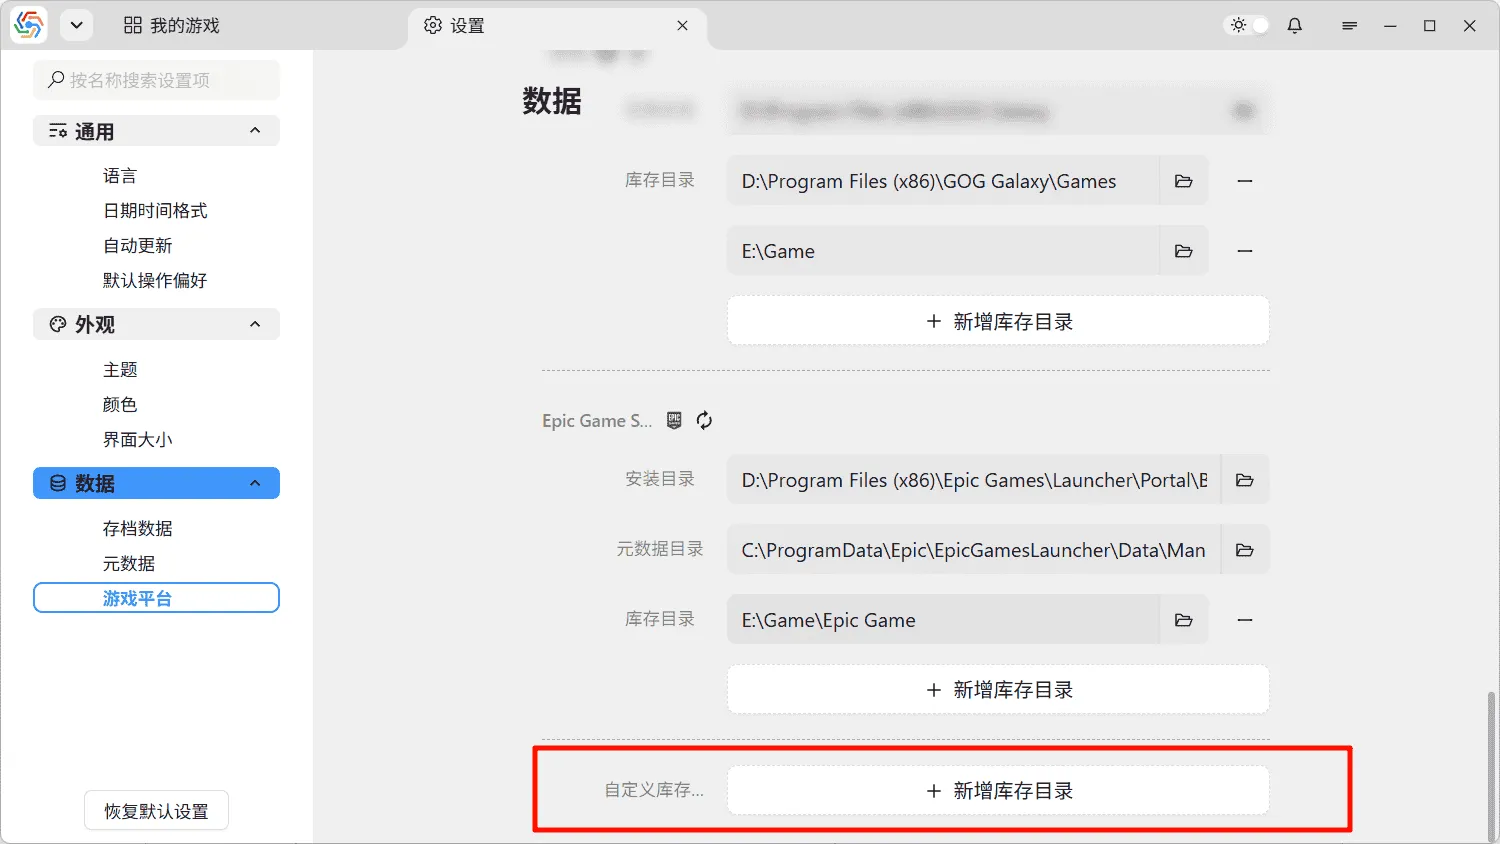
The game library folders are divided by different platforms. Under the condition of a limited game platform, the search will only be conducted within the corresponding library folder. Related settings are located in the Data ----> Game Platforms option on the settings page. The software can automatically obtain the library folders of installed game platforms on the current machine. For details, please refer to Game Platforms. If your game is located on a game platform not yet supported by the software, or if you don’t have a fixed game platform, you can add custom library folders to expand the software’s directory search scope:
Automatic Recognition
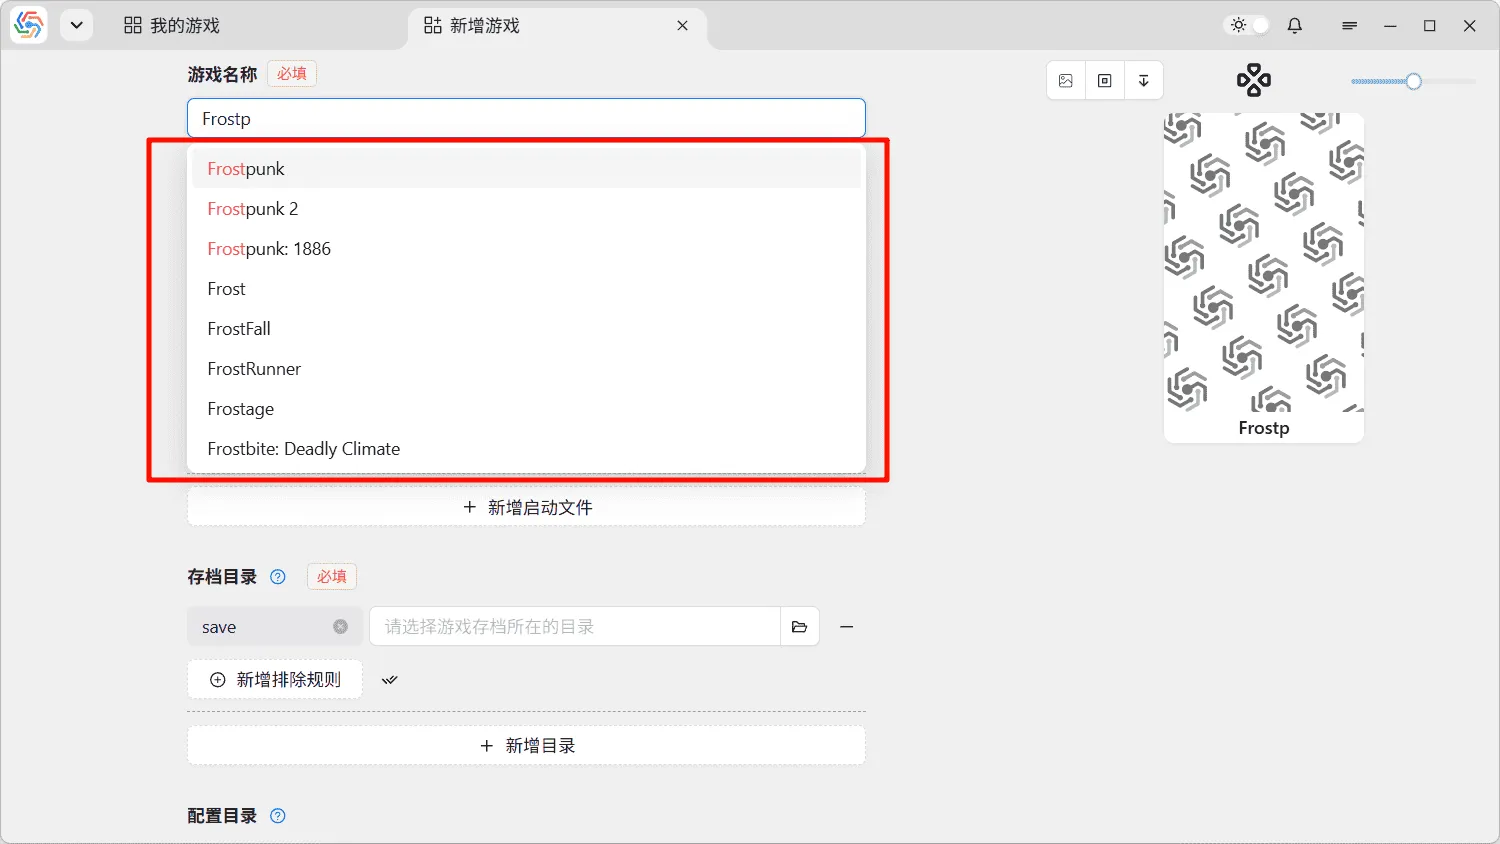
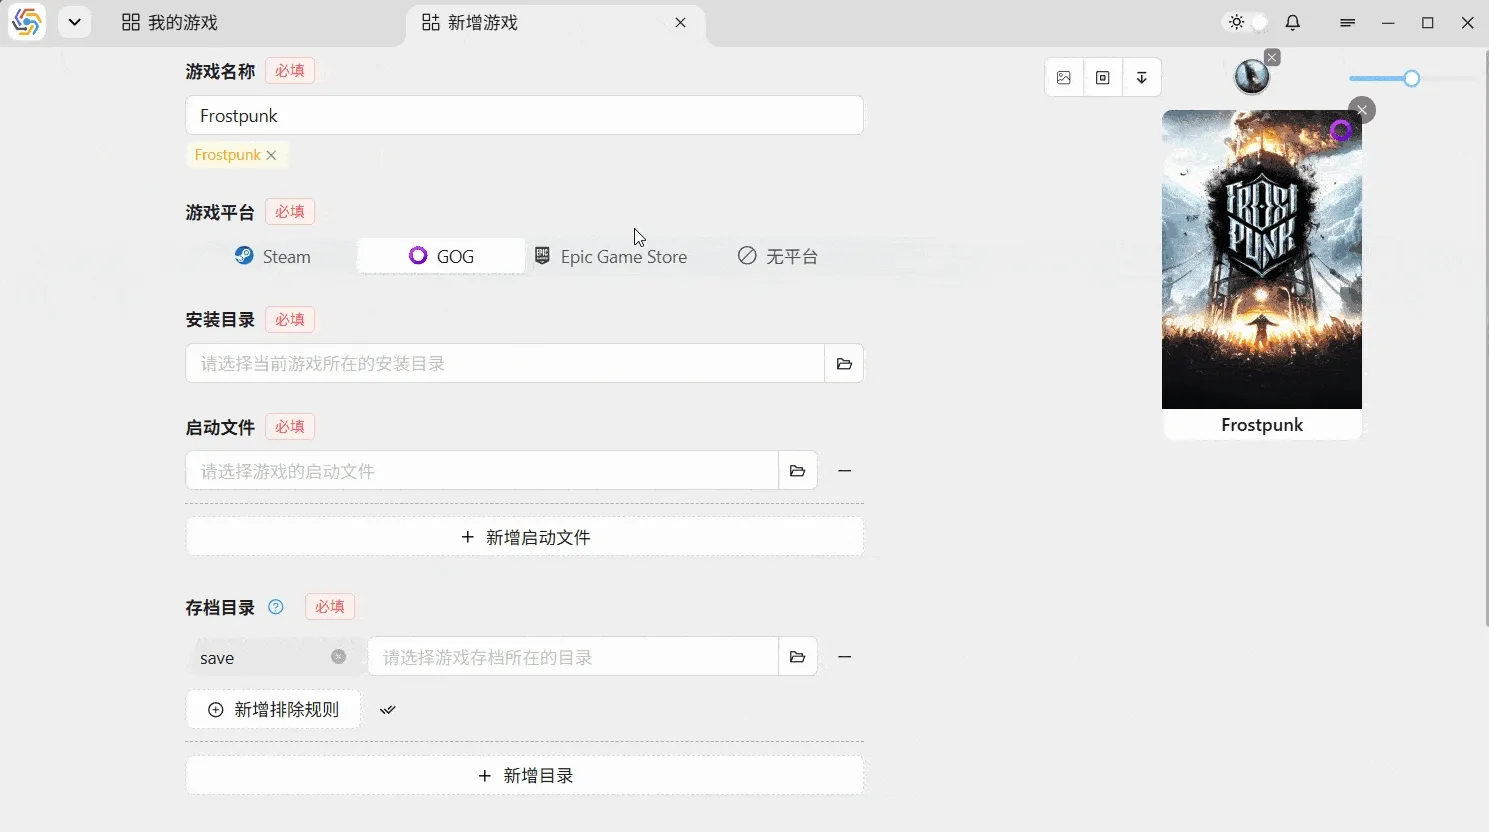
Section titled “Automatic Recognition”When the game’s metadata and library folders are complete, the software can automatically recognize and populate information when adding a new game, requiring only your necessary checks on the final information. Open the Add New Game interface, first enter the English name of the target game in the game name input box. The software will search for the corresponding game metadata in the manifest.yaml file and provide a list of matching games:
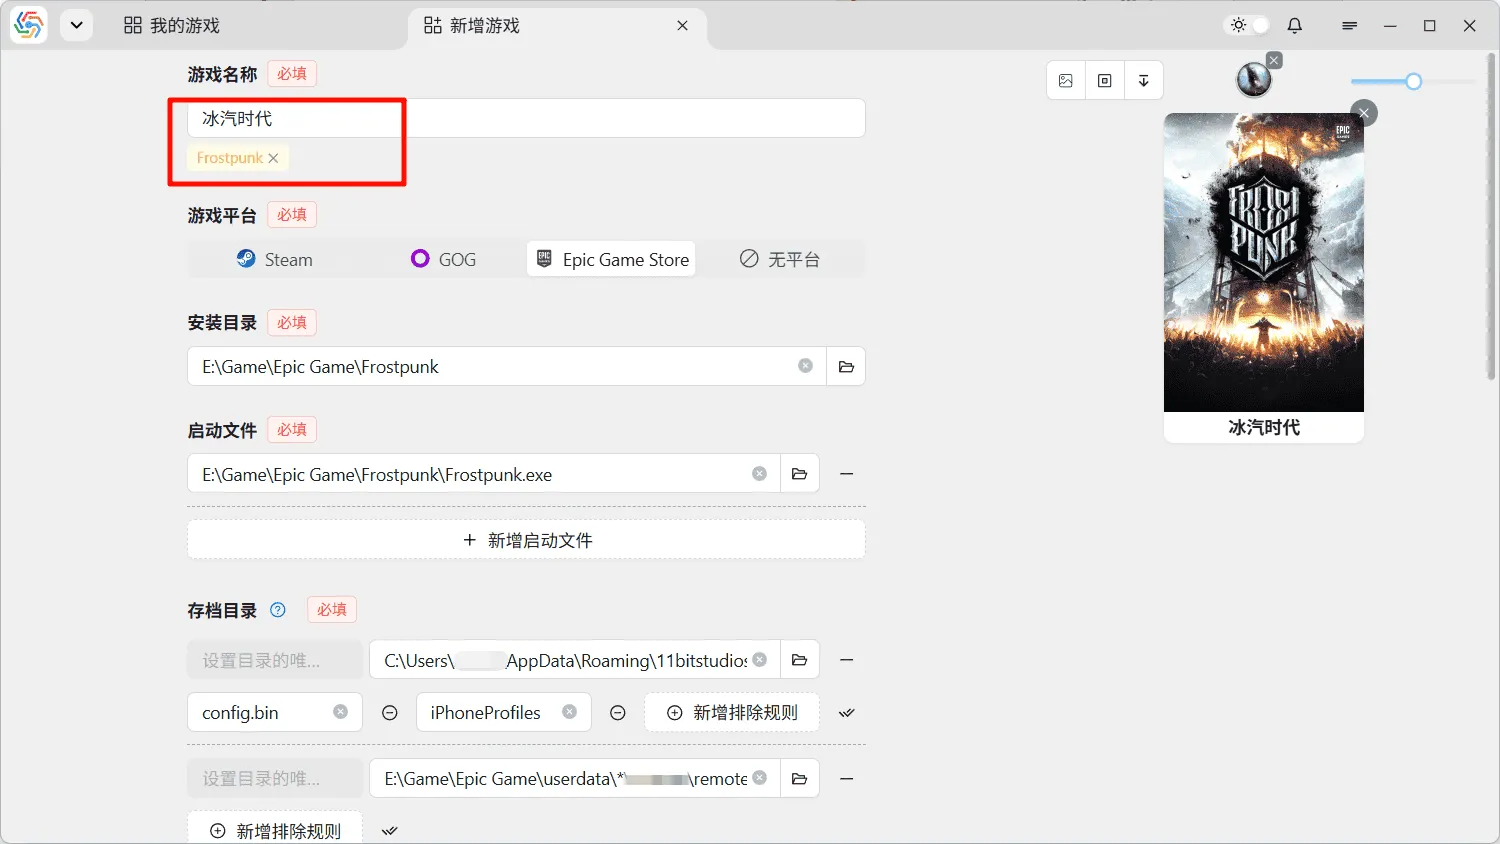
After you find the game you want to add and select it, the software will search based on the retrieved metadata and automatically populate all game-related information, including cover art and icons, into the interface. After completing all this, there will be a tag below the game name input box. This tag is the identity marker for the current game, identified by the game’s official name. The software uses this tag to identify the game’s identity. With this tag, you can freely change the game’s display name to any commonly used localized name without affecting the software’s judgment of the game’s identity.
Manual Adjustment
Section titled “Manual Adjustment”Due to variations in local environments used by each user and potential flaws in metadata files, the software cannot guarantee that the automatically recognized game information is 100% accurate. Therefore, you will need to manually adjust the information on the interface.
To ensure no save directory is missed, unless the software can definitively exclude it, it will be returned to the interface for user reference, even if it doesn’t exist. Consequently, automatic recognition might yield multiple directory results. The software will rank the most probable results first. Most games have only one save directory. In general, you can delete non-existent directories and keep only the first existing one (it is recommended to launch the game first to create the save directory). In some cases, the software cannot determine whether a directory is a save directory or a configuration directory, and will recognize it under other categories. At this point, you need to judge the directory type yourself and drag it to the corresponding category.
Regardless, the final result needs to be verified by the user, rather than relying entirely on the software’s automatic recognition. This is especially true for exclusion rules; if a rule is written incorrectly, all saved data may end up being wrong. You can use the test button to test the current directory path against the rules. For details, refer to Exclusion Rules.
Game Platform
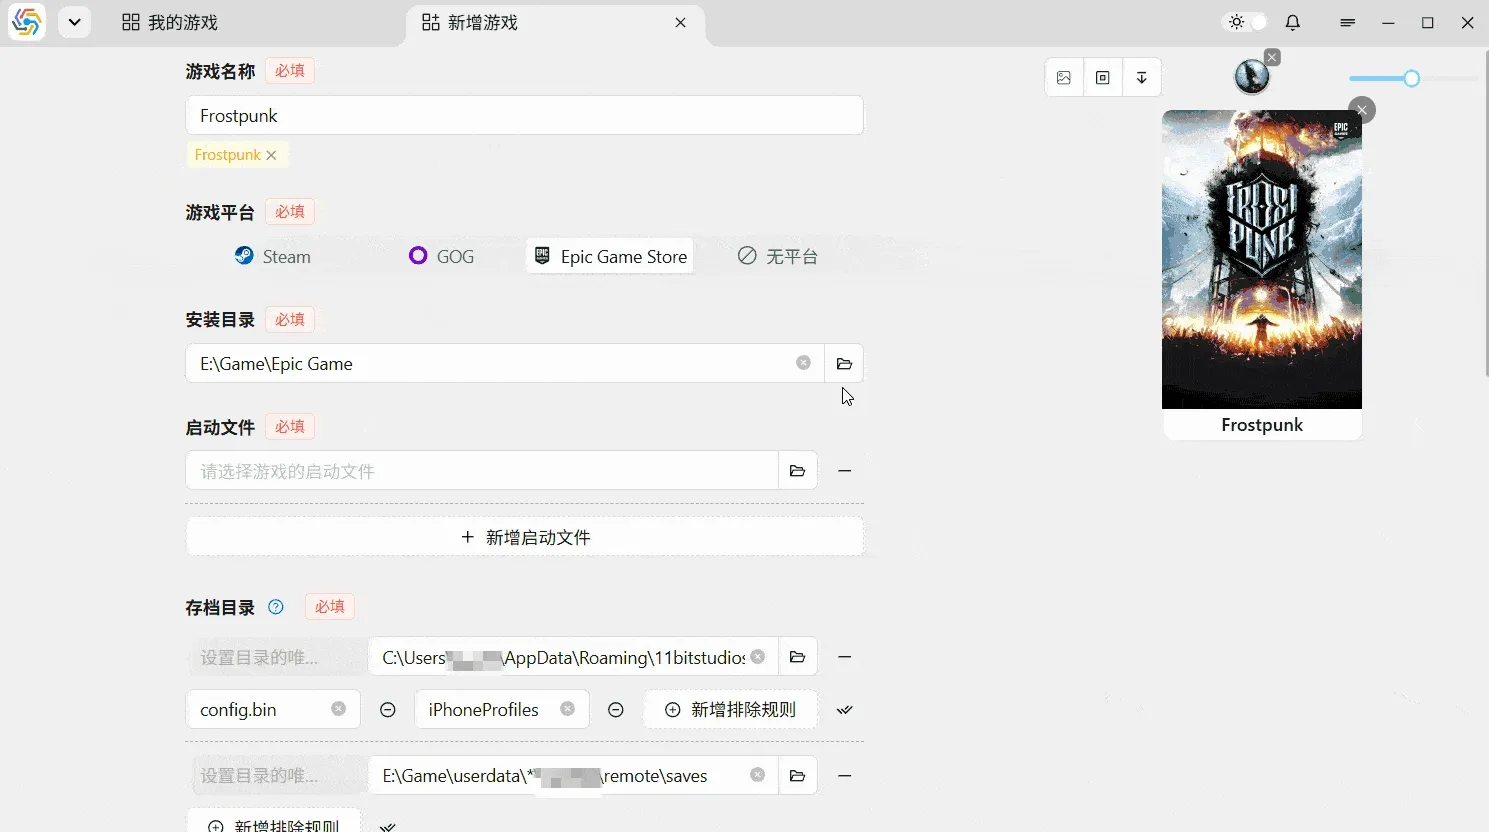
Section titled “Game Platform”The software defaults to judging the game’s platform based on the first successful match in the library folders. If you have installed the same game on different game platforms, you can manually switch the game platform option on the interface. The software will then search again under the specified game platform conditions and re-populate the interface with the search results:
Installation Directory
Section titled “Installation Directory”The game’s installation directory is related to information such as the launch file, save directory, and configuration directory. When the game’s installation directory is re-selected, the launch file, save directory, configuration directory, and other information will be re-searched and updated:
Launch Method
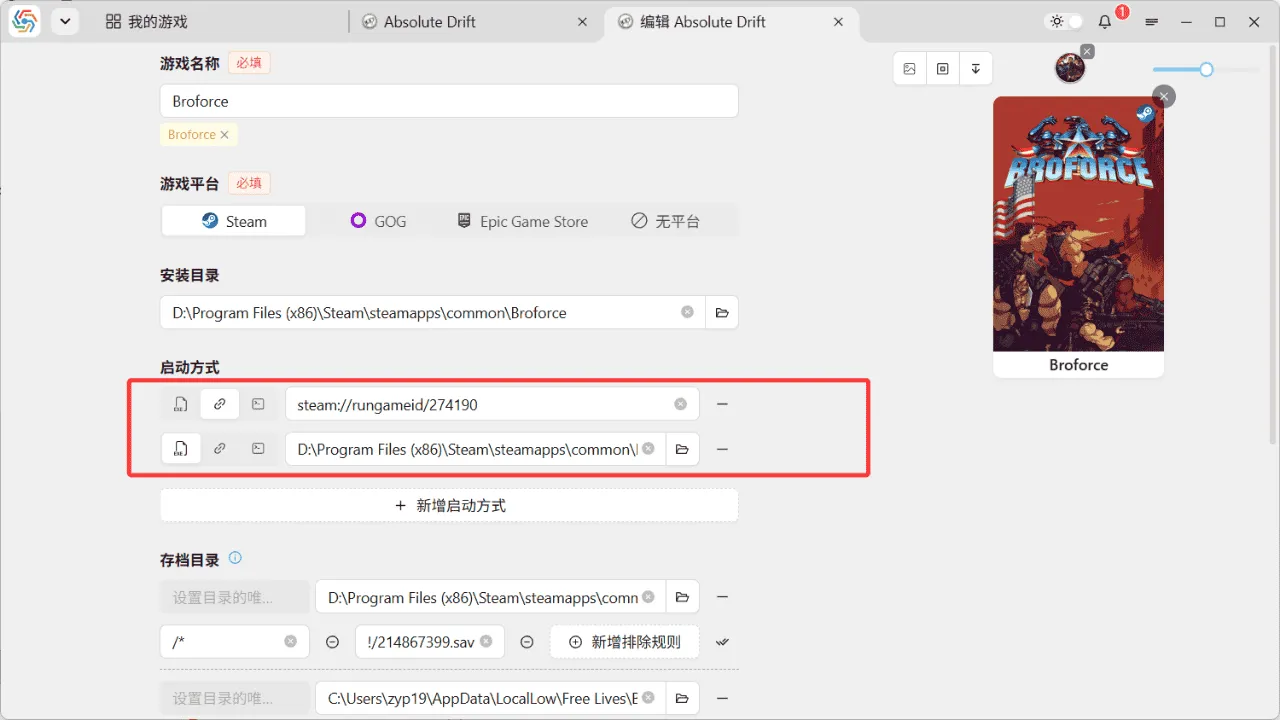
Section titled “Launch Method”The software supports setting three types of launch methods:
-
Launch File: The game’s launch file, usually in
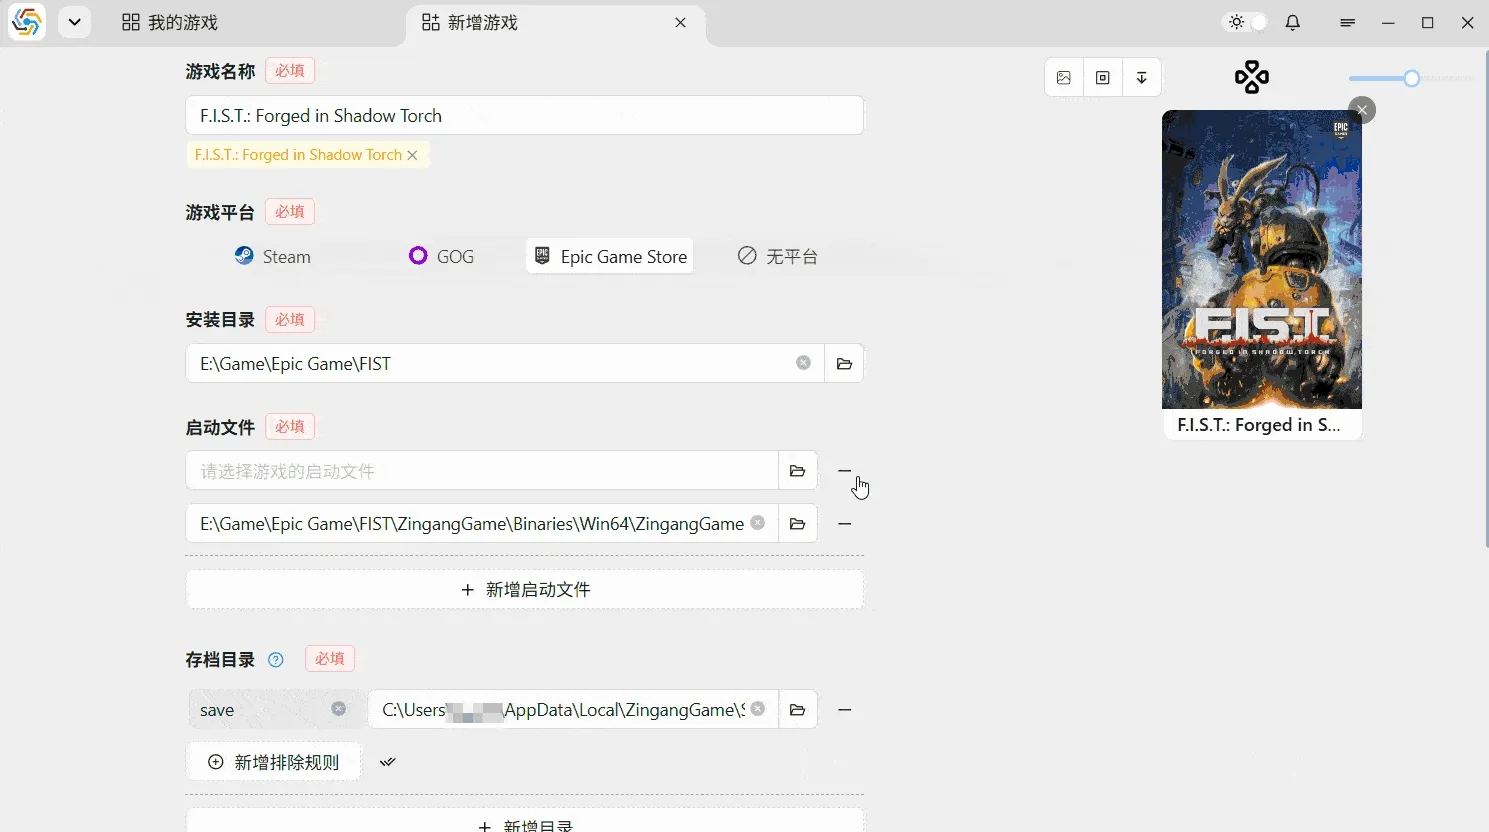
.exeformat. Many games provide multiple launch files to support different system architectures or graphics APIs. Therefore, the software also supports setting multiple launch files for a game. Be sure to set all your commonly used launch files so that the software can detect the game is running regardless of which launch file you use to enter the game. -
Launch URL: Games under platforms like Steam and Epic require URL launching, for example,
steam://rungameid/274190. This method first launches the platform client and then launches the game through the client. -
Command Line Launch: Some games require specific launch parameters when starting. In such cases, command-line launching is necessary. The GOG platform also launches games via command line.
Additionally, if the software fails to retrieve the game’s icon, it will automatically extract the icon from the launch file as the game’s icon. In this case, changes to the launch file will also set a new icon for the game:
Save Directory, Configuration Directory, Other Directories
Section titled “Save Directory, Configuration Directory, Other Directories”The save directory is the directory where save files are located. The configuration directory is where configuration files are located (e.g., resolution, anti-aliasing options are in configuration files). These two are generally in the same directory but their files are mostly independent, so the software divides them into two different storage categories. Directories other than save and configuration directories are considered “other directories” and can be added by you for any purpose, such as data files related to mods. These three directory types share the same usage logic but differ in classification, so they are described uniformly here.
All categories of directories support adding multiple directory paths. This is mainly to handle situations where data files are scattered across different directories, but this is rare for save and configuration directories, typically only occurring in games with installed third-party mods. The directories automatically populated by the software based on game metadata may also be multiple. This is because when the software is not confident enough to exclude certain directories, it will choose to populate all of them into the interface for you to identify. The directory ranked first is considered the most probable by the software:
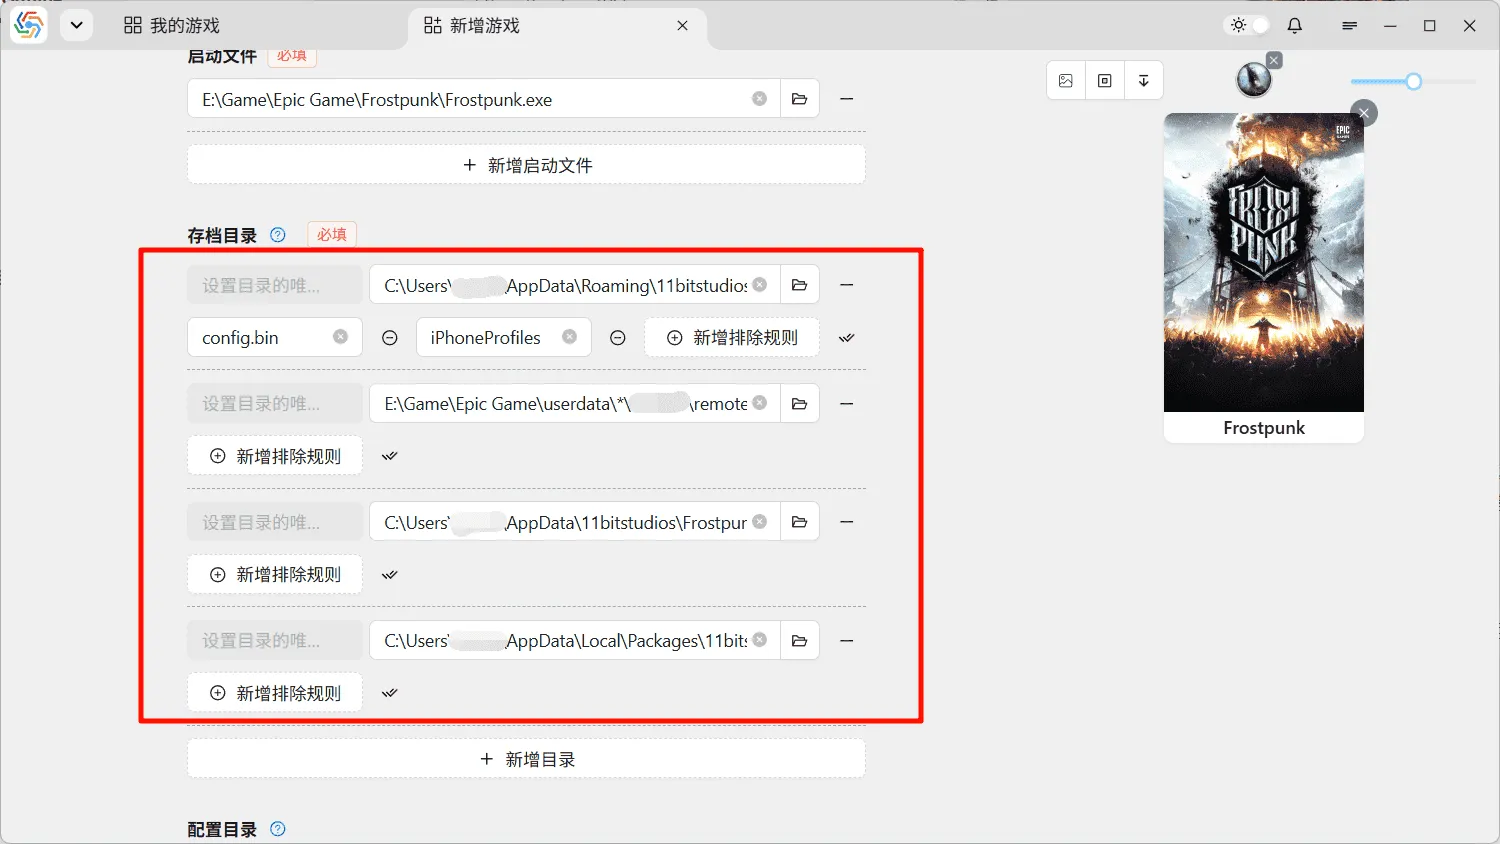
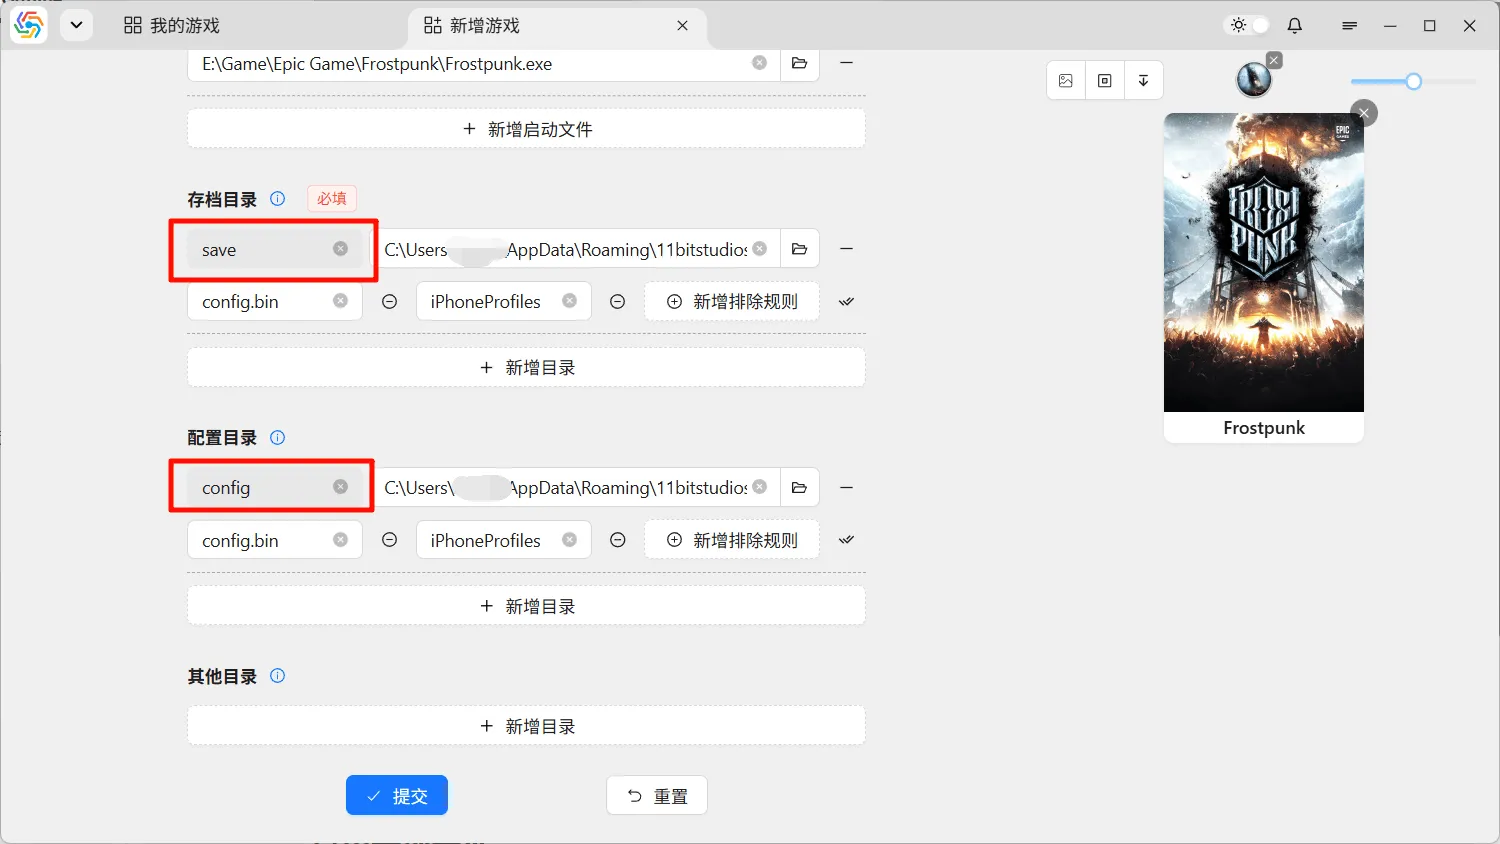
Due to the multi-directory path design, the software requires you to set a unique name for each directory. This way, even if the directory path changes during rollback, the correspondence between directories can still be smoothly identified. When there is only one directory path under save directories and configuration directories, the software will set default names for them (it is recommended to use the default names directly to be consistent with common names for subsequent save sharing). Other directories, due to their undefined purpose, do not offer default names, and you need to set appropriate names based on their usage.
Exclusion Rules
Section titled “Exclusion Rules”The exclusion rules below the directory are used to exclude specific files or directories from a directory. For most games, save files and configuration files are generally in the same directory, making mutual exclusion rules necessary. Exclusion rules use standard gitignore syntax. For syntax details, refer to the Official Documentation.
For the vast majority of games, complex exclusion rule syntax is not required. Simply write the name of the file or directory to be excluded. If there are multi-level directory structures, use / as a separator. If you need to include only certain files or directories instead of excluding them, you would theoretically need to use gitignore’s exception syntax. However, the software provides a rule inversion function that allows you to directly invert exclusion rules into inclusion rules using the button on the far right. The rule content remains the same, but the result will be the opposite of exclusion rules.
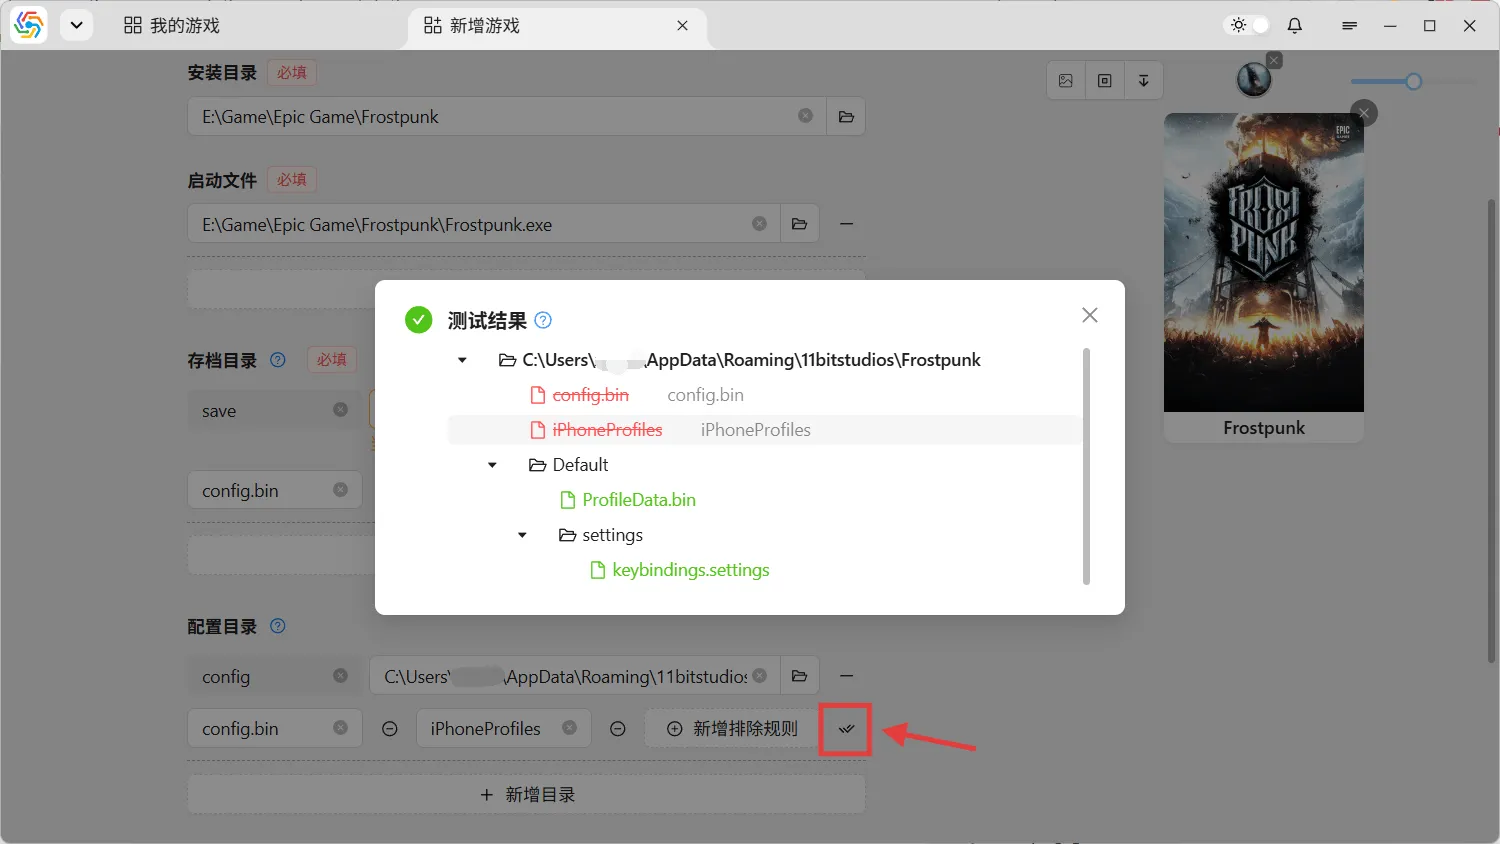
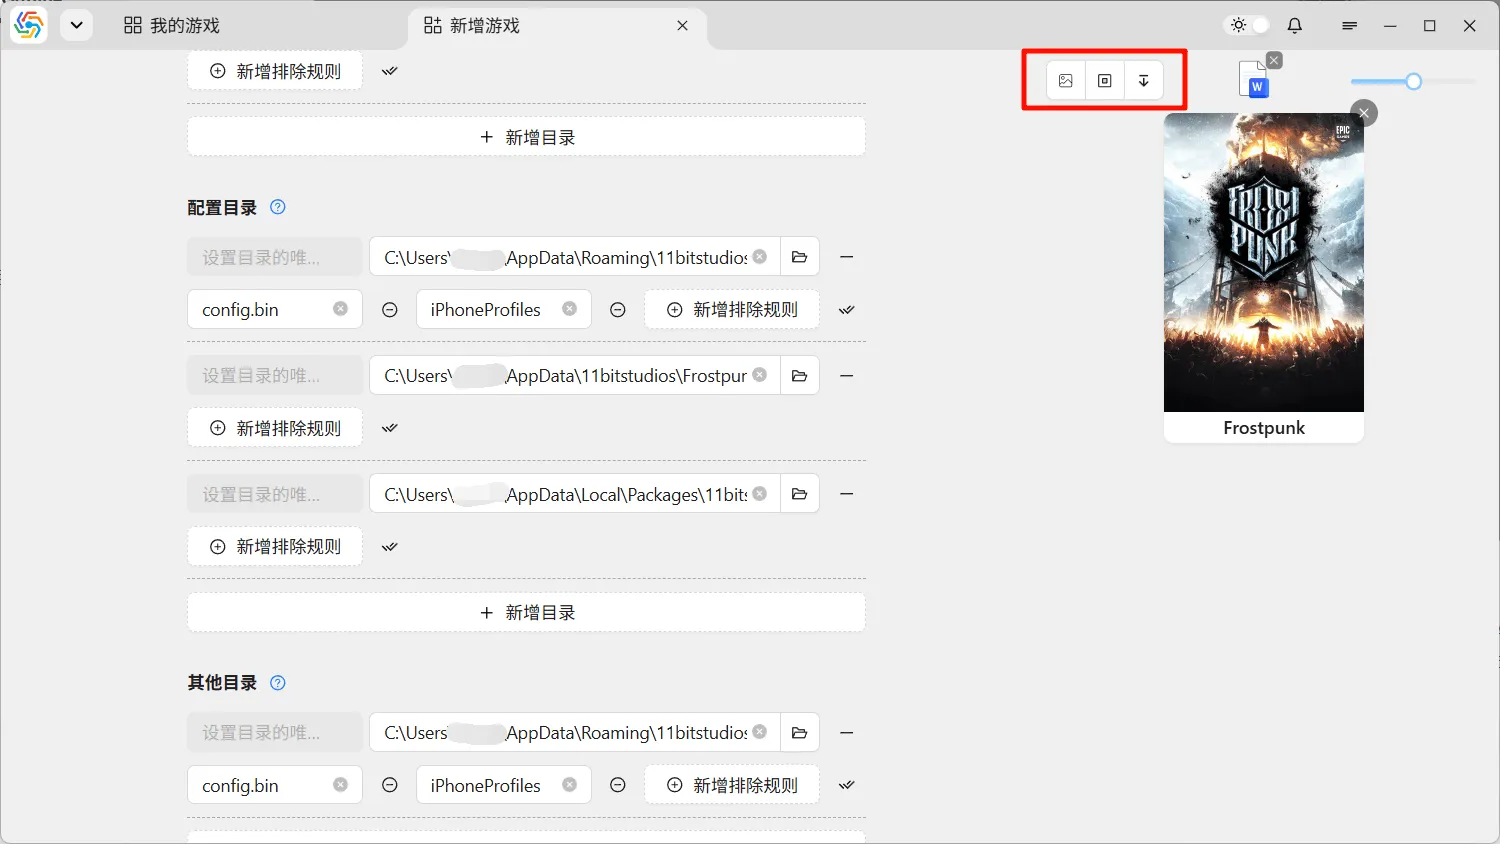
After writing all exclusion rules, you can use the test button to preview the matching results for the current directory. In the preview results, items that are crossed out are files or directories that will be excluded, followed by the rule that excludes them:
Cover and Icon
Section titled “Cover and Icon”Covers and icons are primarily sourced from the network or cached resources on the local machine by game platforms. The software automatically retrieves them from the local machine or downloads them from the network. Icons are mainly used in the tabs at the top of the software interface, while covers serve as the main visual elements for game cards. You can freely choose any local image as the icon or cover for the current game, and you can also extract icons from any file as the game icon:
Process Tracking
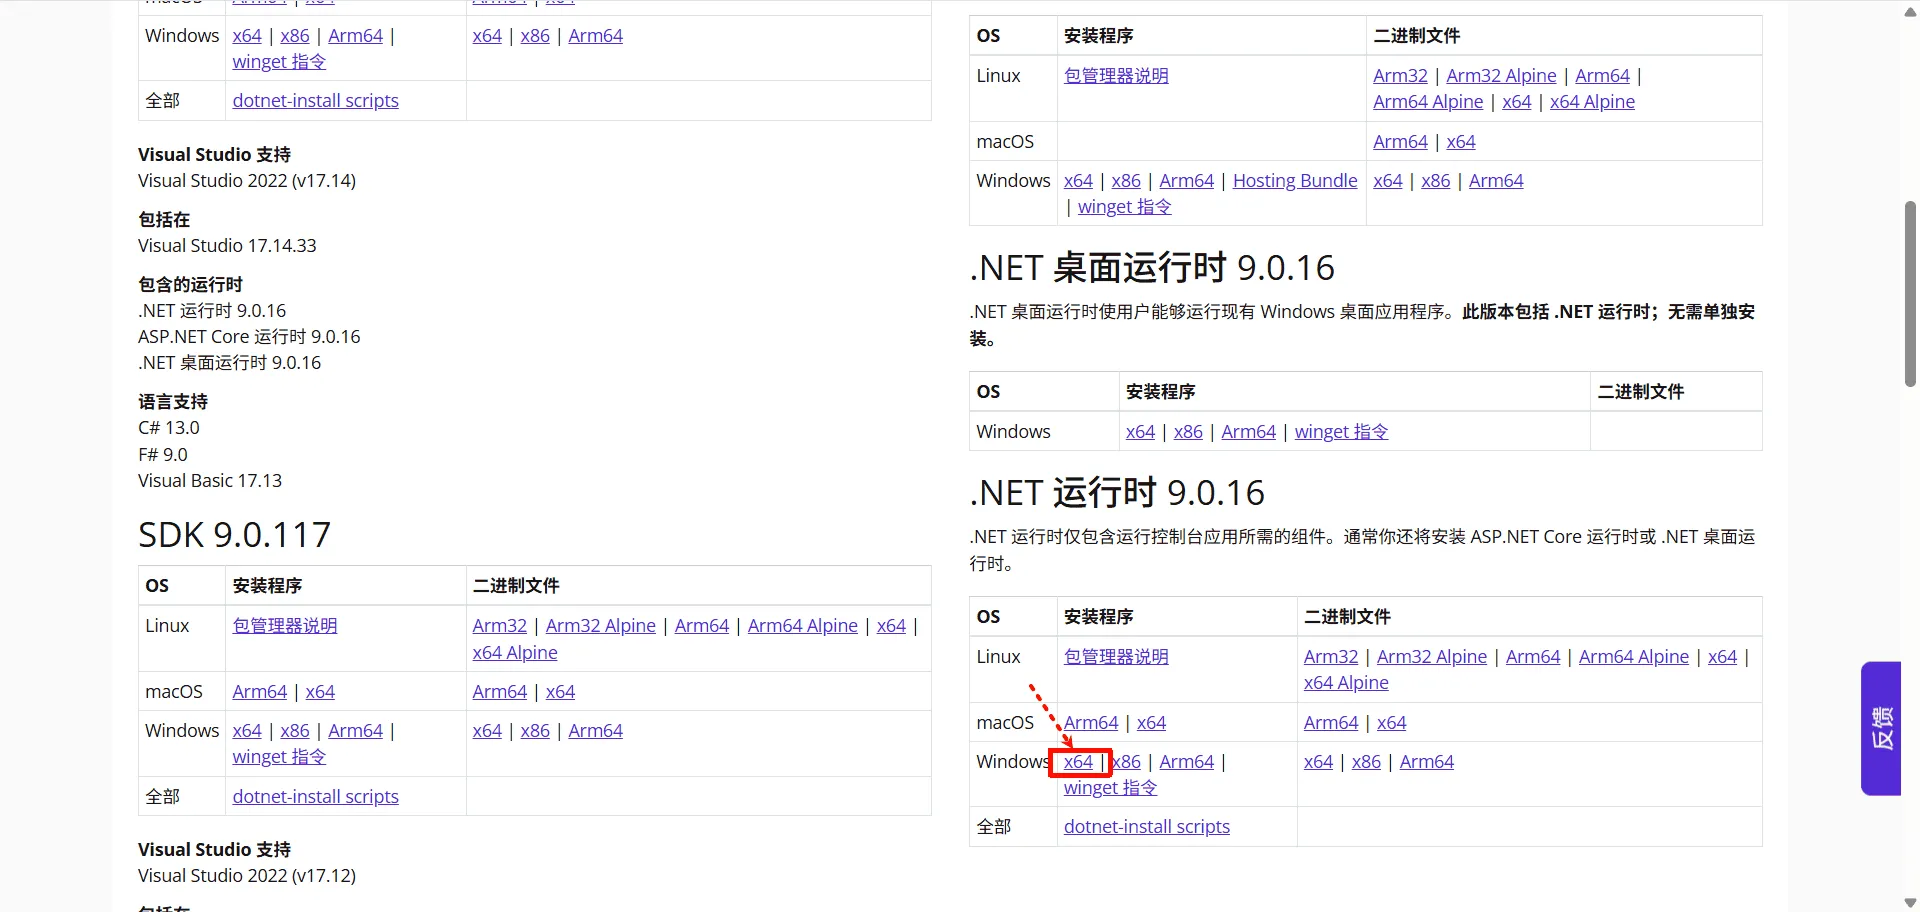
Section titled “Process Tracking”The process tracing feature determines the location of the saved game directory by monitoring file write activity in the game process. However, this function relies on the .NET 9 runtime environment. You can download and install .NET 9 from the official website.
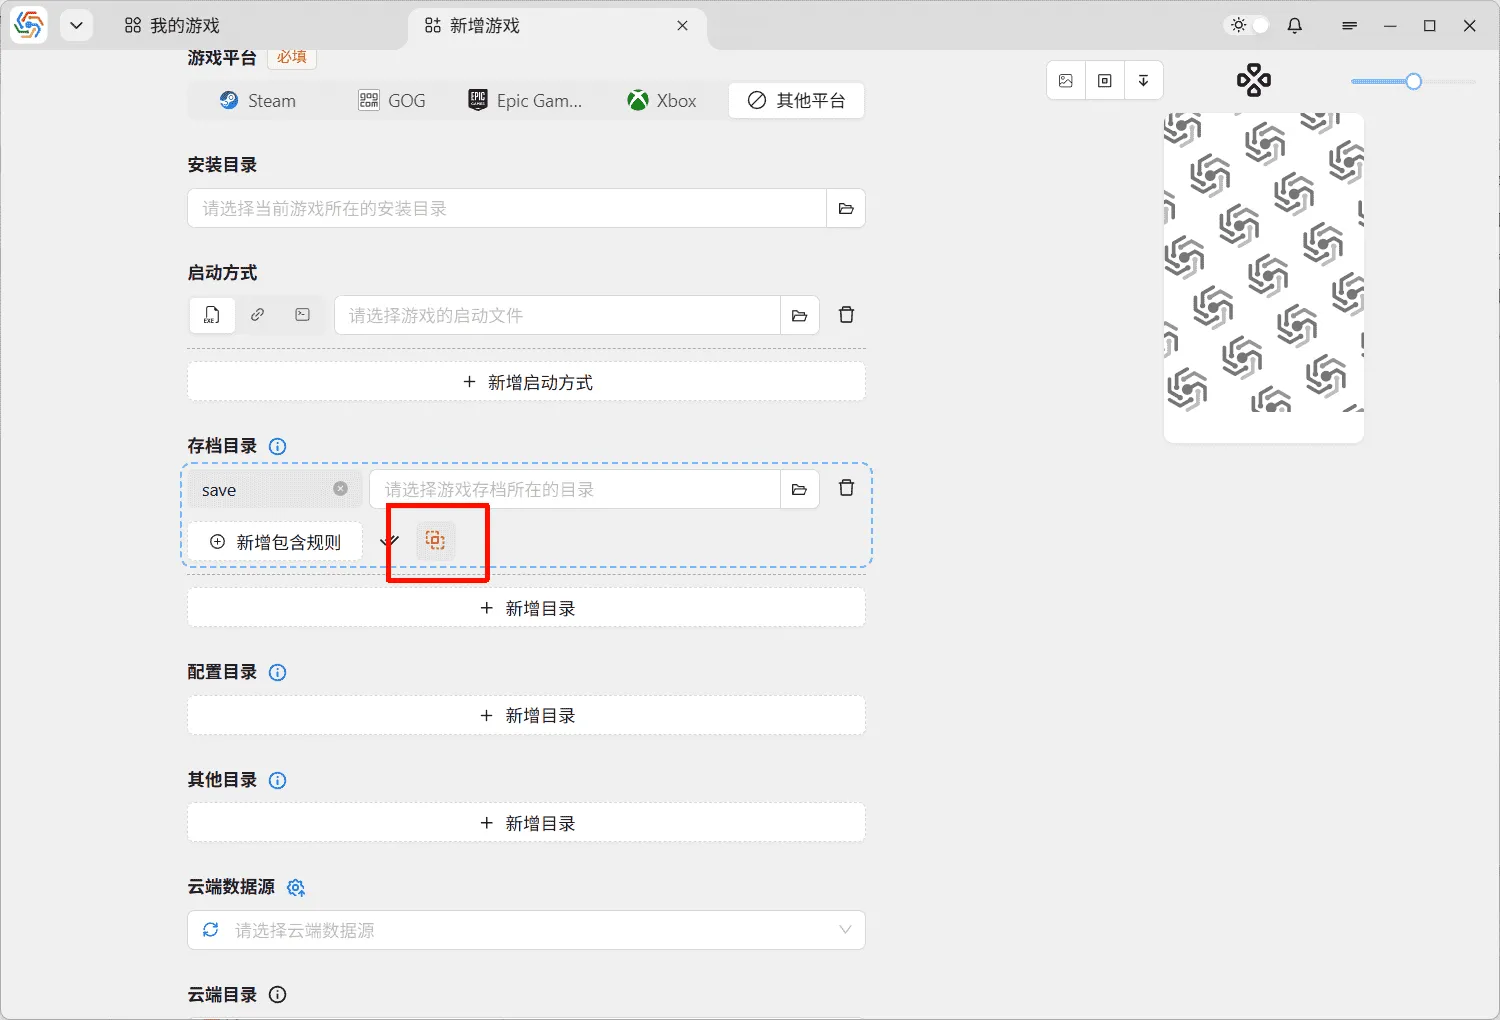
Click the process tracer button in the bottom-right corner of the interface to open the process tracing window, then select the target process and start tracing. When a save is triggered within the game, the interface will display the detected file write locations. Select the one you believe is most likely to be the game’s saved game directory, then simply drag it into the target field in the form:

Add Unknown Game
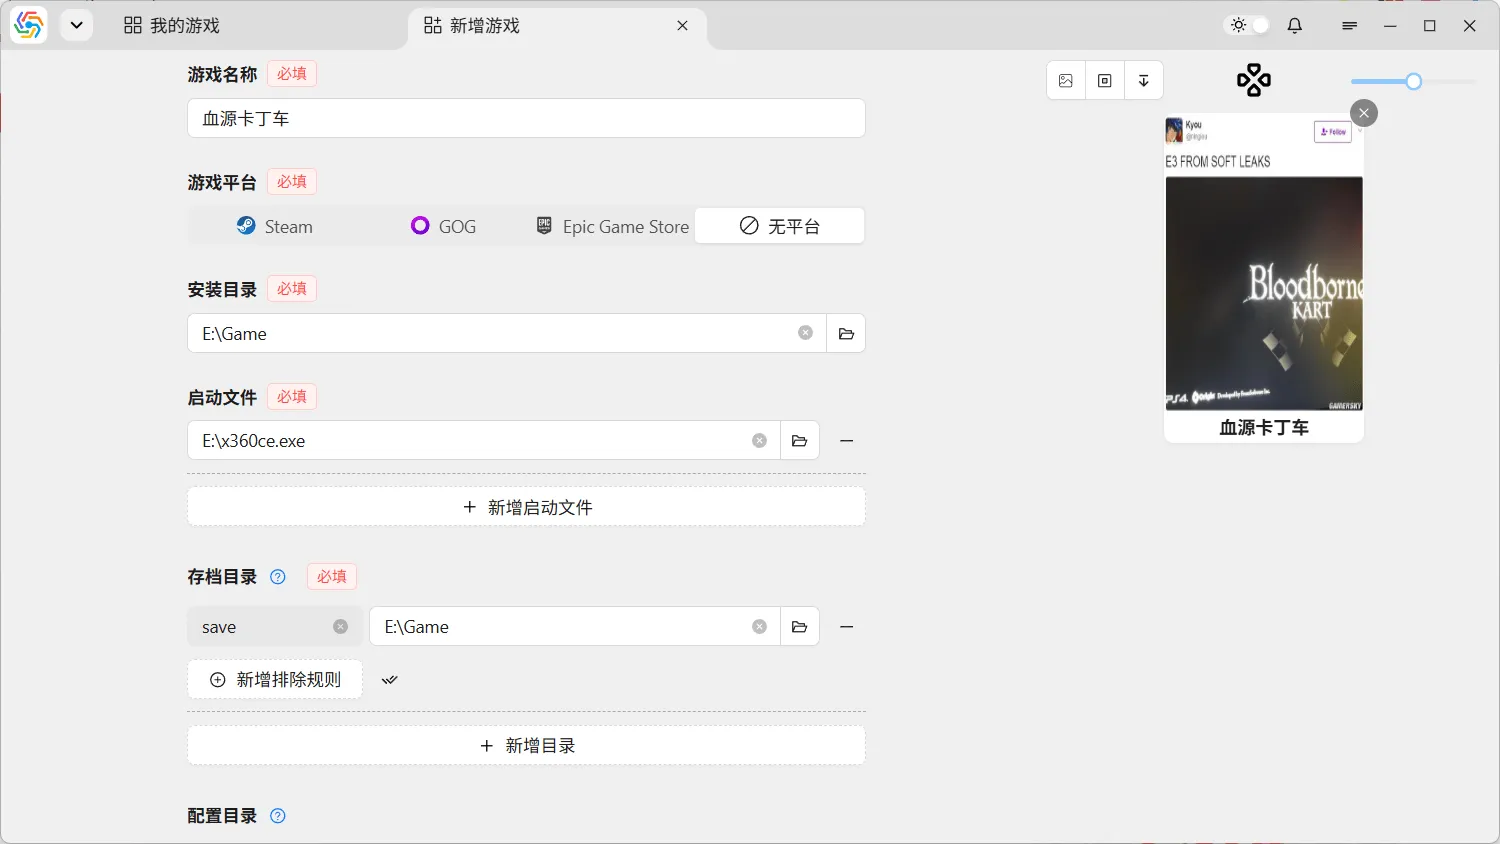
Section titled “Add Unknown Game”Unknown games refer to games whose identity the software cannot recognize. This is mainly used in scenarios where game metadata cannot be found. When there is no identity tag under the game name in the Add New Game interface, it means the game being added will be an unknown game. Due to the lack of game metadata when adding new games, all information needs to be manually entered, and the software’s automatic recognition function cannot be triggered:
Import Game
Section titled “Import Game”The purpose of importing games is the same as adding new games: to add games to the software that can be managed for saves. The difference is that the import game function is suitable for adding a large number of games at once, while adding a new game can only add one game at a time.
Import from Cloud
Section titled “Import from Cloud”When users upload save data to the cloud directory using the software’s cloud synchronization function, the basic game information is also uploaded to the cloud directory (refer to Upload Settings for details). Therefore, when switching devices, users can scan the cloud directory using the import game function on the new device to batch transfer all games saved in the directory to the new device, while retaining key information such as the originally set installation directory, save directory, quick save settings, cover art, and icons.
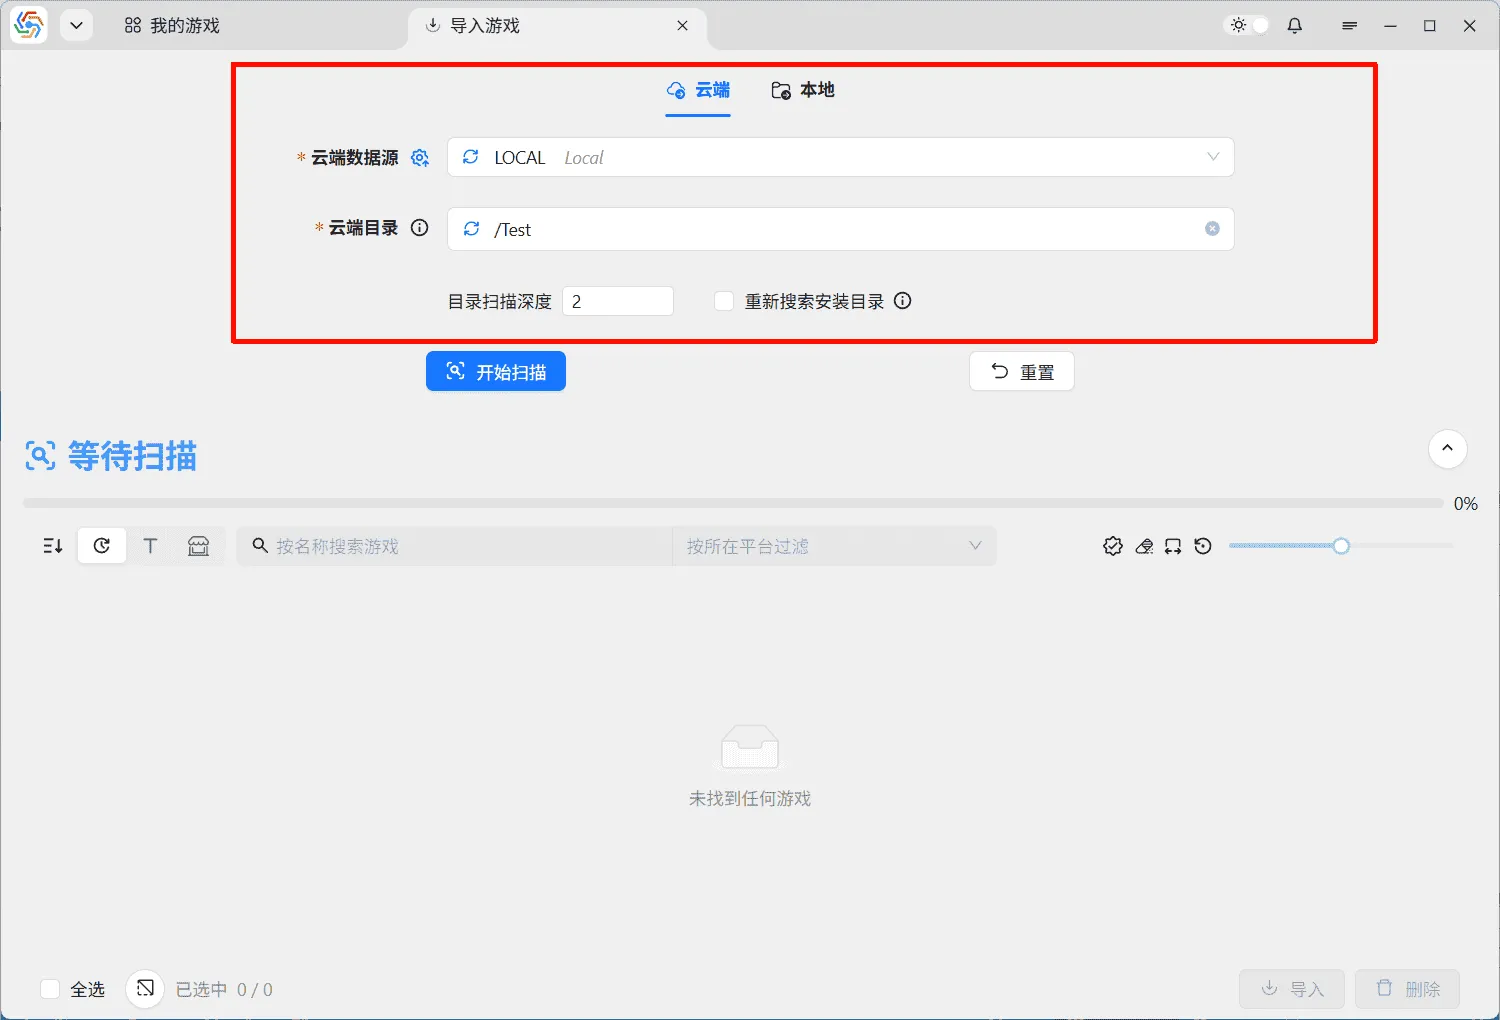
The image above shows the interface for scanning the cloud directory. Select the corresponding cloud directory to start scanning. There are two scanning options below:
- Directory Scan Depth: During scanning, the software searches up to the specified number of subdirectory levels. For example, if the target directory is
/Testand the current directory is the first level, with a scan depth of 2, the uploaded game directory/Test/Game1can be scanned, but/Test/Games/Game1cannot. This option is mainly to speed up scanning and avoid scanning meaningless subdirectories. If the target game cannot be scanned, try increasing the scan depth. - Re-scan Installation Directory: The game’s installation directory may change after device migration. Enabling this option will re-scan the library folders for the game’s installation directory, but it will significantly increase the scanning time.
Import from Local
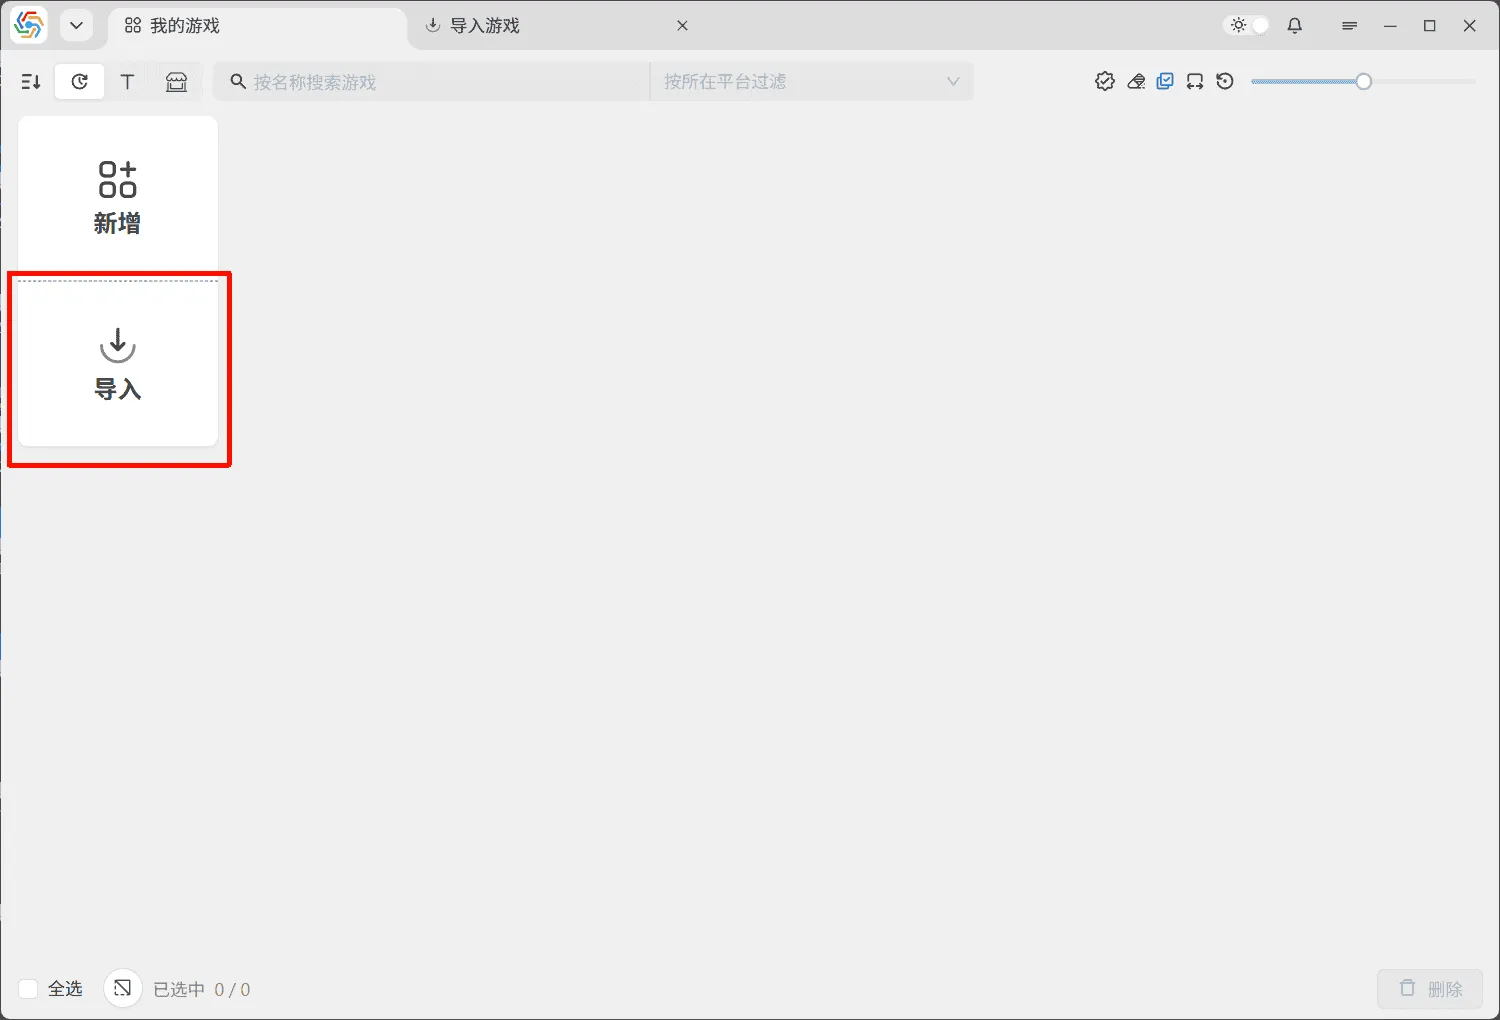
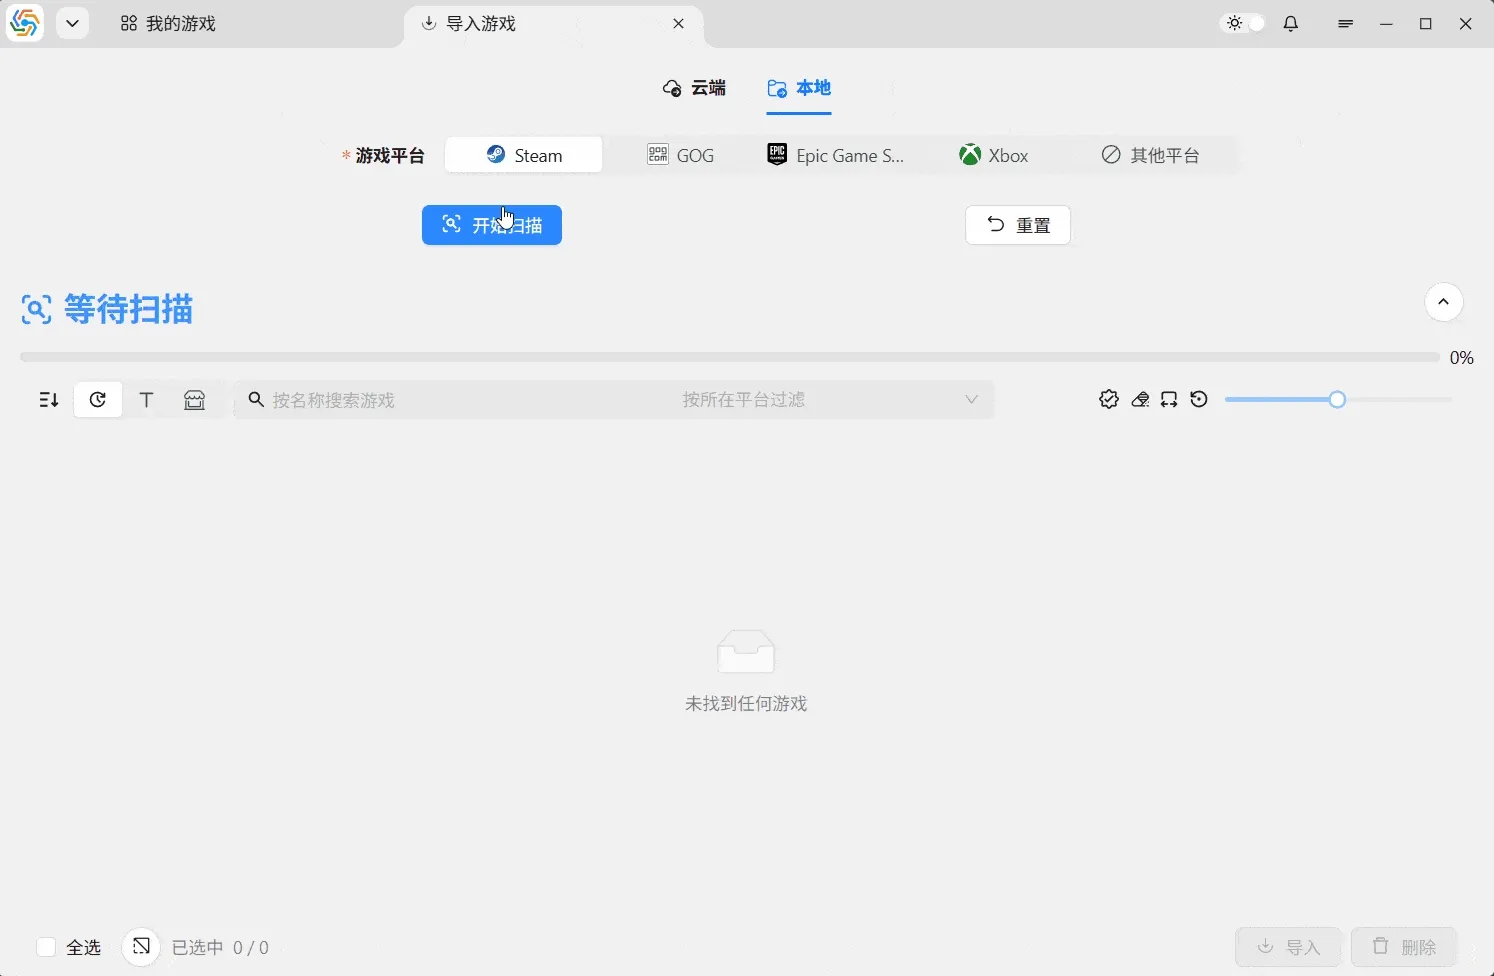
Section titled “Import from Local”The software can automatically scan locally installed games and import them into the software in batches, saving the tediousness of adding them one by one.
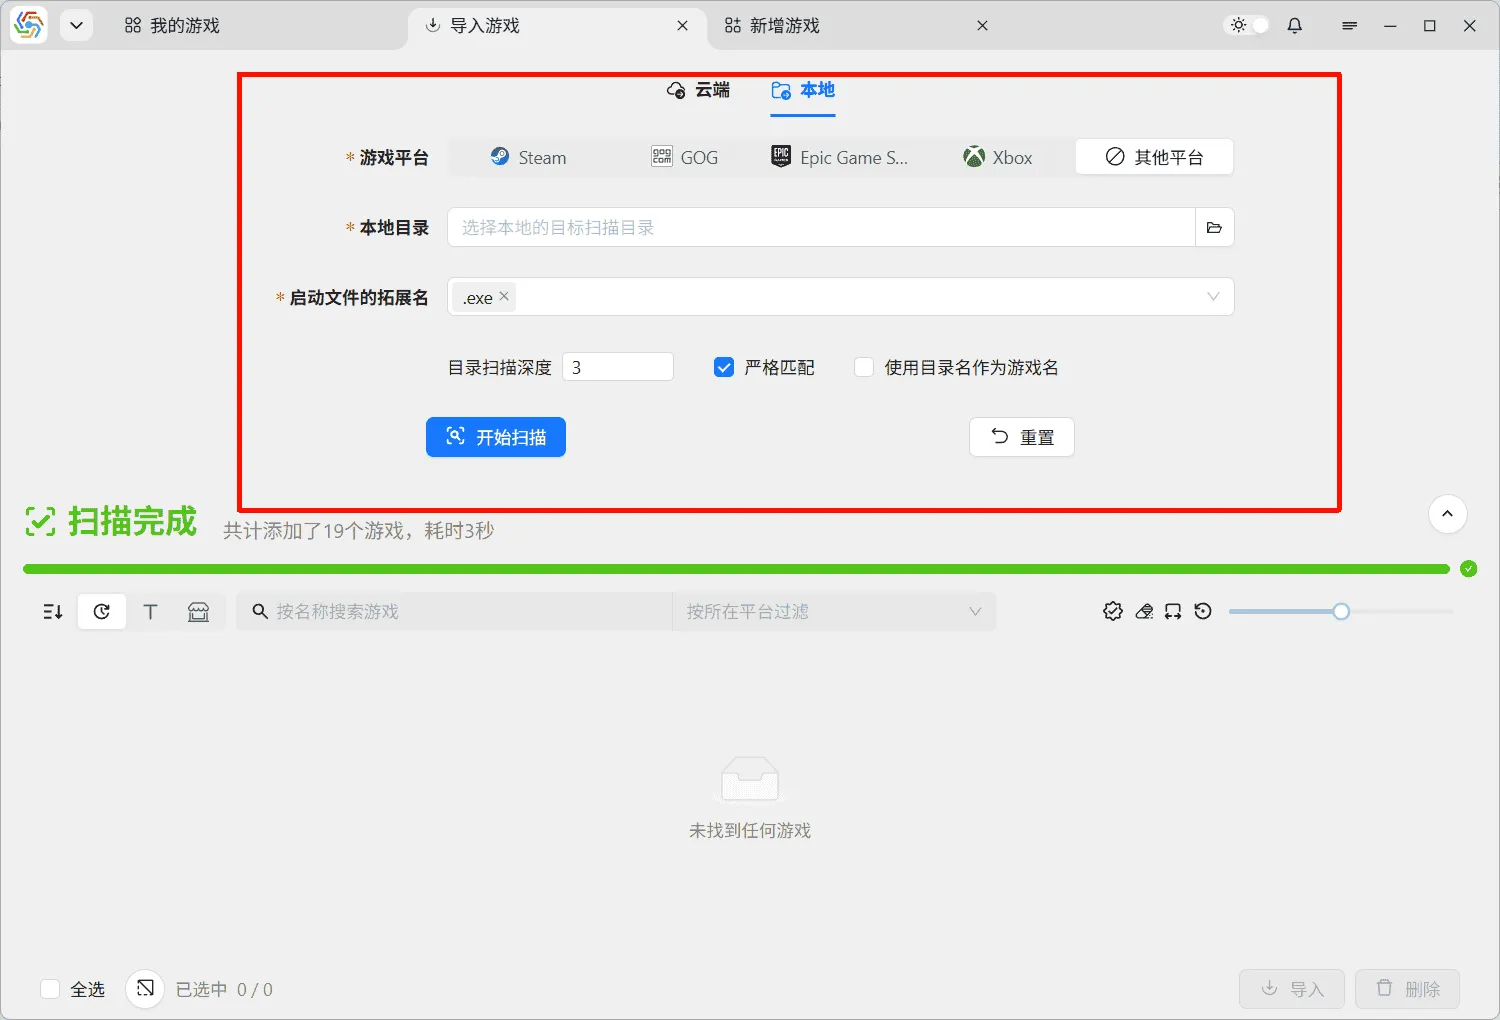
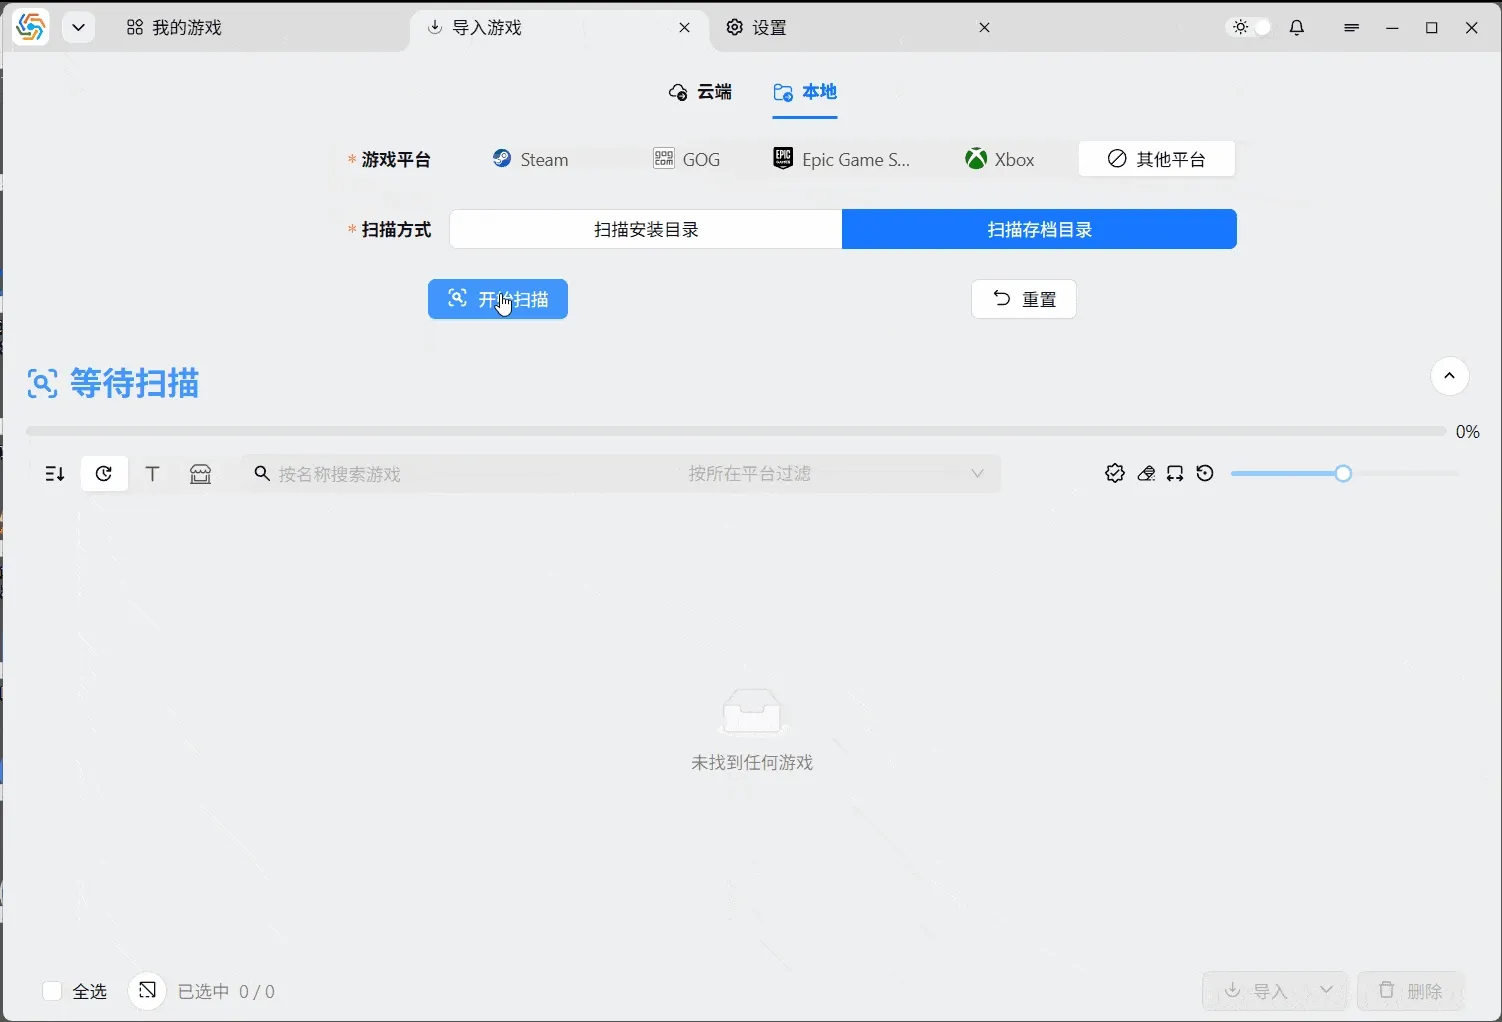
The image above shows the interface for importing games from local. Before importing, you need to select the corresponding game platform. If you select specific game platforms like Steam or Epic, you can automatically recognize games installed under those platforms without additional options, provided that the installation information for the corresponding game platforms has been set in the Data ----> Game Platforms option on the settings page.
Scan Installation Directory
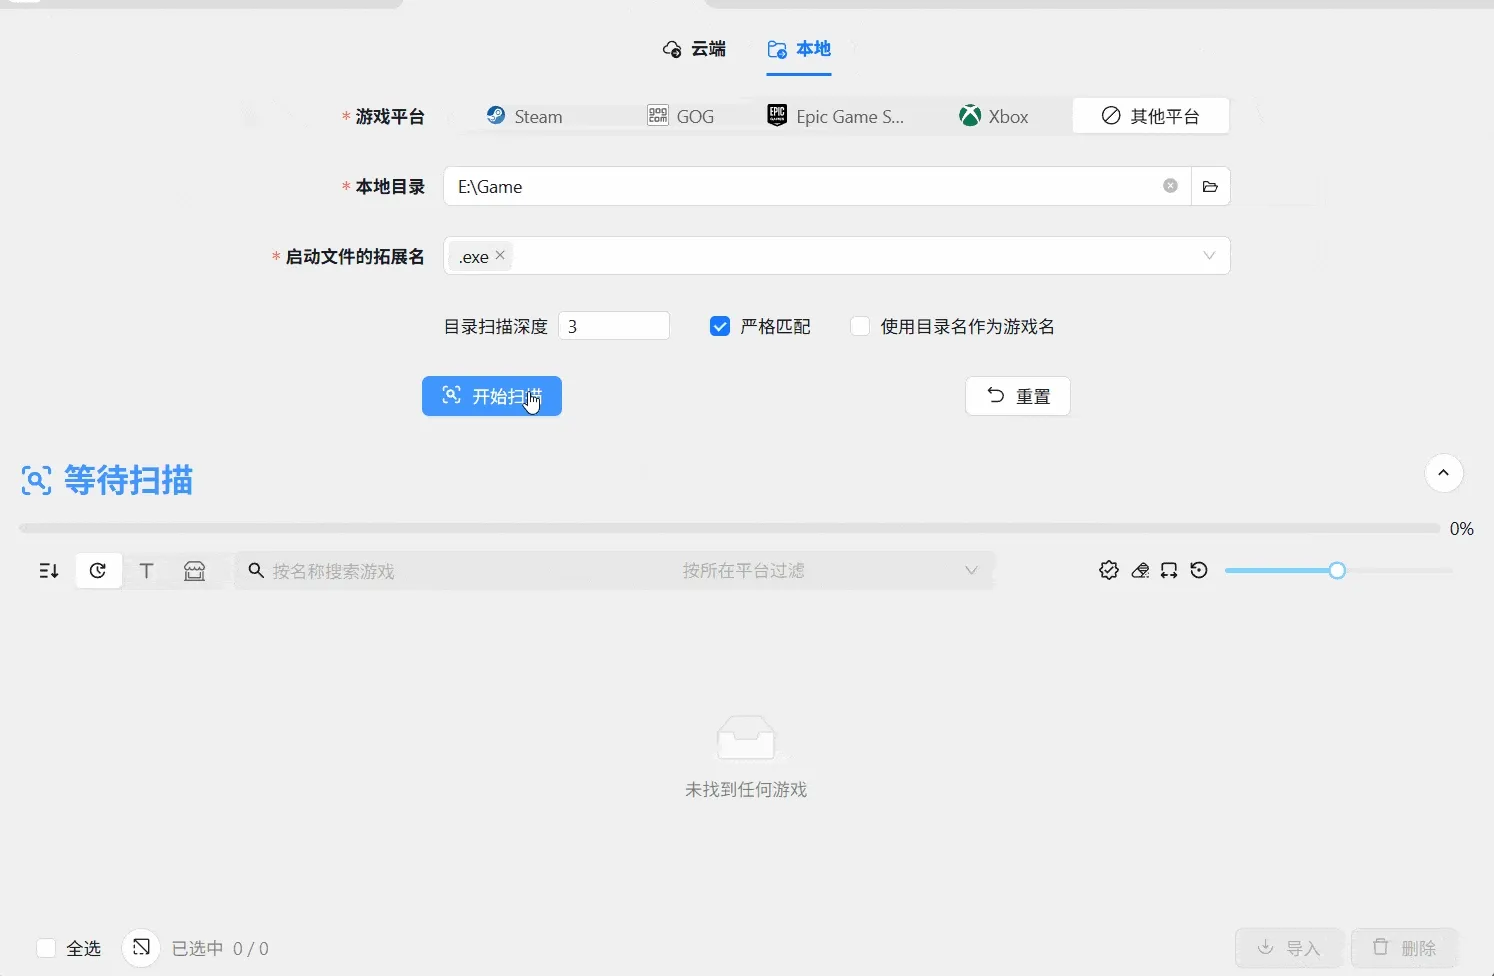
Section titled “Scan Installation Directory”If you select other platforms, there are two scanning methods available. When selecting to scan installation directory, you need to identify games by scanning for their launch files in specific directories. After selecting the target directory and the file extension for the launch file, you can start scanning. There are three scanning options below:
- Directory Scan Depth: This option is the same as the directory scan depth option for cloud import. It can speed up scanning and avoid scanning meaningless subdirectories. However, compared to scanning cloud directories, scanning local directories has no network overhead and does not trigger cloud service provider rate limits, so this option can be set relatively high.
- Strict Match: This option can improve the recognition accuracy for some games with common launch file names, such as many games having
launcher.exeas their launch file. With strict matching enabled, a match is only considered successful if the save directory is also found. This helps exclude most games with identical launch file names. However, strict matching requires the game’s save directory to exist. If your game has not been launched and its save directory has not been generated, the game may not be recognized. - Use Directory Name as Game Name: The game name automatically recognized by the software defaults to the official name from the game metadata. However, official names are mostly in English. If you have good directory naming habits and name your game installation directories with localized game names, enabling this option will use the directory name as the game name for automatically recognized games, saving the trouble of manually changing the game name.
Scan Saved Game Directory
Section titled “Scan Saved Game Directory”When selecting to scan saved game directory, the software will search your local machine for all available saved game directories and display scan results for the corresponding games based on the directories found. Compared to scanning installation directories, the results from scanning save directories only include the location of the save directory, without information such as the installation directory or launch method. Additionally, due to the large number of games, the scanning speed is relatively slow. However, this method does not require the game to be installed on the local machine. If a game has been uninstalled, using this method can scan for teh saved game that remains on the local machine after uninstallation:
Complete Import
Section titled “Complete Import”Games imported from the cloud or local will be displayed in the game list below. This list uses the same operation logic as the game list on the homepage and supports Batch Operations:
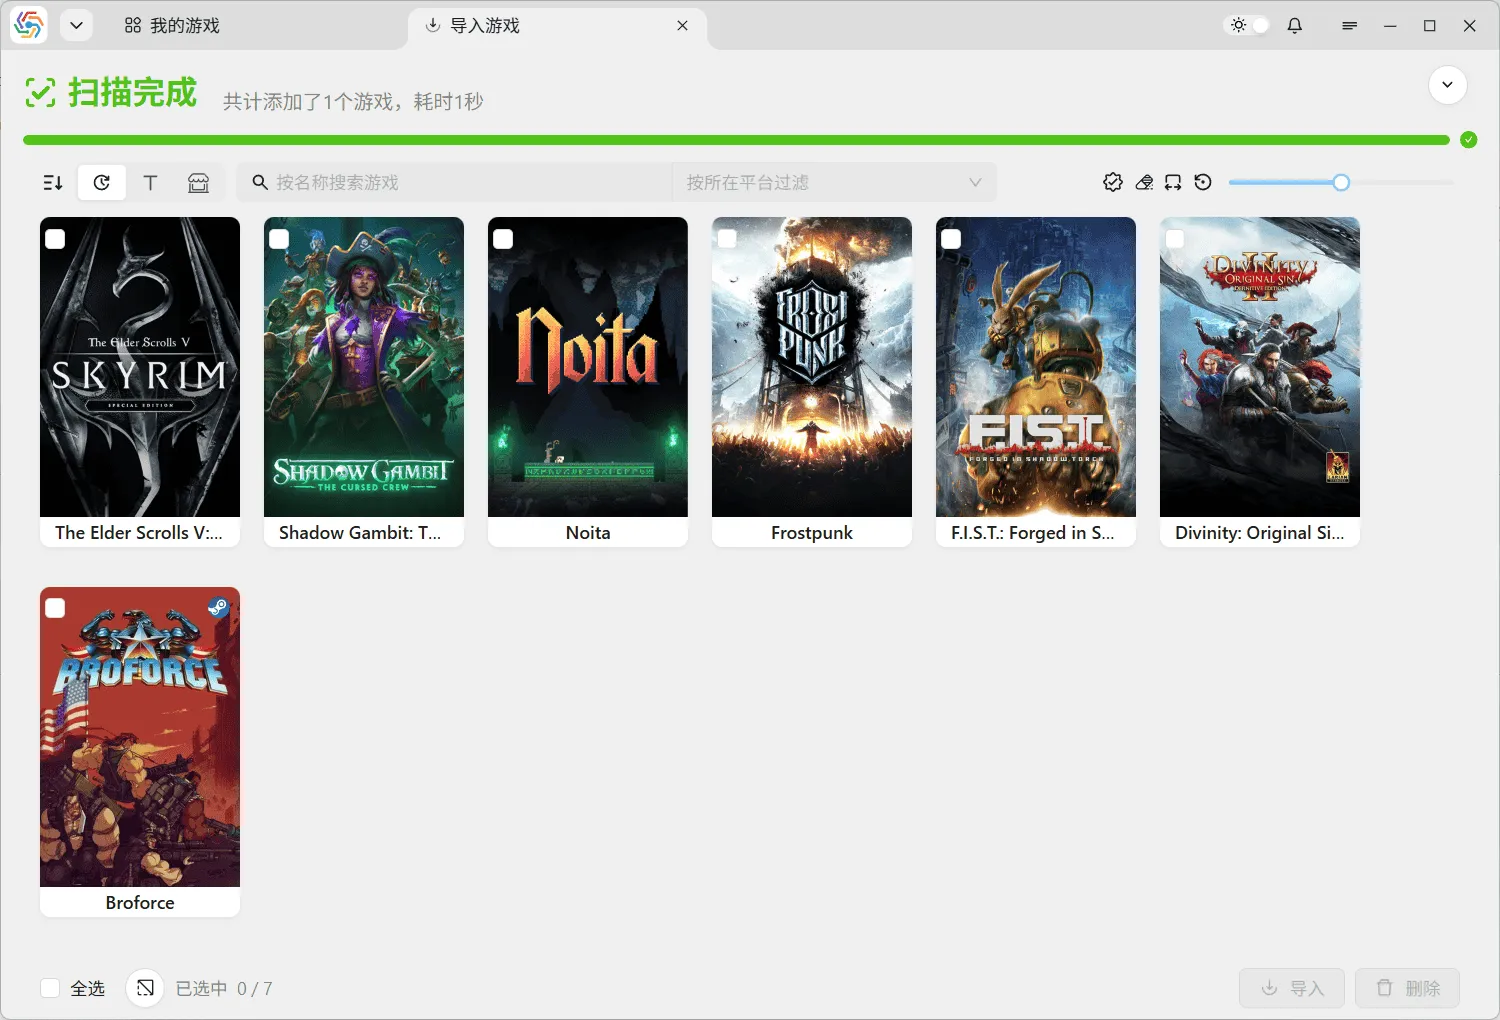
Users select multiple games to import and click the import button in the lower right corner to import them all. However, each game will be validated before import. The validation logic is the same as during new game addition, including ensuring the game name is not duplicated and that the save directory exists. If validation fails, click the edit button on the game card to edit the imported game’s information:
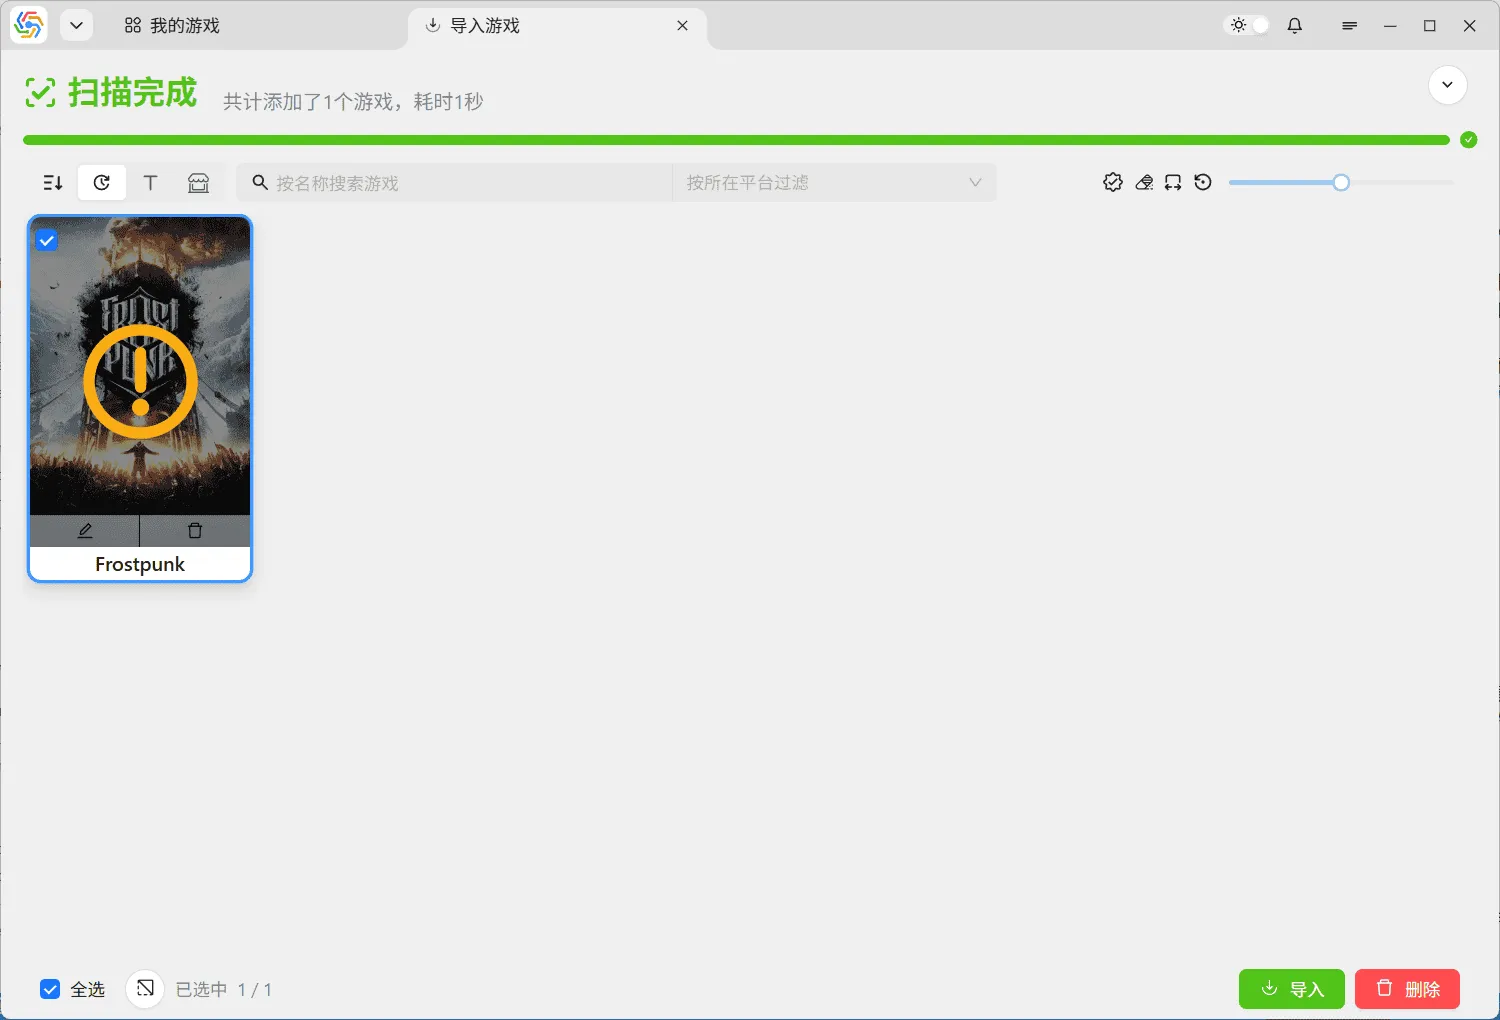
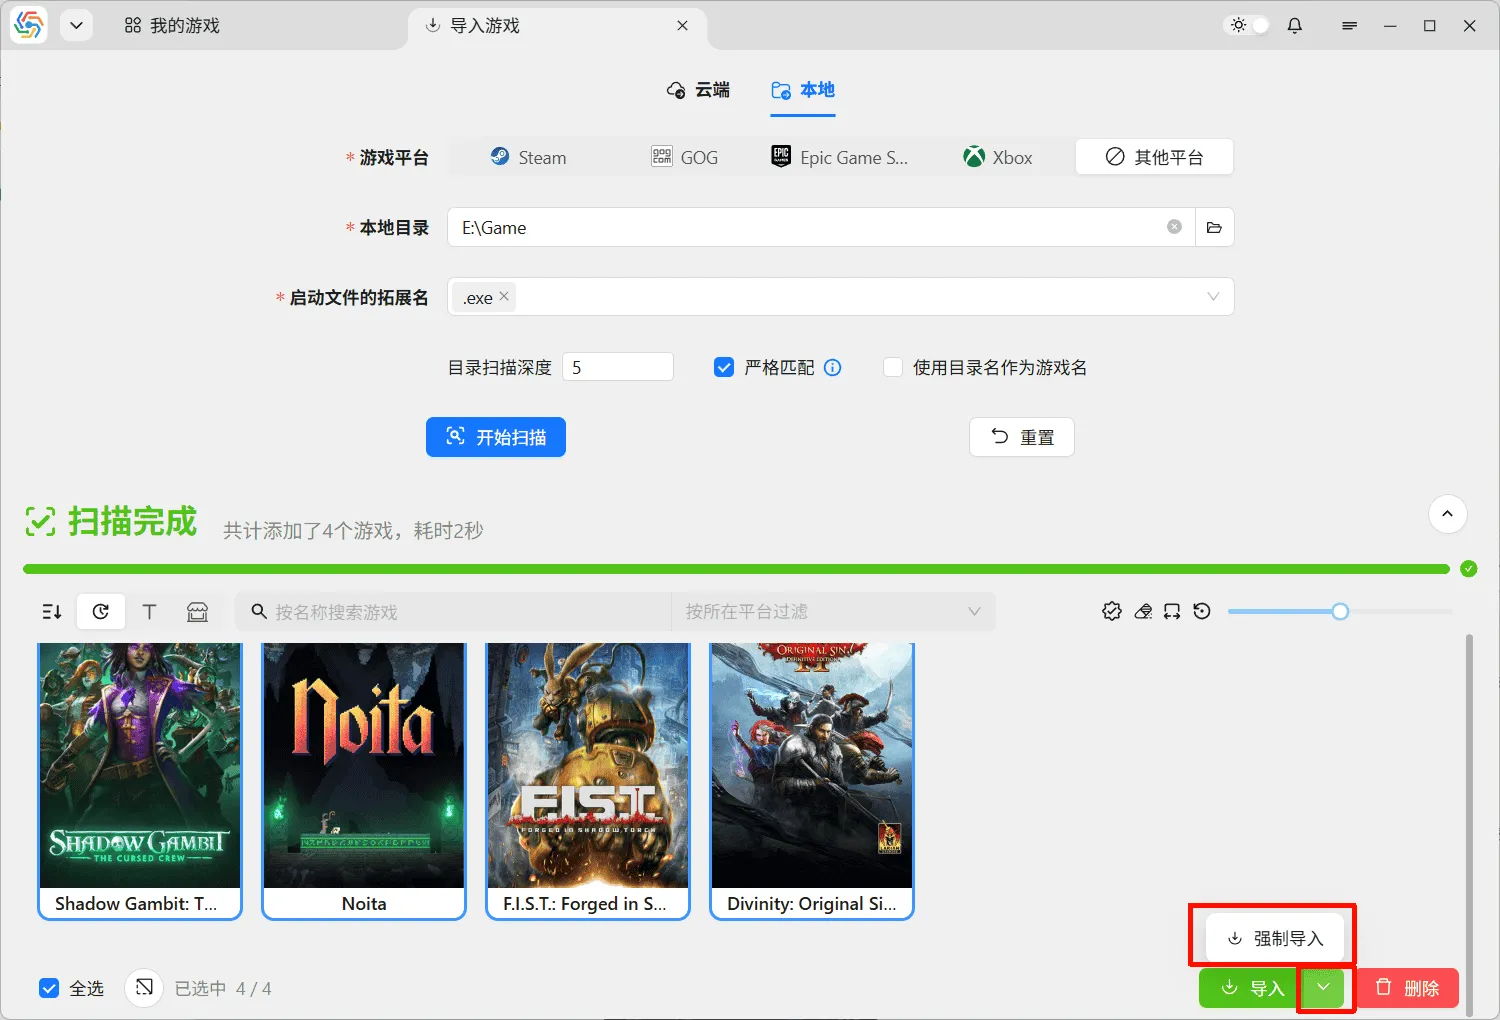
If your game is not yet installed, you can use the force import function to bypass validation related to installation and save directories, and import the game into the software first, completing the game information later:
Game List on Homepage
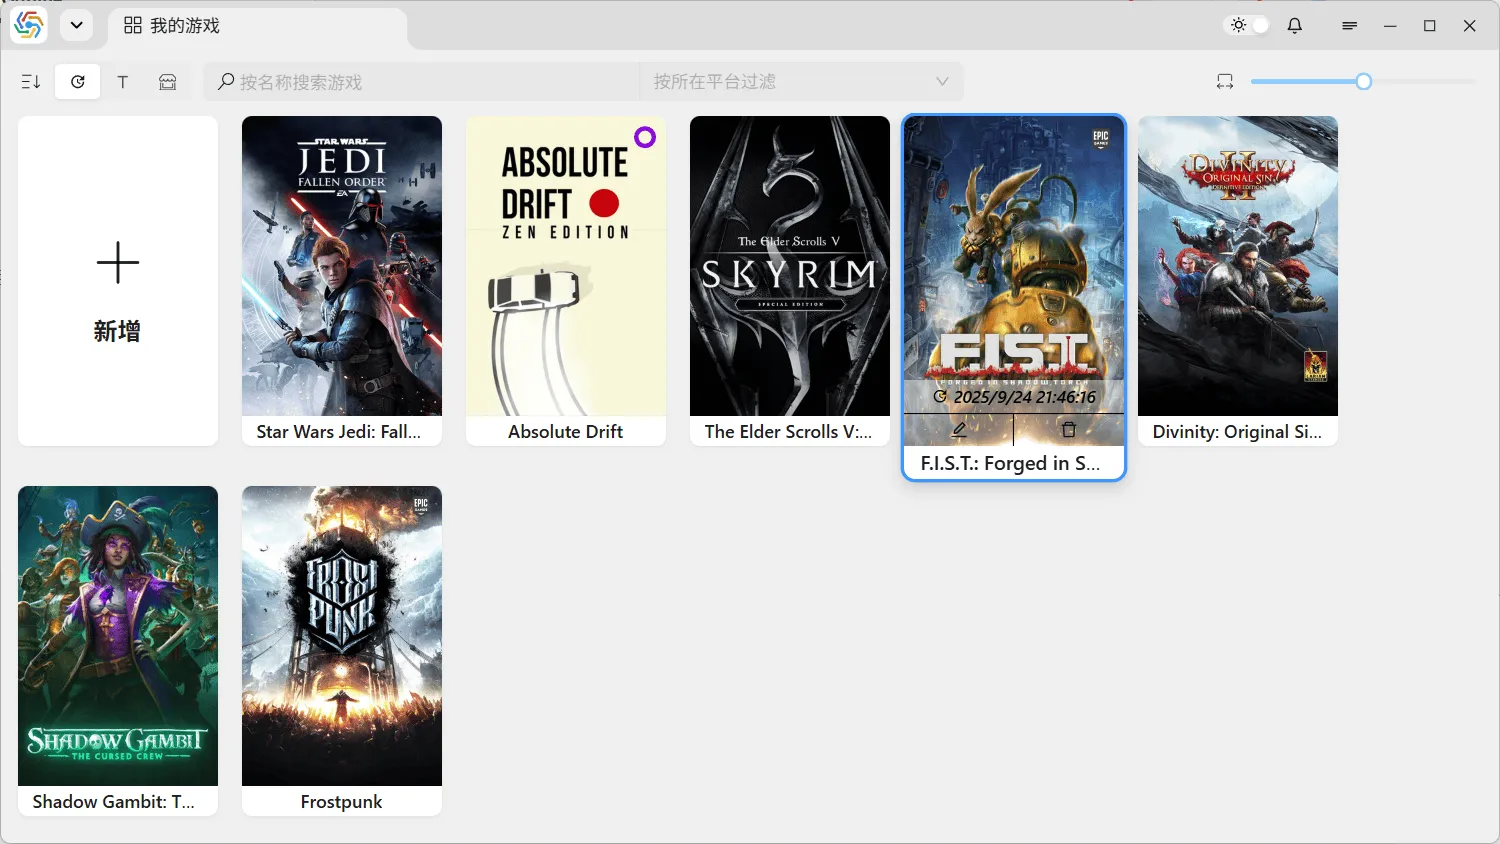
Section titled “Game List on Homepage”All added games will form a game card on the software’s homepage. The operation bar at the top of the page allows sorting, searching, filtering, and resizing these game cards from left to right. Hovering the mouse over a card will display all content, including the game platform in the upper right corner, the edit and delete buttons below, and the game’s last updated time, which is the time of the last save:
Multi-Select Mode
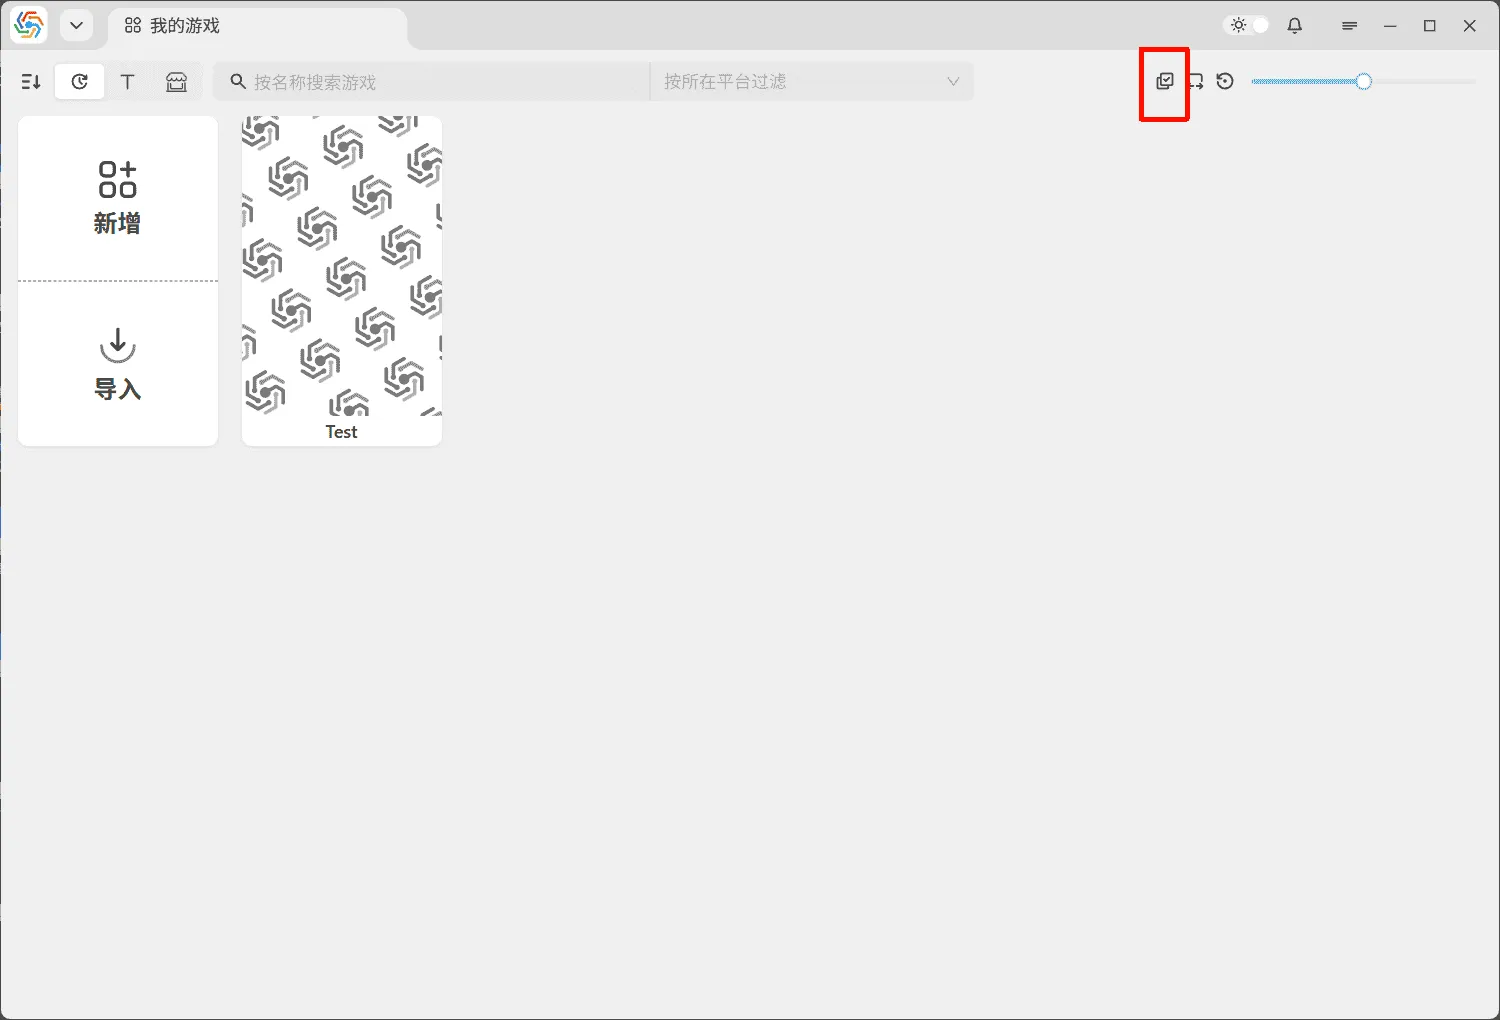
Section titled “Multi-Select Mode”In the upper right corner of the homepage game list, there is a button to enter multi-select mode. You can enter or exit multi-select mode using this button:
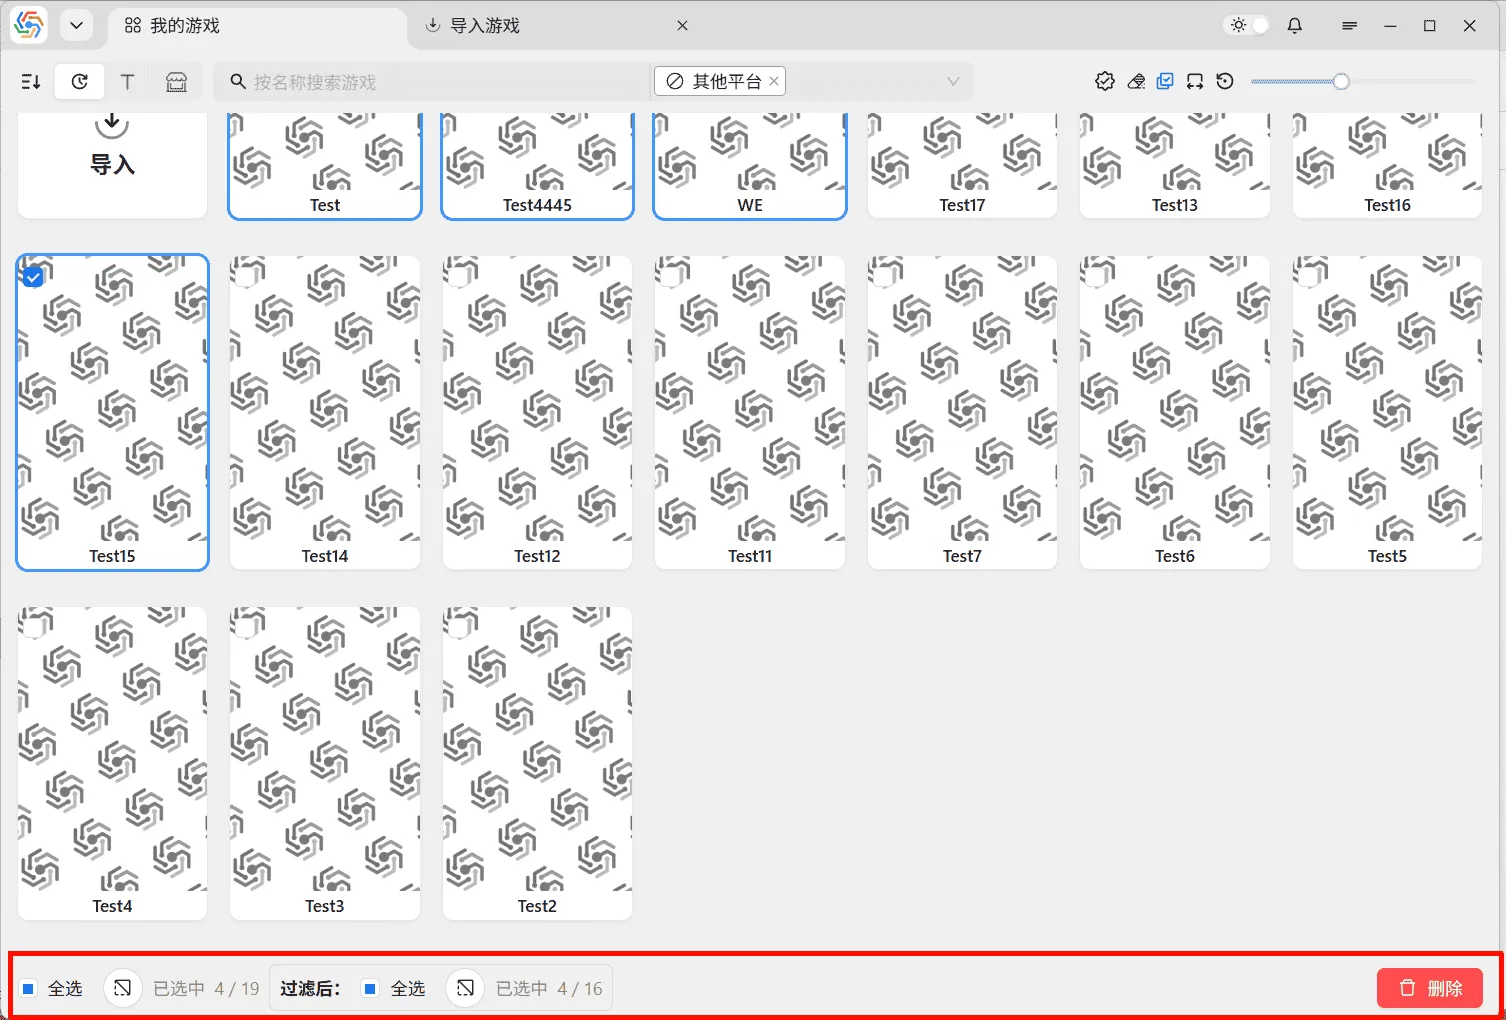
After entering multi-select mode, clicking a game card will select it instead of entering the save management interface. Simultaneously, a multi-select operation bar will appear at the bottom of the page. The left side of the operation bar allows operations like select all, deselect all, and invert selection. The right side contains specific batch operations. If the game list is filtered, a multi-select operation bar specifically for the filtered results will also appear:
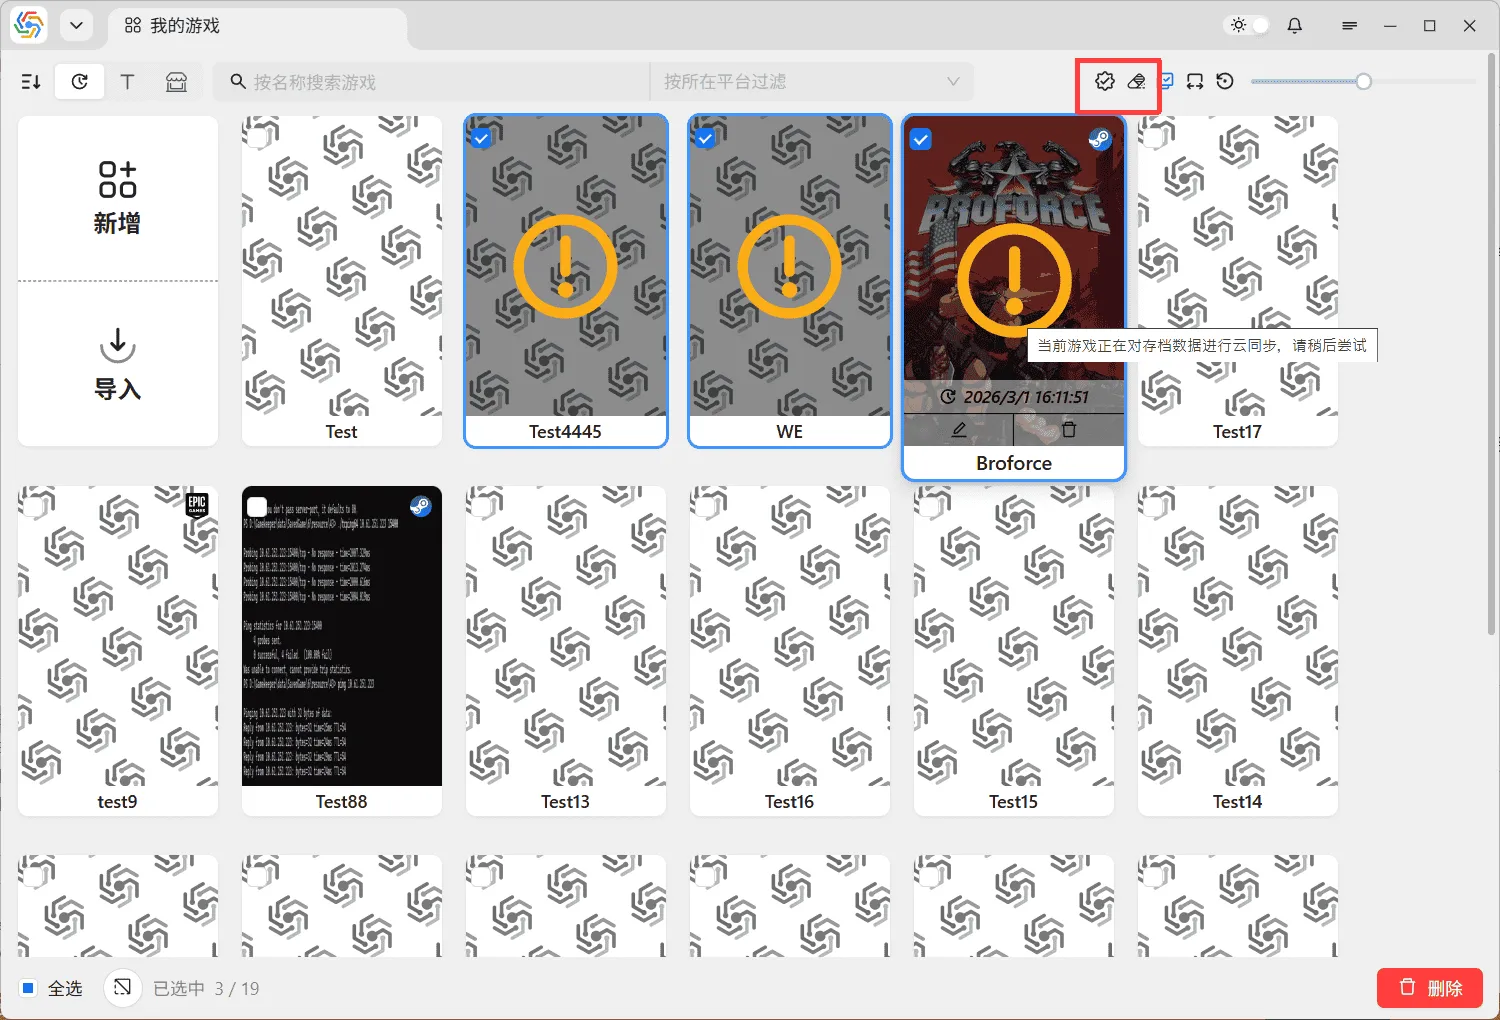
Use the batch operation buttons on the right side of the operation bar to perform batch operations on all selected games. Some batch operations require validation of the target games first. If validation fails, the validation results will be displayed on the game card. At this point, you can use the two buttons next to the multi-select mode button in the upper right corner to reset validation results or filter out these validation-failed games:
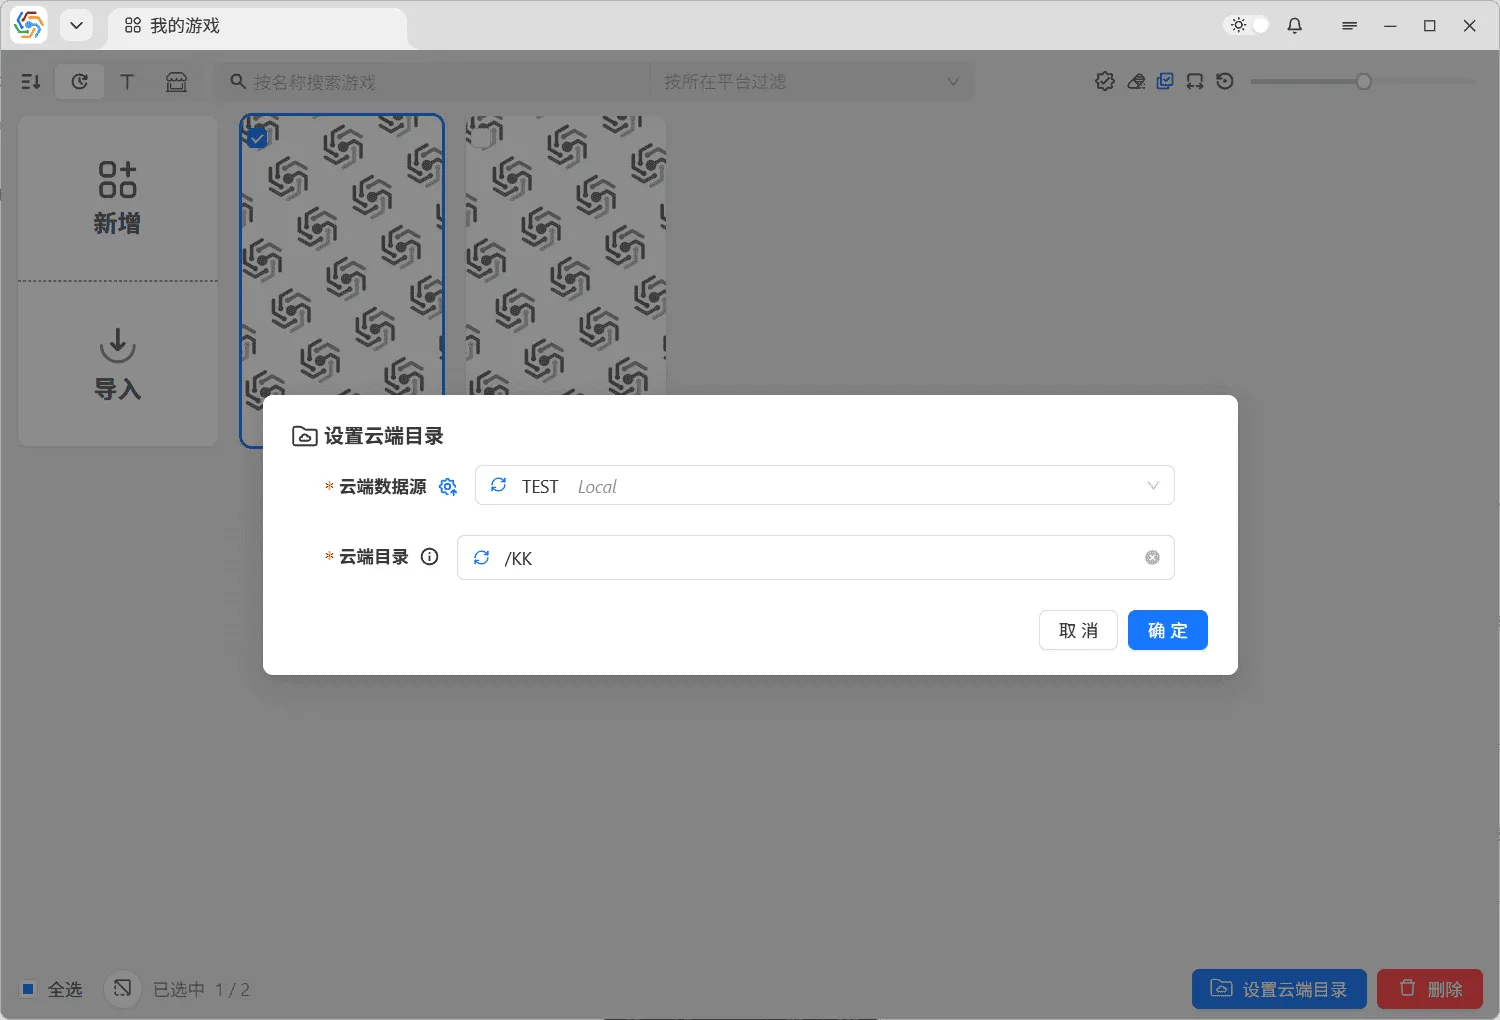
Batch Set Cloud Directory
Section titled “Batch Set Cloud Directory”In multi-select mode, you can batch-set cloud directories for multiple games. After selecting the cloud data source and cloud directory, the actual cloud directory set for each game will be a subdirectory named after the game within the selected cloud directory:
Edit Game
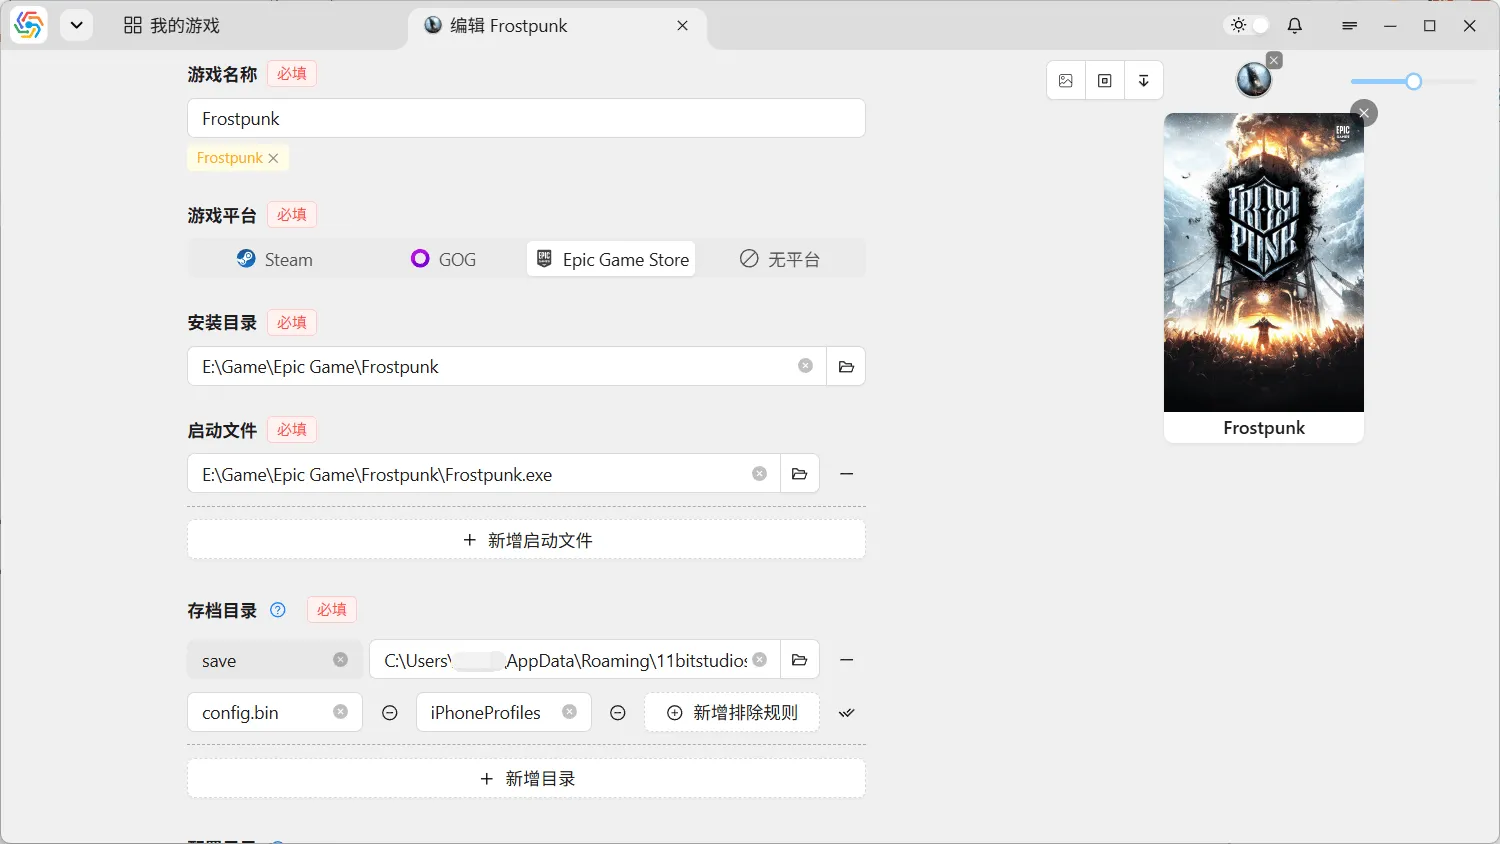
Section titled “Edit Game”Clicking the edit button below a game card will take you to the edit game interface, where you can readjust the game’s basic information. This interface is functionally and visually identical to the add new game interface:
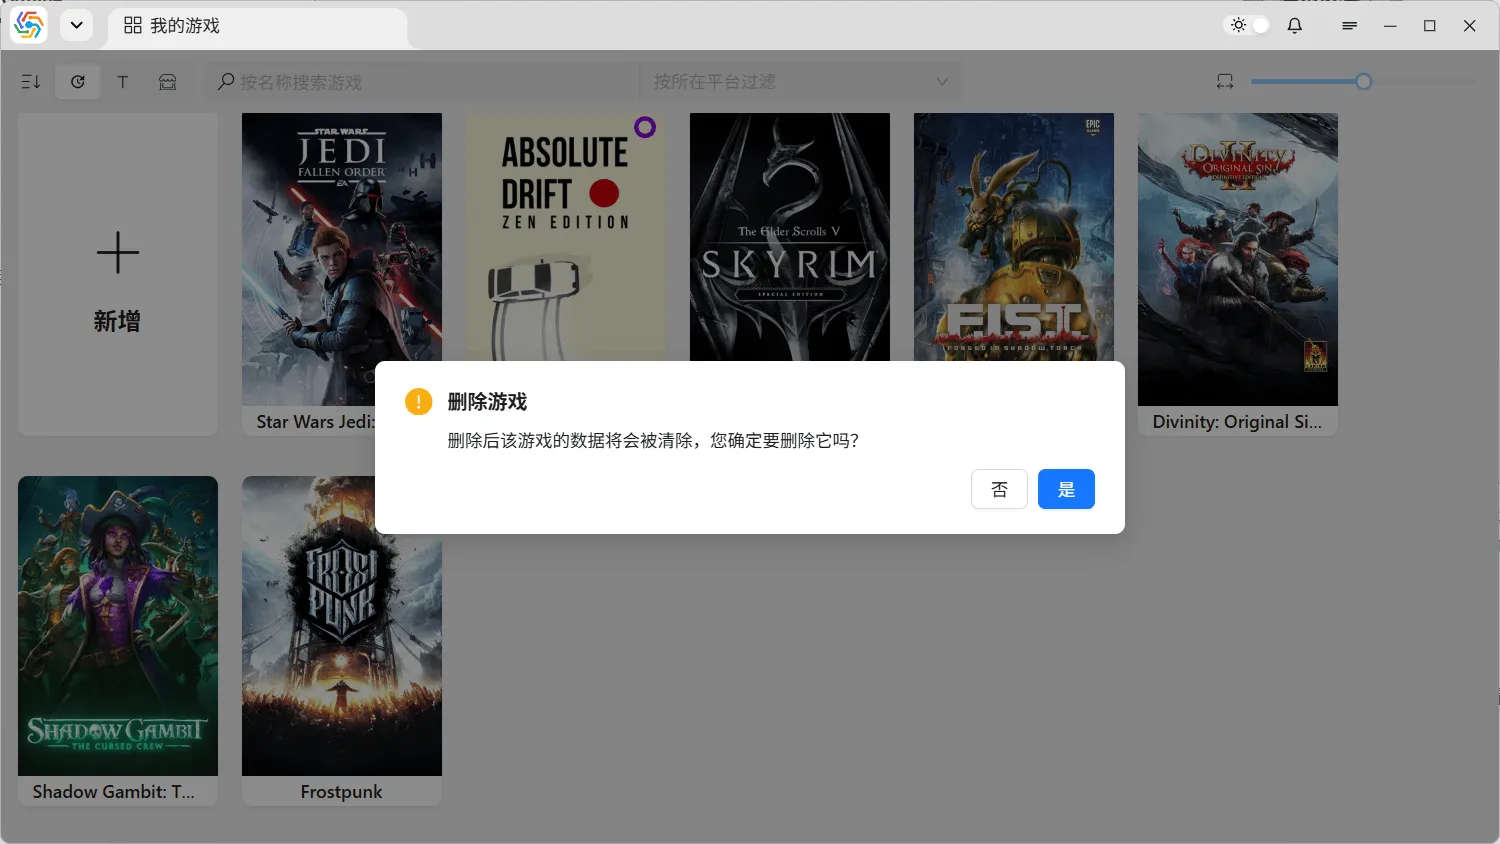
Delete Game
Section titled “Delete Game”Clicking the delete button below a game card will delete the game. After the game is deleted, all its saved archives will also be deleted. Local data cannot be recovered, so please be cautious before deleting:
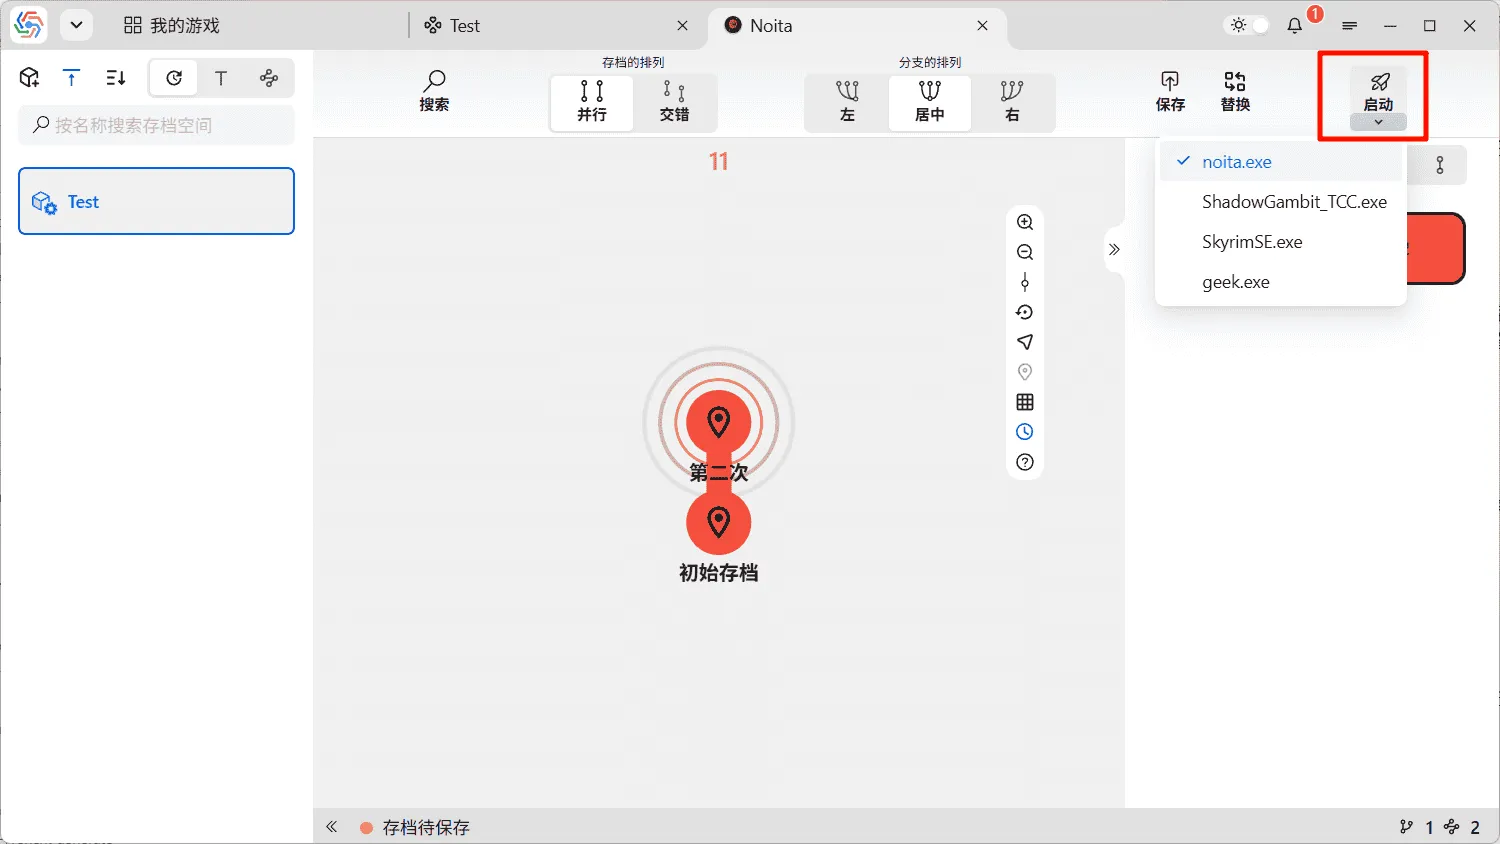
Launch Game
Section titled “Launch Game”The software supports launching games directly from the software interface. Click on a game card to enter the save management page. On the rightmost side of the operation bar at the top of the interface, there is a launch game button. First, select the game’s launch method from the dropdown menu below, then click launch game to start the game using that method:
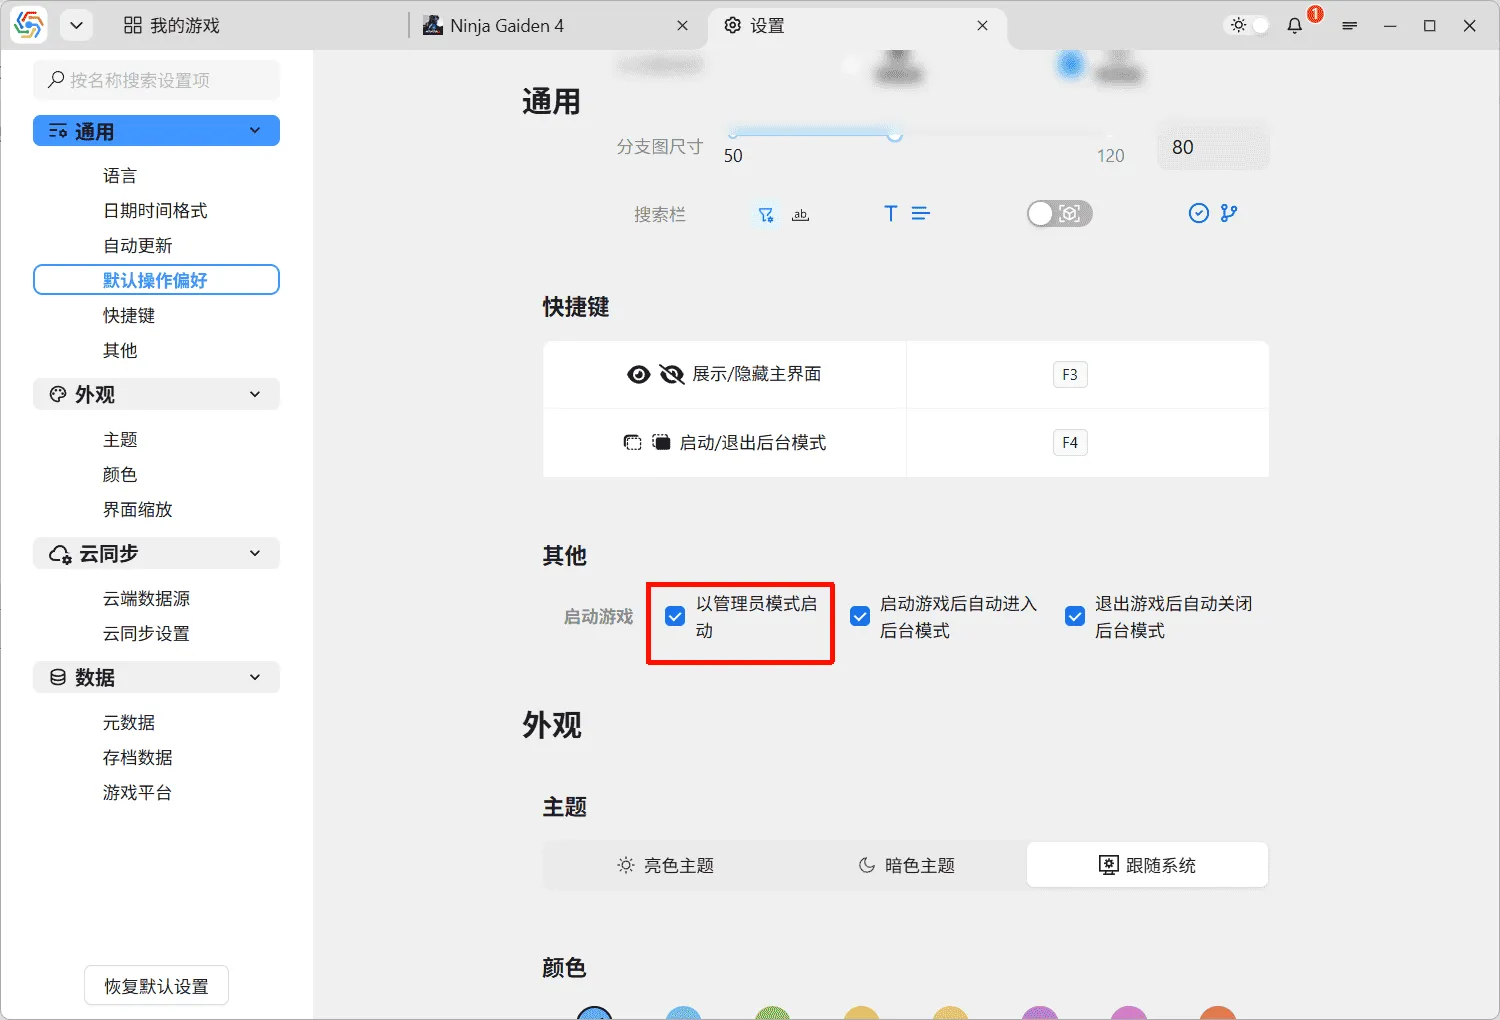
If a game’s launch file is selected, the software executes it in administrator mode by default. This behavior can be adjusted in the settings page under General ----> Other ----> Launch Game option: