Saved Game Management
Save Space
Section titled “Save Space”Create Space
Section titled “Create Space”Click on a game’s game card to enter its save management interface. The first step in save management is to create a save space. The concept of a save space can be compared to the save slot mechanism in games, but it is much more powerful than common save slot mechanisms. Each save space provided by the software can manage multiple branches of saves, which do not affect each other. The left sidebar of the interface is where save spaces are located. Use the “New” button at the top to create a new save space:
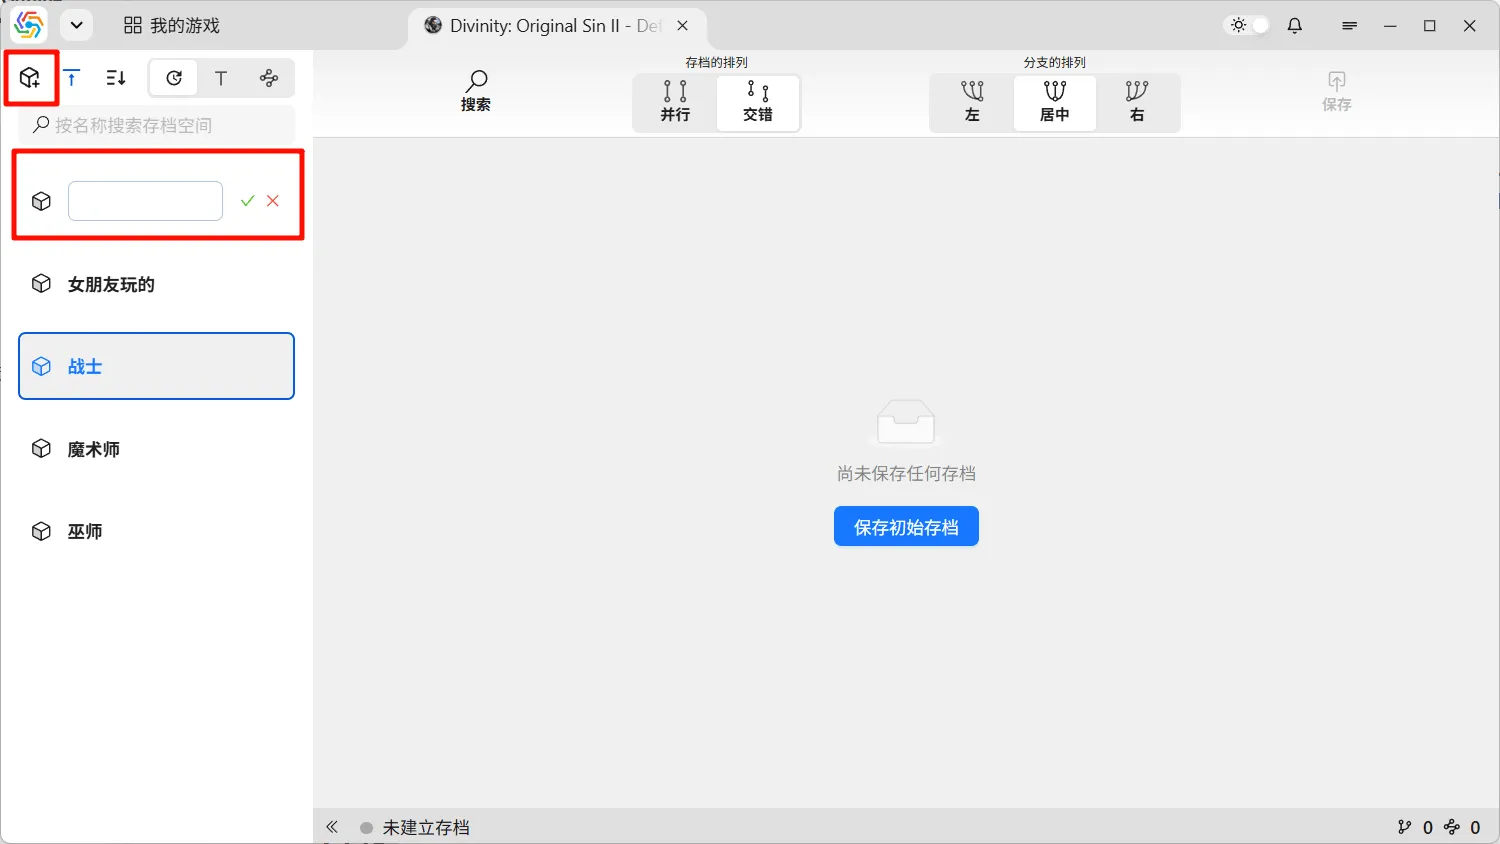
Following the “New” button are the pin-to-top switch (to pin the currently used save space) and various sorting options. Each save space item can have its name edited by hovering the mouse over it, and it also displays the last updated time of that space, which is the save time of the last save within it.
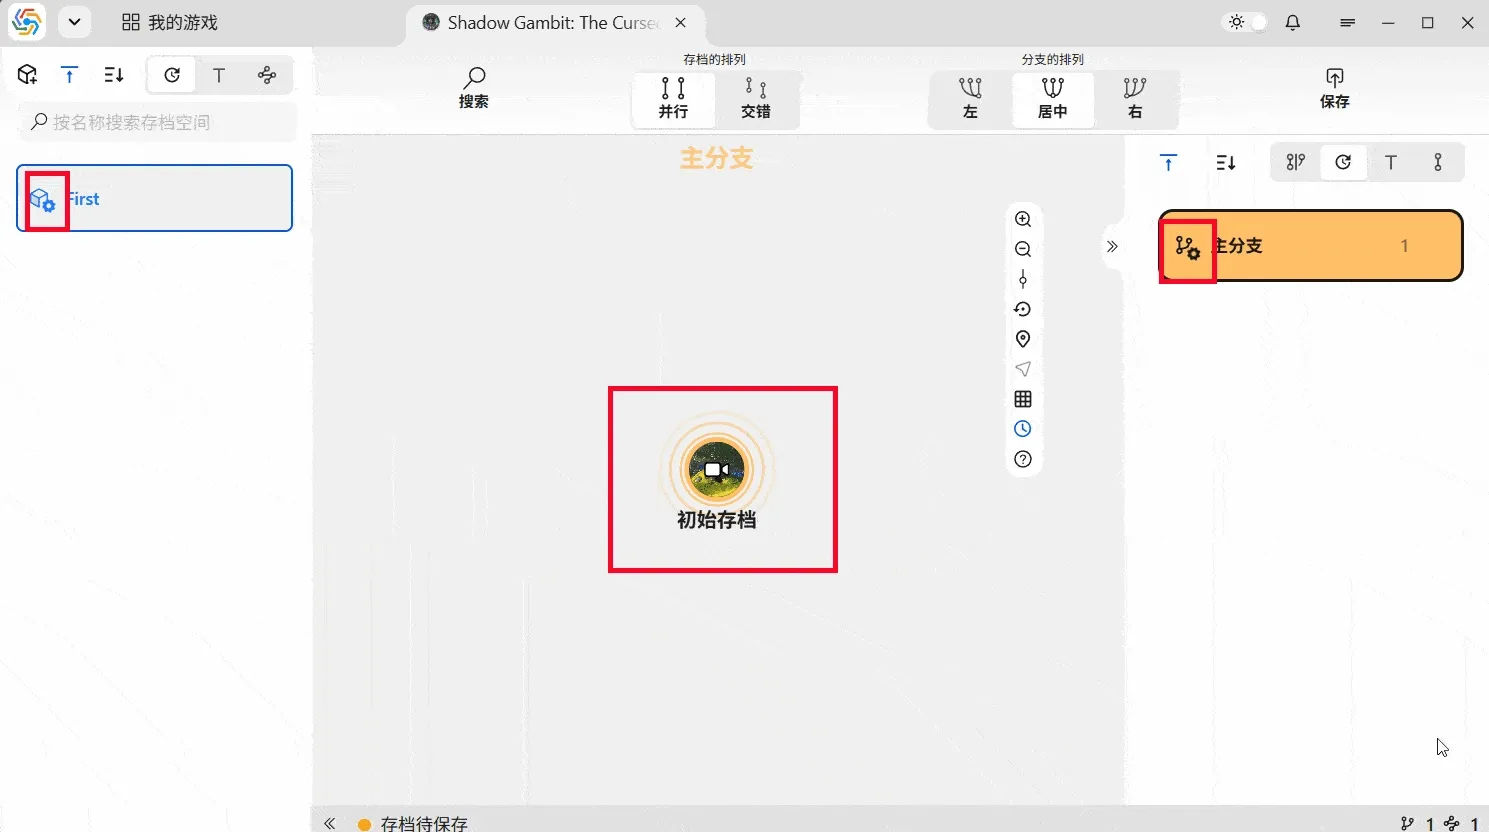
Create Initial Save
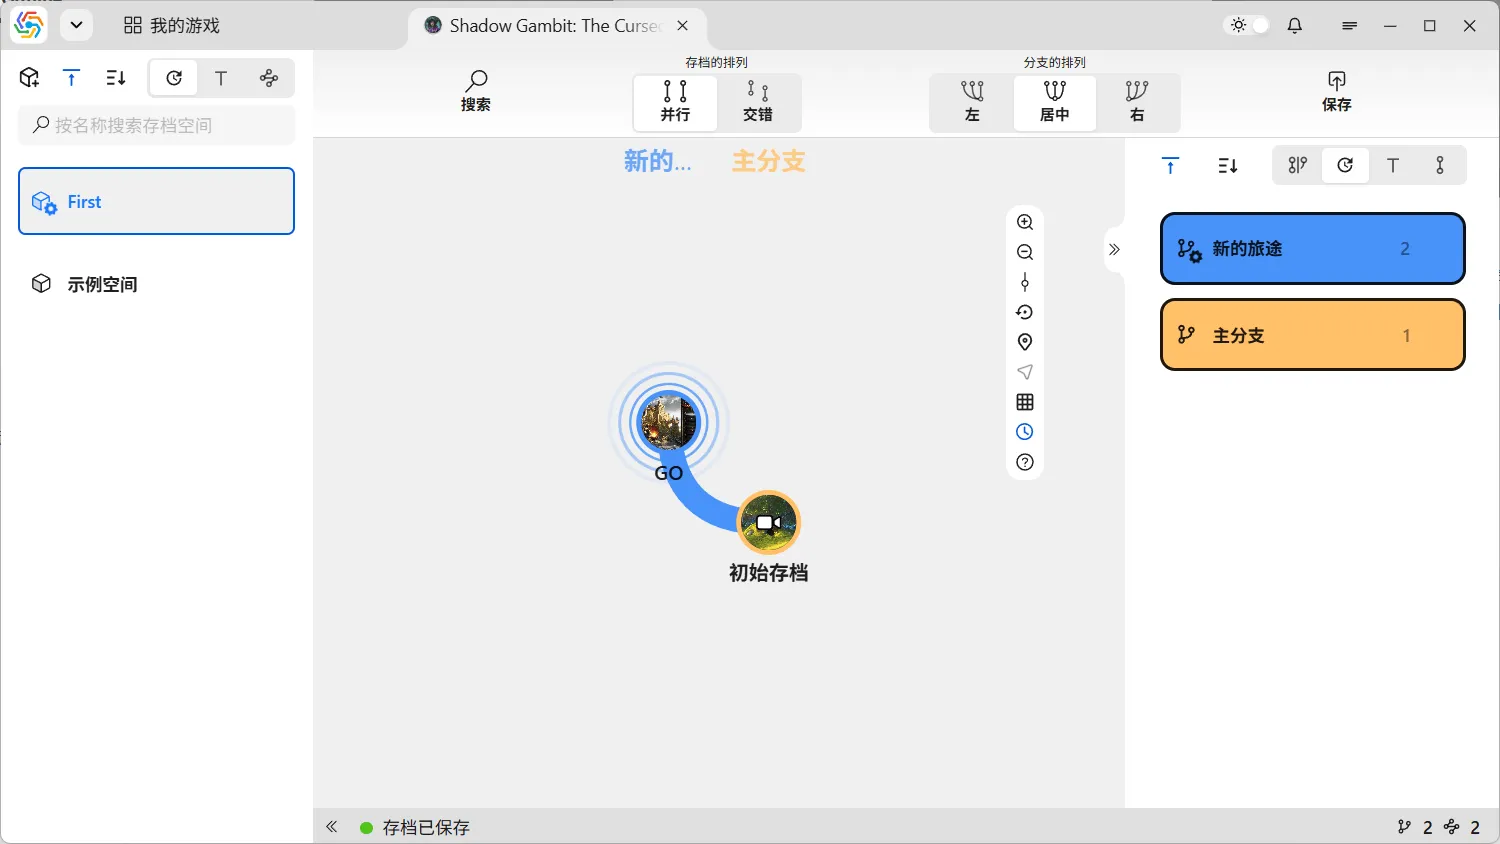
Section titled “Create Initial Save”Every new save space must first create an initial save. An initial save is an empty save that does not contain any save data. It represents the state of the game before it has been officially started. Due to the software’s multi-branch save management mechanism, all saves under a save space eventually converge on a “branch tree.” The initial save is the root node at the bottom of this tree, serving as the source for all subsequent saves.
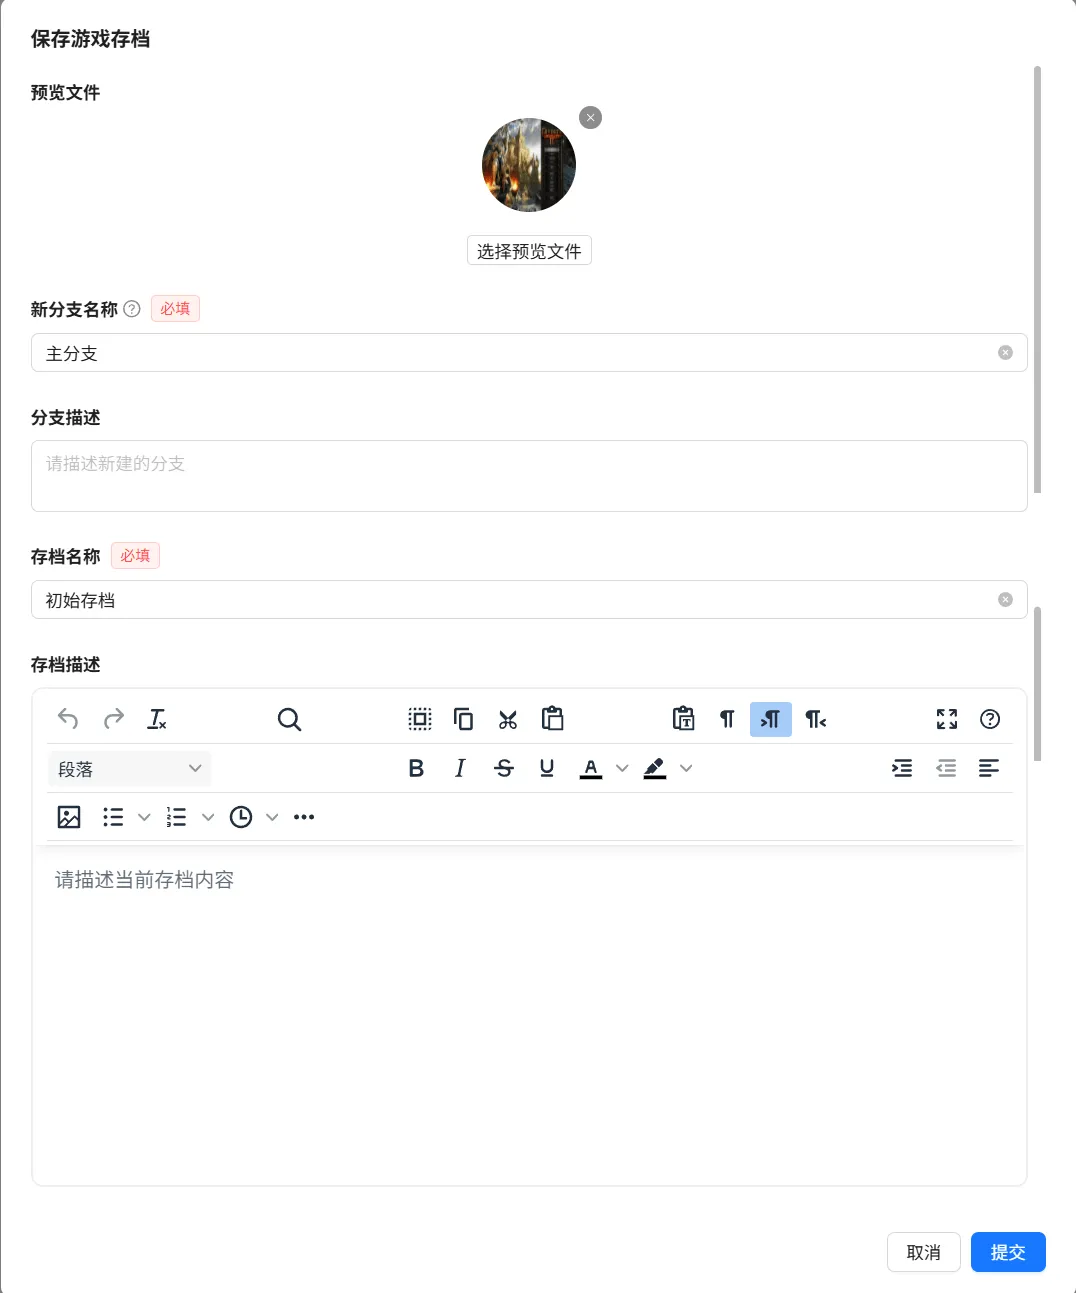
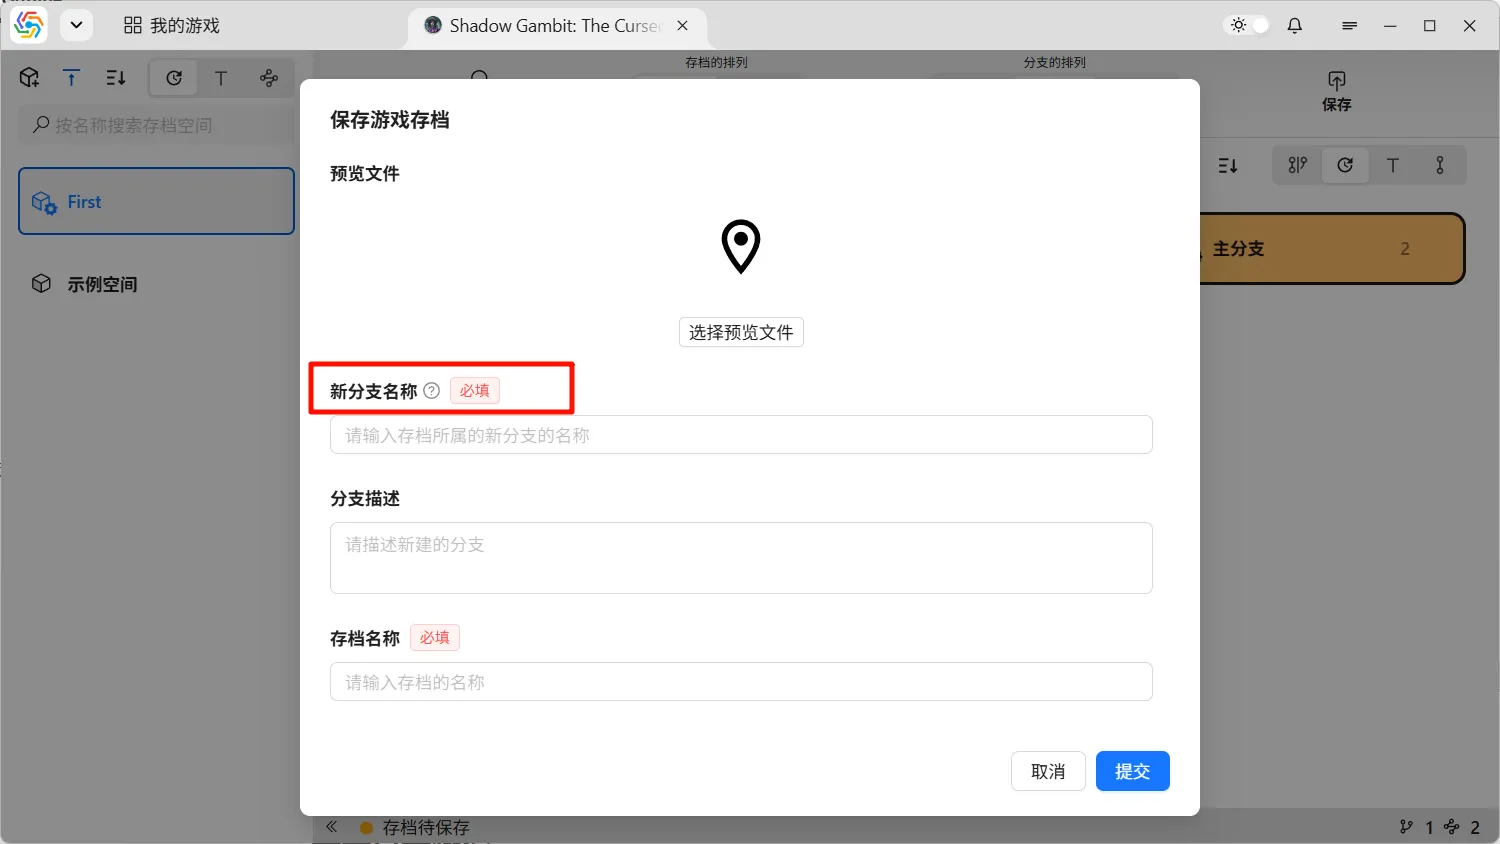
The interface for saving an initial save is the same as the interface for saving all regular saves. It divides save information into five parts:
- Preview File: The preview file can be an image, a GIF, or a short video. The software’s intention is for this file to allow you to quickly ascertain the game’s progress at the time of saving. Therefore, it is recommended to use a screenshot or screen recording of the gameplay as the preview file.
- New Branch Name: If your save requires a new save branch, enter a new branch name. New branch names cannot be the same as existing branches.
- Branch Description: Text used to describe the new branch.
- Save Name: The name of the current save. Names can be repeated with existing saves.
- Save Description: A detailed description of the game content for the current save. Rich text is supported, allowing for the addition of images, links, etc.
Currently Used Save
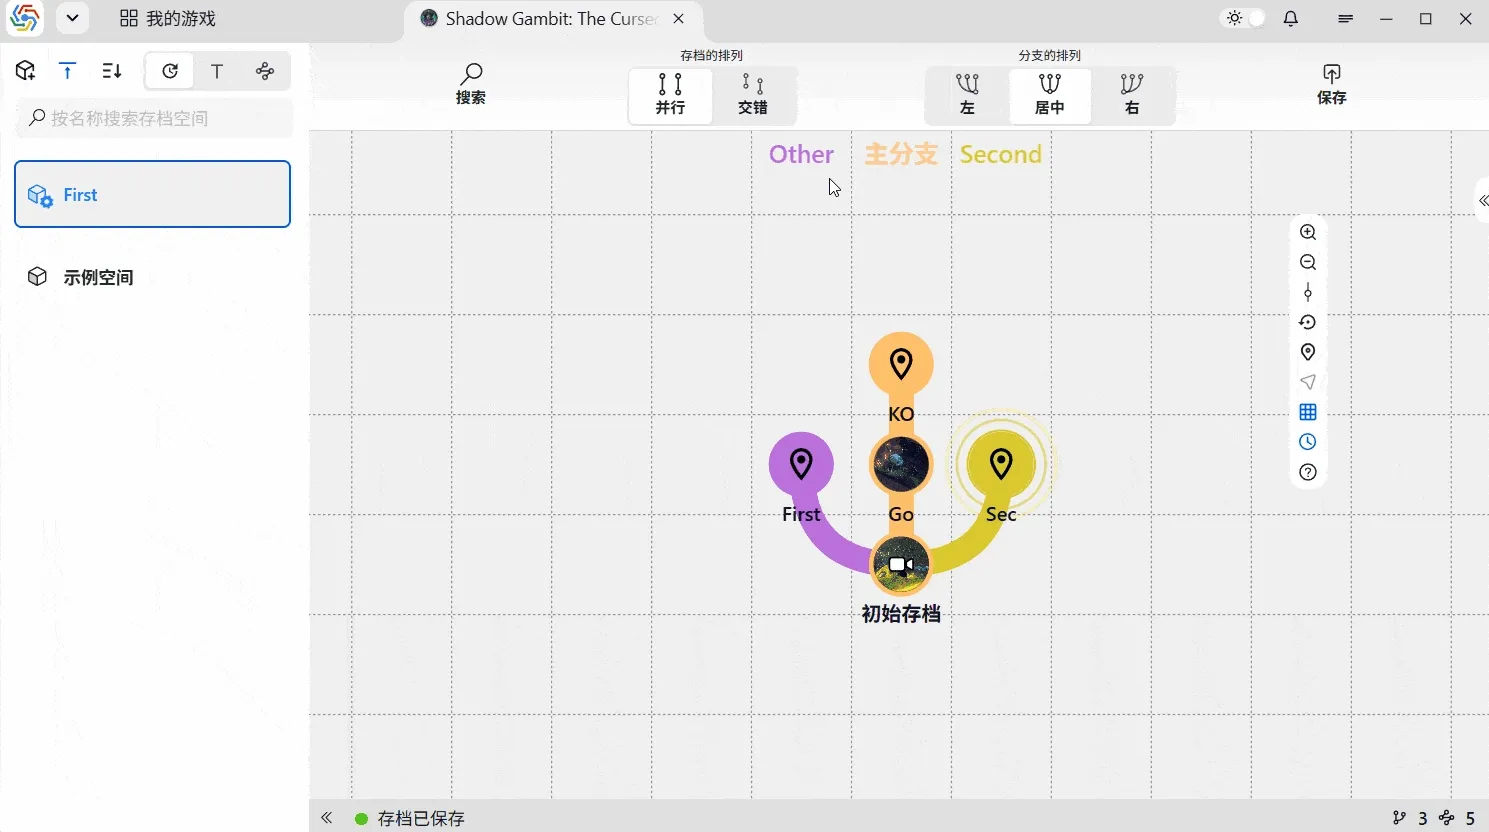
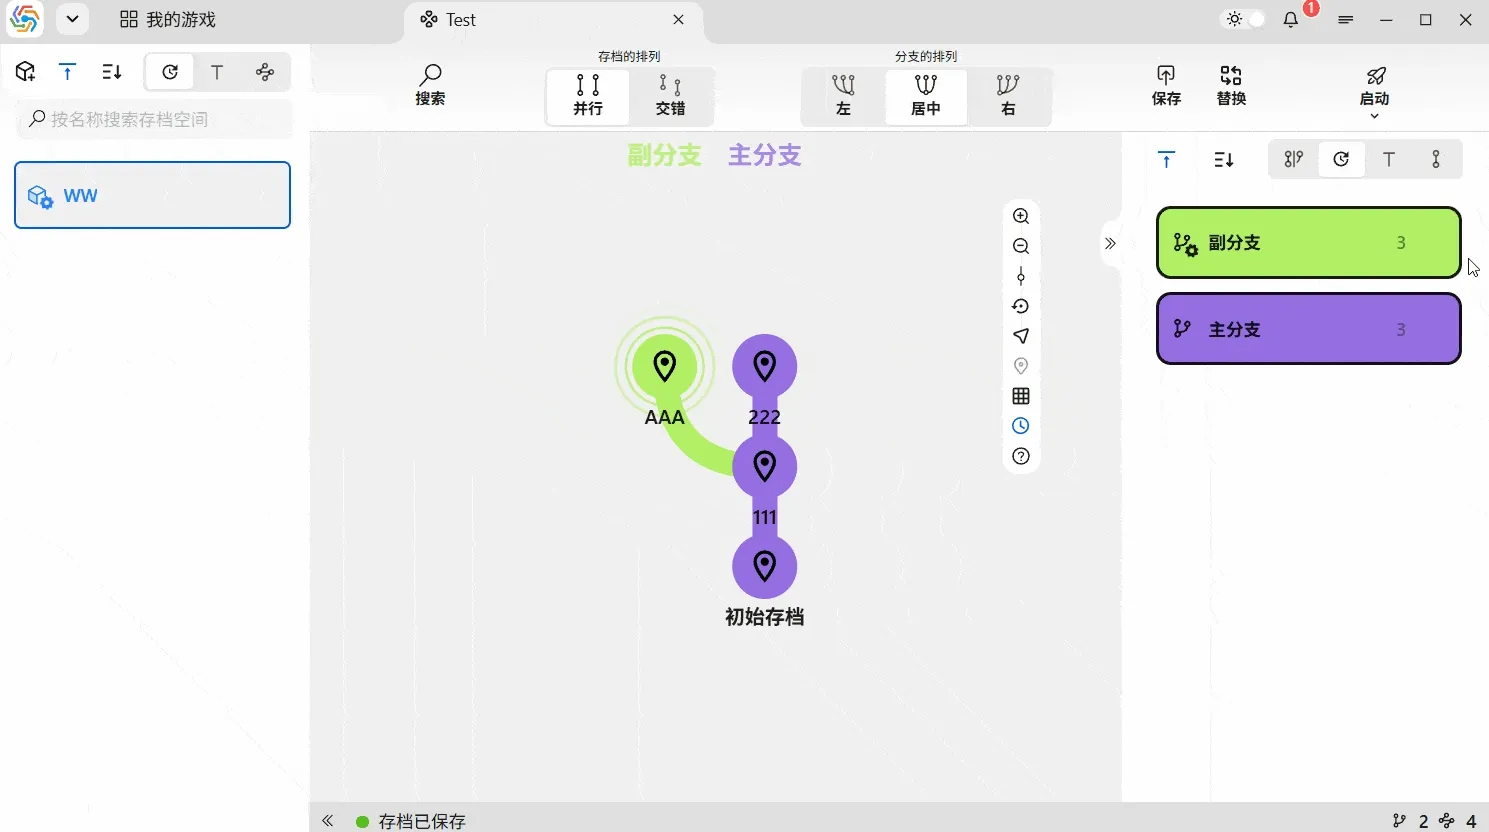
Section titled “Currently Used Save”The “currently used save” refers to the save that is actually being used among all saves for that game. If a save is the currently used save, then the actual save file currently in use for this game is either the file saved by this save, or it has evolved from the file saved by this save after further gameplay. If you have some experience with Git or SVN, you should find this easy to understand. The “currently used save” is analogous to the currently checked-out version in a version control system (the version pointed to by the HEAD reference in Git). It is the save data from your last save. After subsequent gameplay, the game’s real-time save data may have evolved into a new version. Since this new version has not yet been committed and saved in the software, the “currently used save” remains the last saved one. Once the new version is saved in the software, the new save version will become the currently used save, and the current save will become the parent save of the new save. This evolutionary relationship is clearly visible in the branch graph.
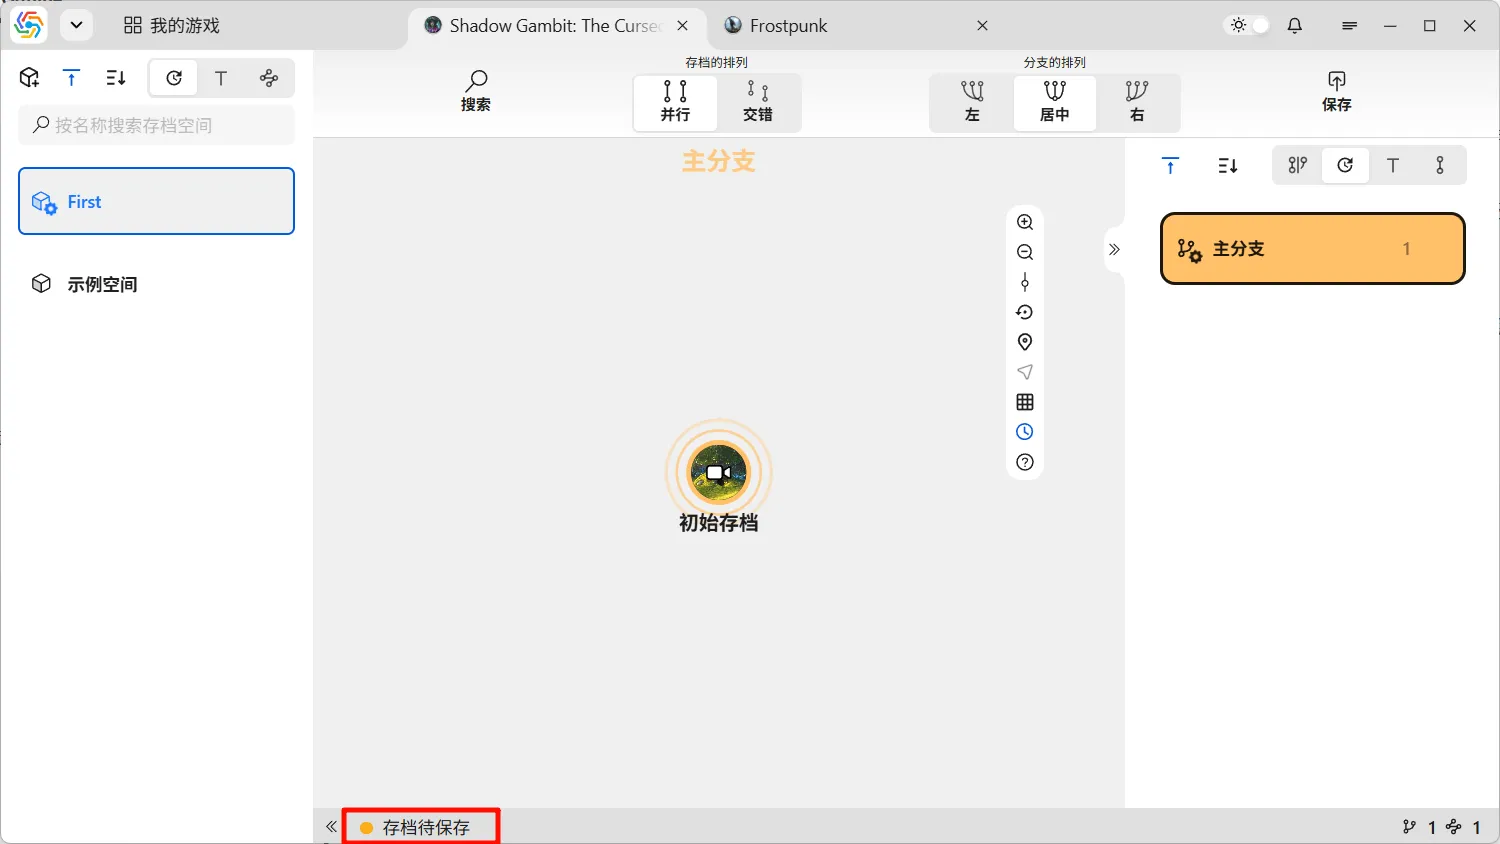
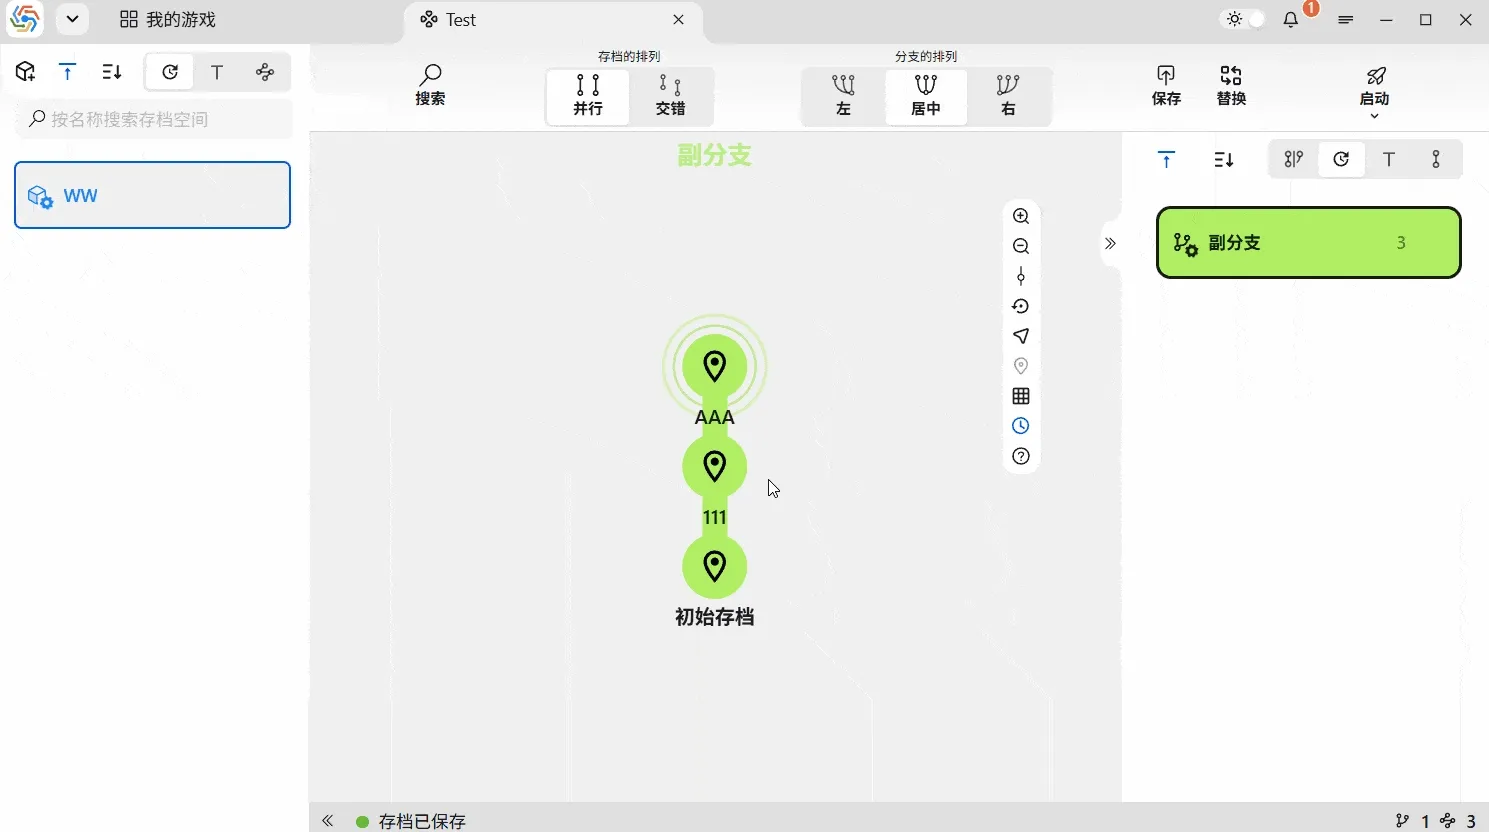
Since a game can only use one save at a time, the “currently used save” is unique for a single game. The branch it belongs to is the “currently used branch,” and the space it belongs to is the “currently used space.” Visually, the software indicates the currently used space and branch by adding a spinning gear icon to the bottom right of their icons. The currently used save will have a distinct ripple effect added to it on the branch graph:
Save Status
Section titled “Save Status”The status bar is located at the bottom of the save space interface. The left side of the status bar displays the current save status of the game. The software currently defines four save statuses:
- Save Pending: There is a difference between the game’s real-time save file and the file saved by the currently used save. This means your game progress has advanced, but the new save content is pending.
- Save Complete: There is no difference between the game’s real-time save file and the file saved by the currently used save. All your save data has been saved in the software, and there is no new save content pending.
- Currently Used Save Not Found: This status occurs in two situations.
- The game has not yet created its first initial save, so there is no currently used save, and the software has not saved any save information.
- You have just updated cloud save data to your local machine, and the cloud data does not contain the previously used save. In this case, you can freely choose any save and use it.
- Directory Path Missing: This situation occurs after the game’s save directory, configuration directory, or other directories have been modified. The new settings are incompatible with old saves, making it impossible for the software to determine if there is new save content pending (See details at /docs/problems/pathmapping/).
Save Management
Section titled “Save Management”Save New Archive
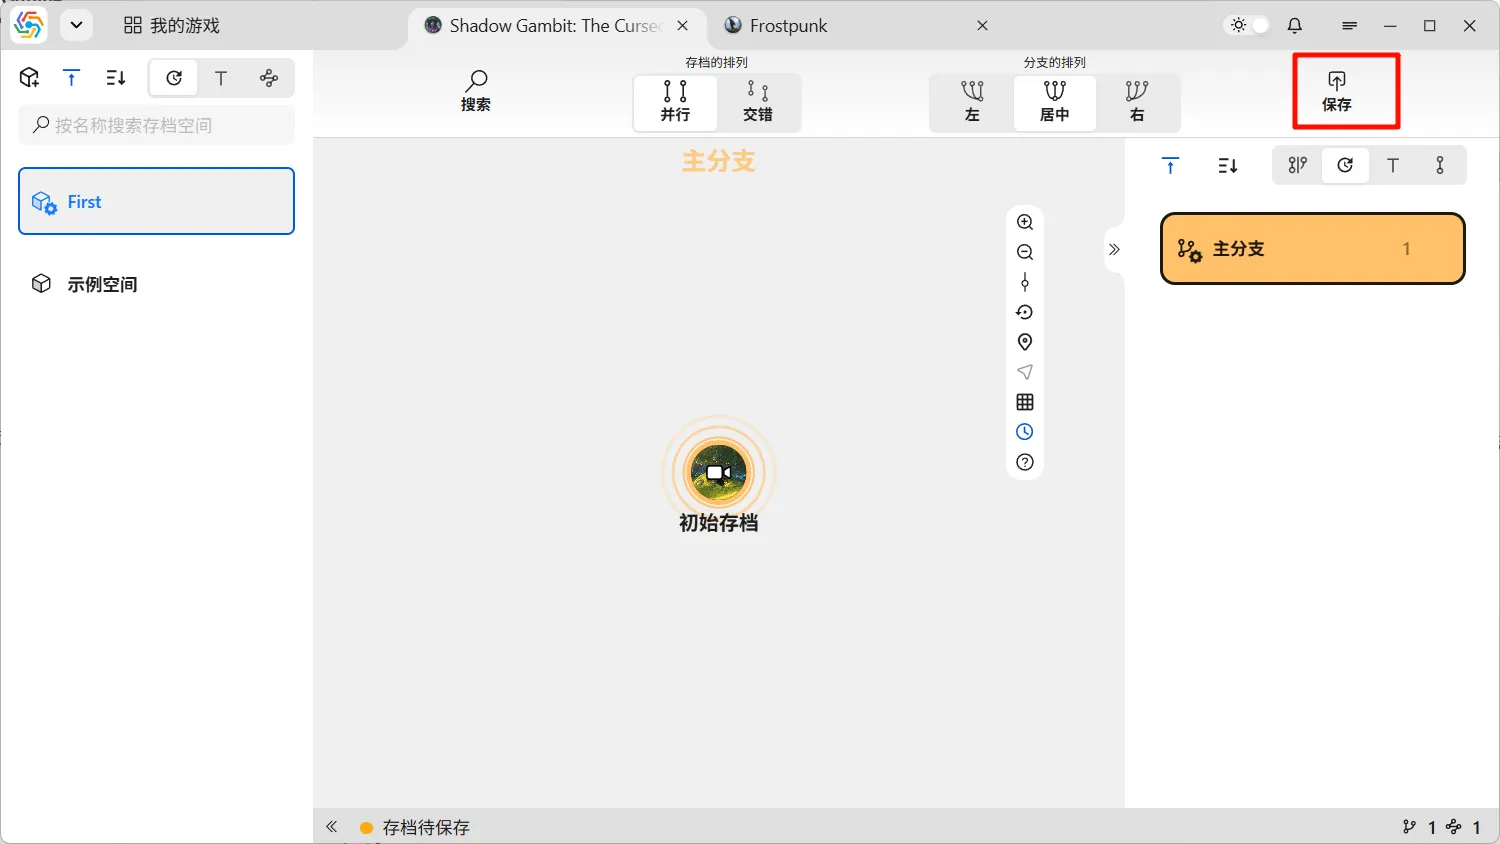
Section titled “Save New Archive”When the save status is “Save Pending,” it means you can consider saving the latest save content to the software. First, you need to return to the currently used space and click the save button in the upper right corner to initiate the process of saving a new archive:
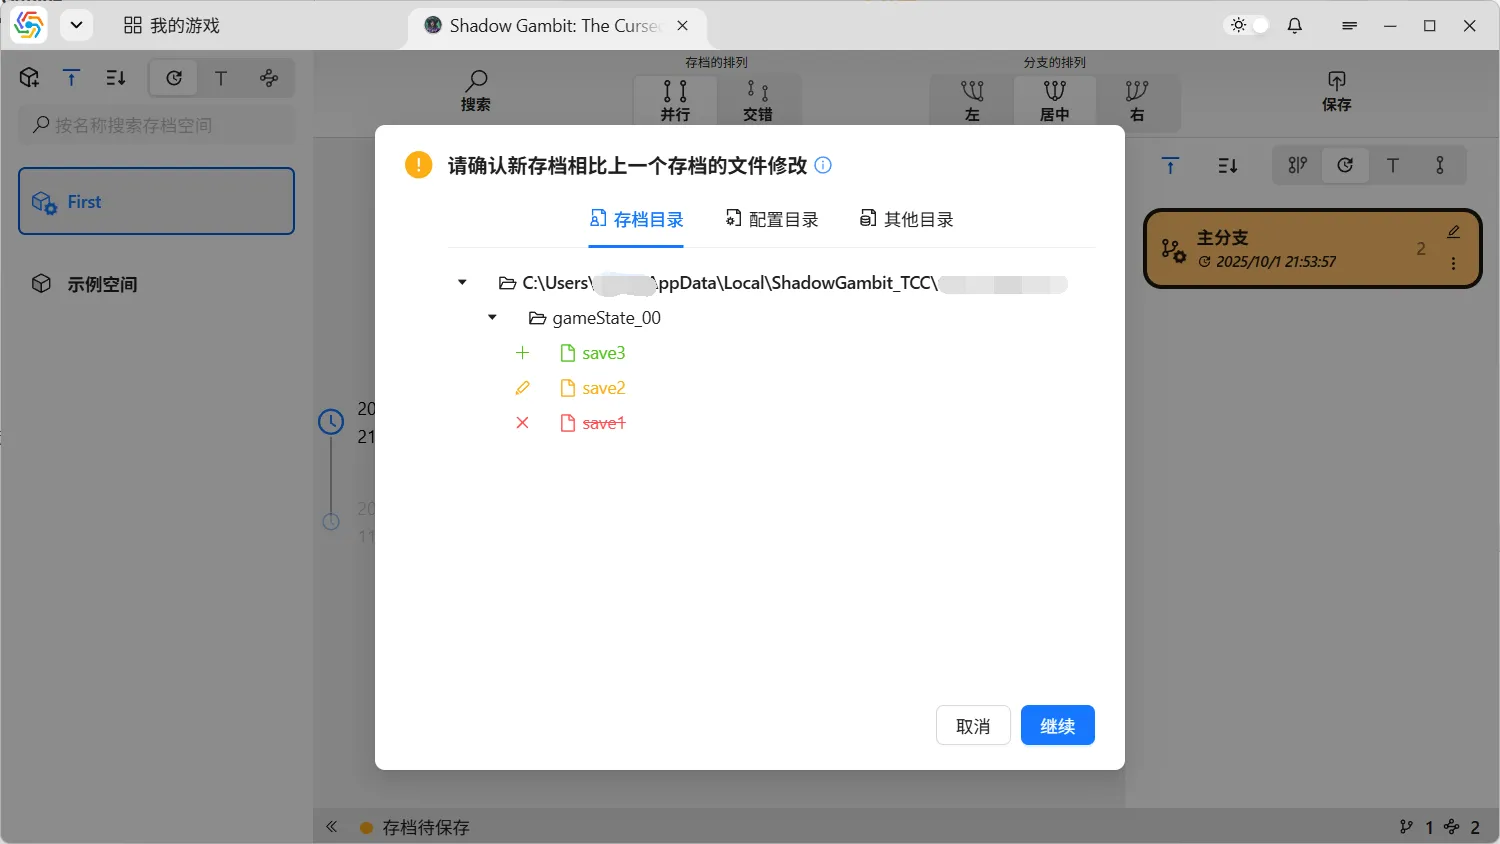
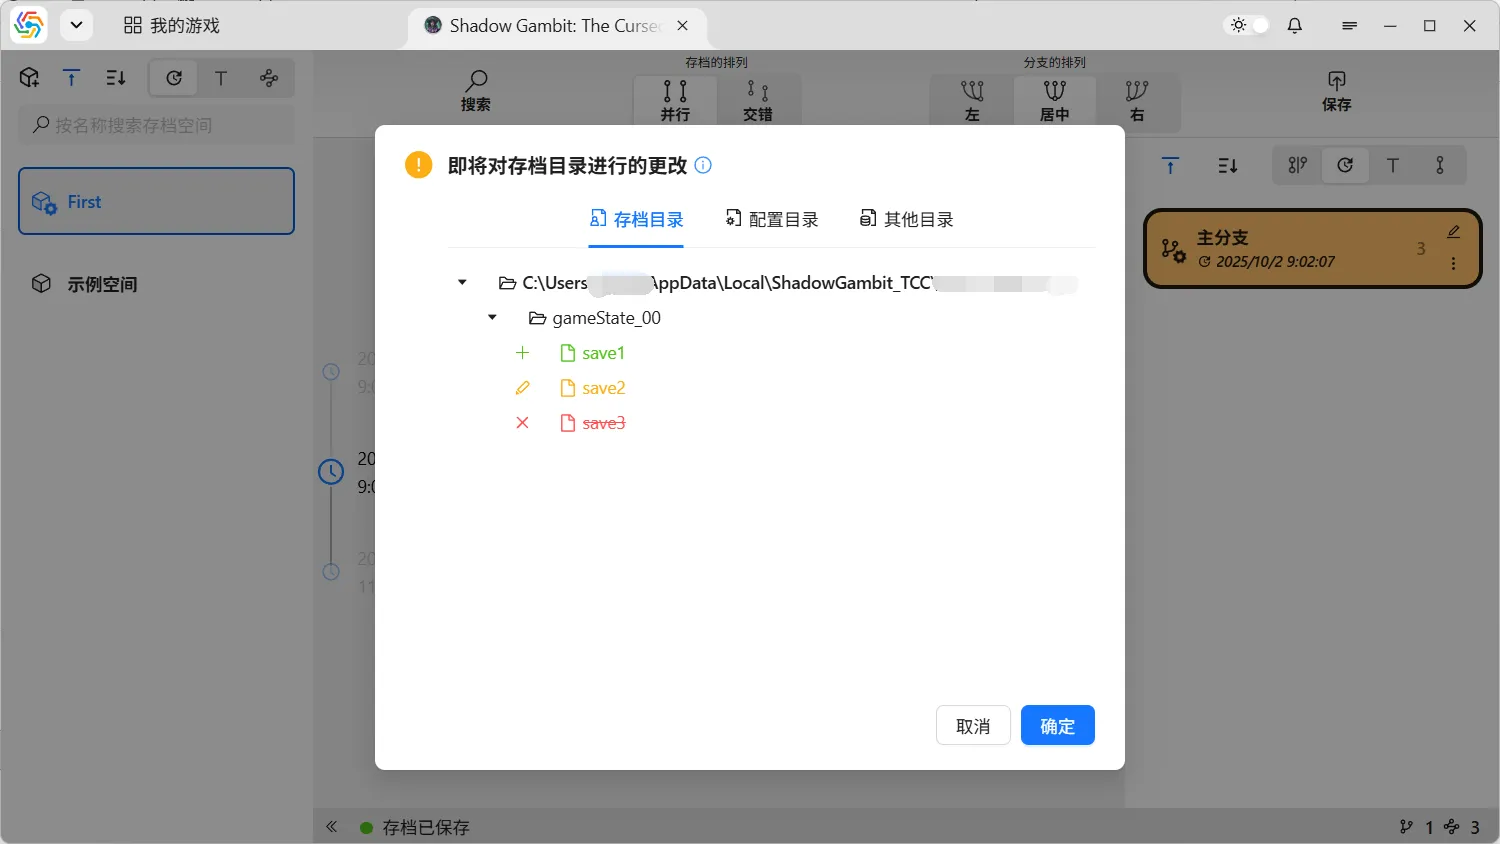
The first step of the process is to confirm the file changes for the new save. The interface displays all save files for the new save and their differences compared to the currently used save. Green represents new files or directories, yellow represents modified files or directories, and red represents deleted files or directories. These file difference comparisons do not indicate that the save operation will cause these changes; they are merely to let you confirm whether the file changes between the old and new saves are as expected:
The second step of the process is the same as the interface for creating an initial save. After entering the desired information in the form, click “Submit” to save the new archive. The new archive will replace the previous one as the currently used save, and the previous archive will become its parent save. The saved new archive will form a brand new node in the branch graph, with the preview image in the center and the save title below. If you created a new branch, the new save node will be located on the new branch; otherwise, it will continue to use the original branch:
When saving a new archive, you can freely choose whether to create a new branch. However, if the currently used save is not the latest save in its branch, saving a new archive based on it requires creating a new branch because the original branch is already occupied by another save:
Save New Archive and Replace Old Archive
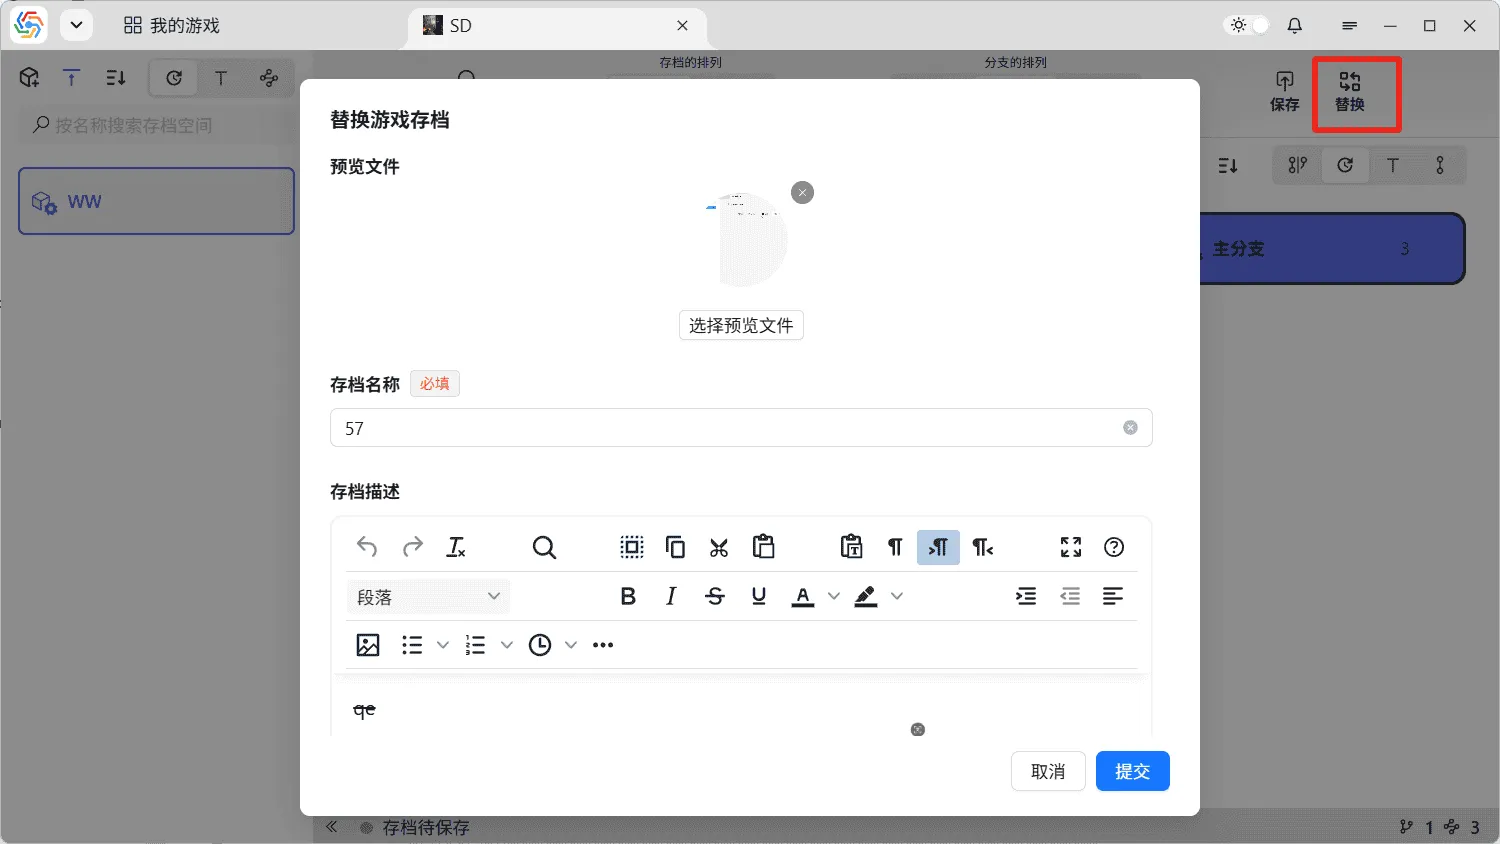
Section titled “Save New Archive and Replace Old Archive”The “Replace” button next to the save button can be used to replace an archive. Replacing an archive is equivalent to saving a new archive and then deleting the previously used archive, effectively replacing the current save with the latest one. When replacing an archive, you cannot create a new branch; the new archive must belong to the currently used branch. The interface automatically loads the archive information from the previous save for user modification:
Use Archive
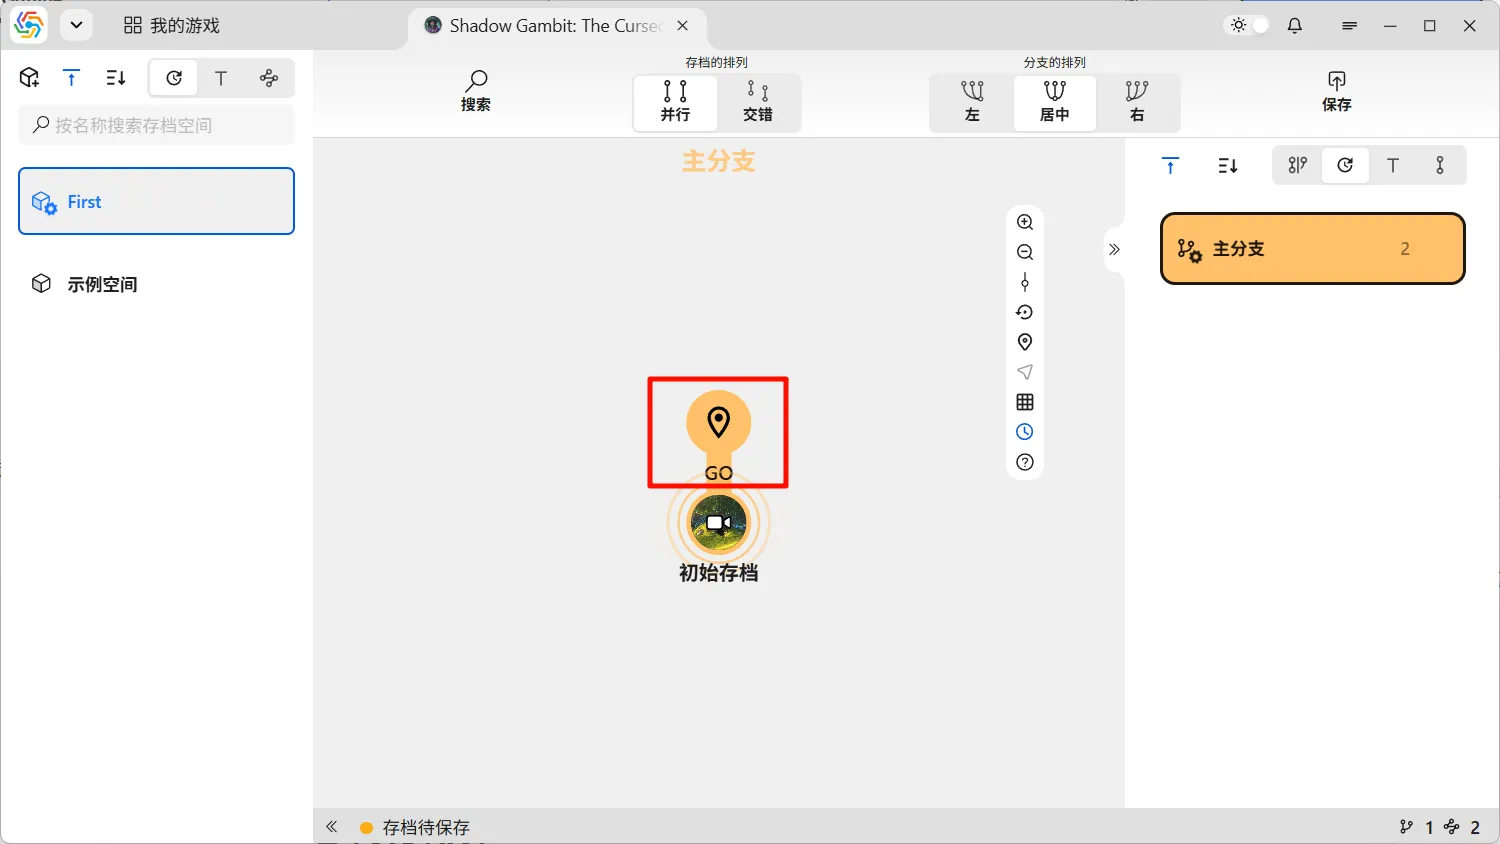
Section titled “Use Archive”Select an archive node in the branch graph to see the circular menu surrounding it. The buttons on the menu are the operations available for that archive. The most common operation, located on the far left, is “Use Archive,” which is what we commonly refer to as rolling back.
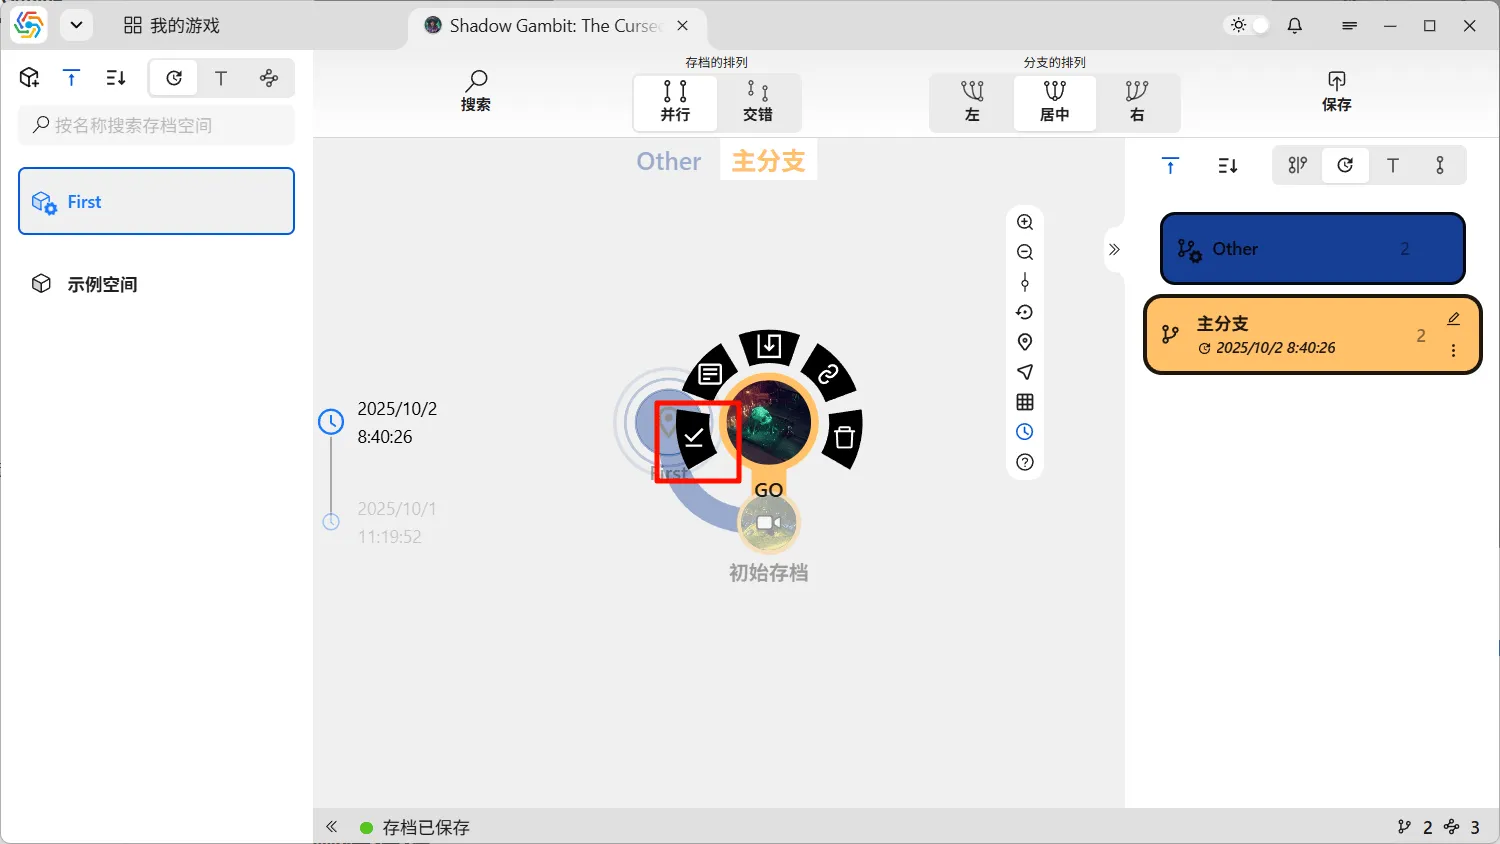
Using an archive means overwriting the game’s actual save files with the files saved by that archive. The game’s progress will revert to the state it was in when that archive was saved. Because file overwriting is involved, before using an archive, please ensure you have no pending saves. Then, in the pop-up interface, confirm whether the impending file changes are as expected:
The interface above is similar to the file difference display interface when saving a new archive. However, the file changes displayed here are about to be applied to your actual save directory. Therefore, you must confirm them carefully to avoid trouble caused by file loss.
After rolling back, the currently used save will become the rolled-back archive, and the currently used branch and space will also change accordingly:

Use Archive (No File Changes)
Section titled “Use Archive (No File Changes)”In some situations (e.g., after downloading the latest save data from the cloud), you may need to change the position of the currently used archive node without altering any existing save files. In such cases, you can use this function:
Since this function does not change any files, it will not prompt for a file difference comparison interface, and there is no rollback effect after the operation.
View and Edit Archive Information
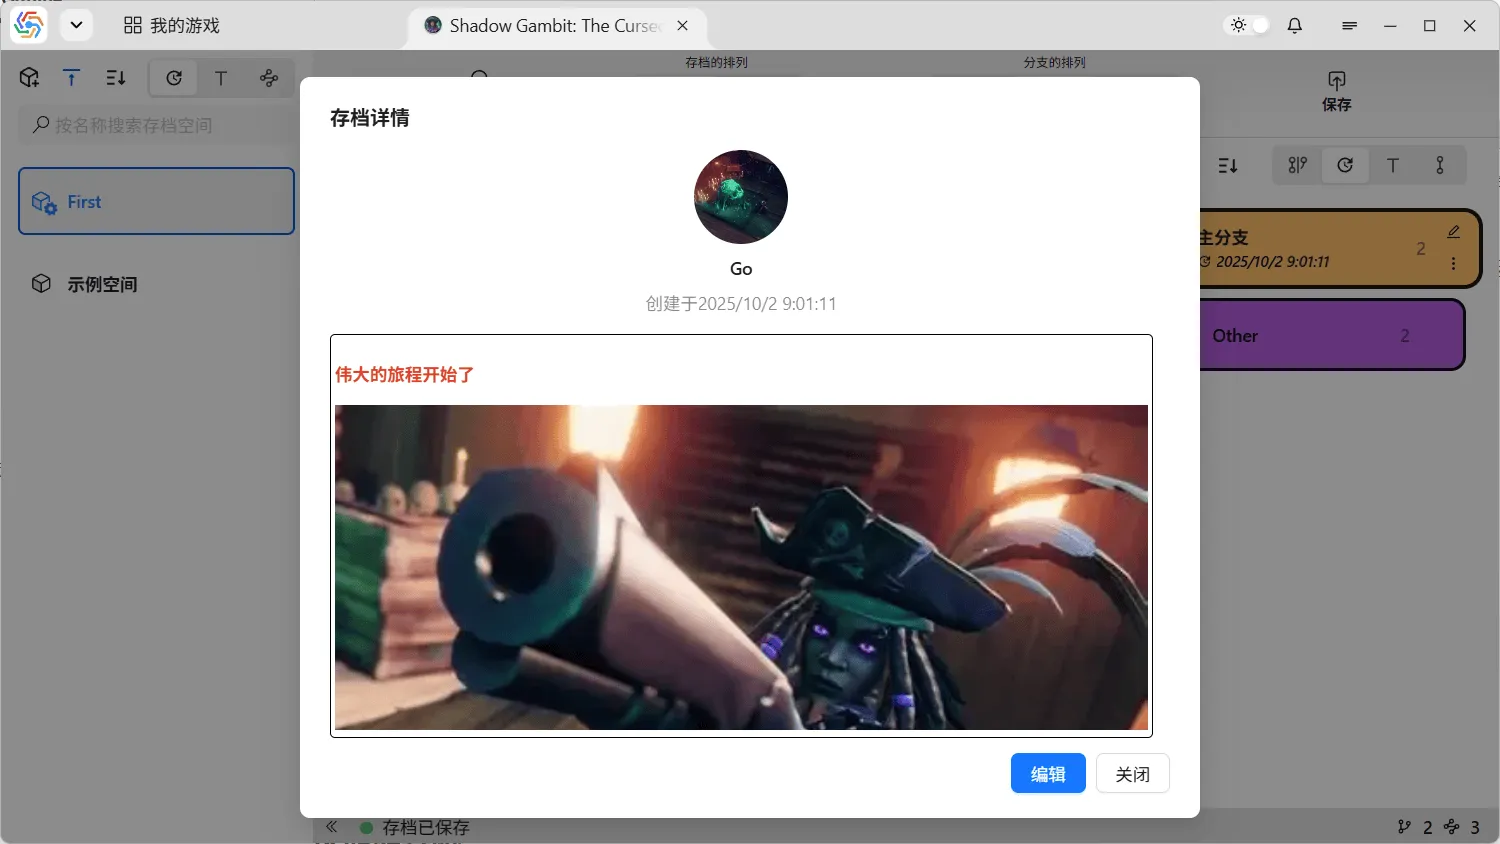
Section titled “View and Edit Archive Information”The second button in the circular menu is for viewing and editing the current archive’s information. You can re-modify the game’s preview file, archive name, and archive description:

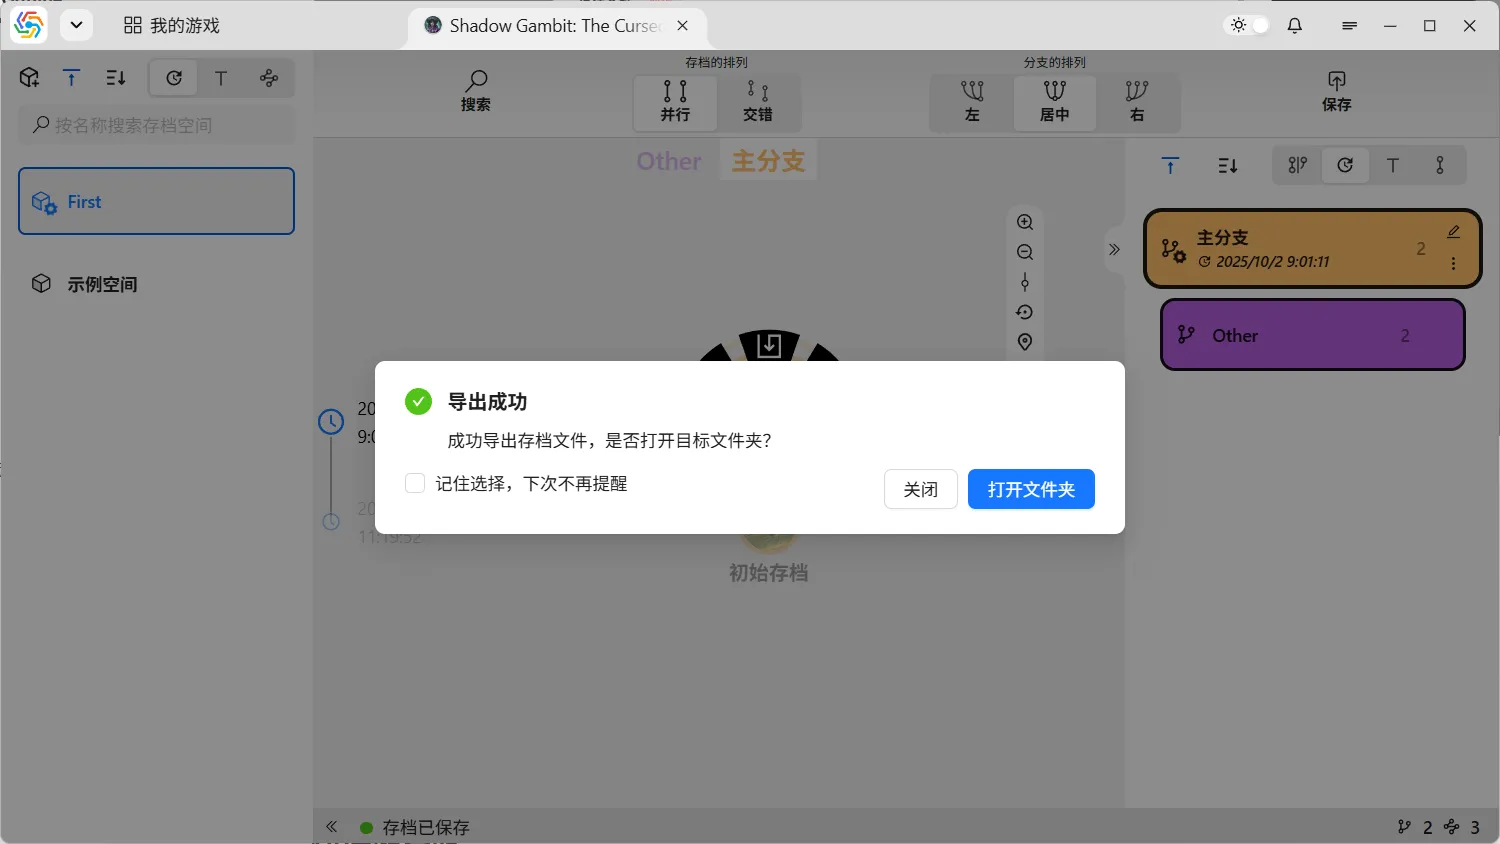
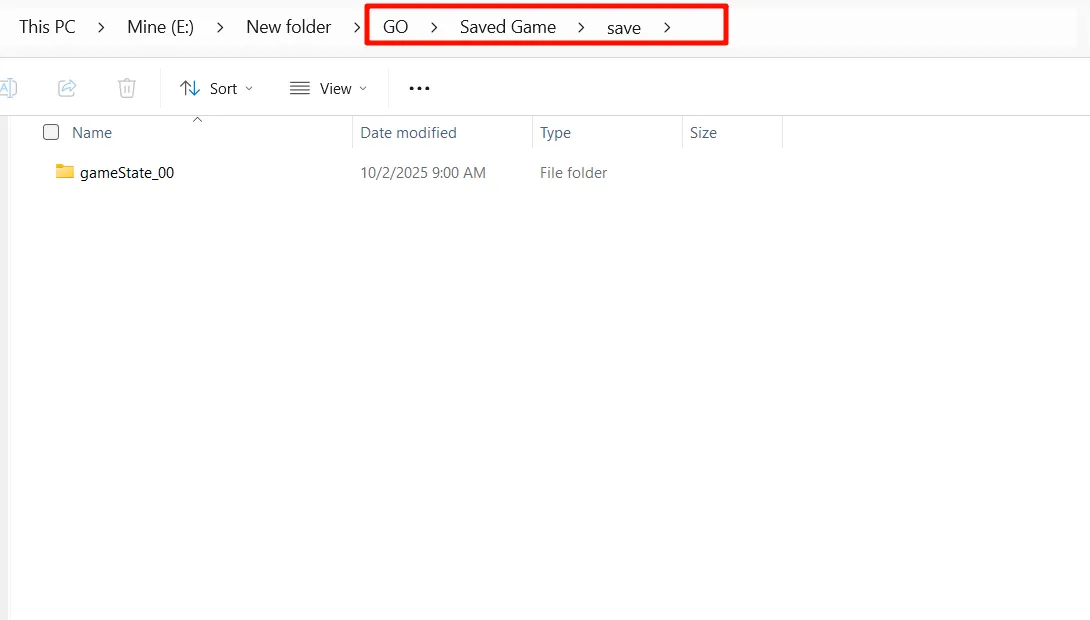
Export Archive Files
Section titled “Export Archive Files”The third button in the circular menu allows you to export all archive files under the current archive to any local path. The exported directory will have the archive name as its root directory name. The second-level directory will be named “Saved Game,” “Configuration,” or “Other,” corresponding to the save directory, configuration directory, and other directories, respectively. The third-level directory will be named after the directory configured by the game during saving. Below that are the saved archive files:
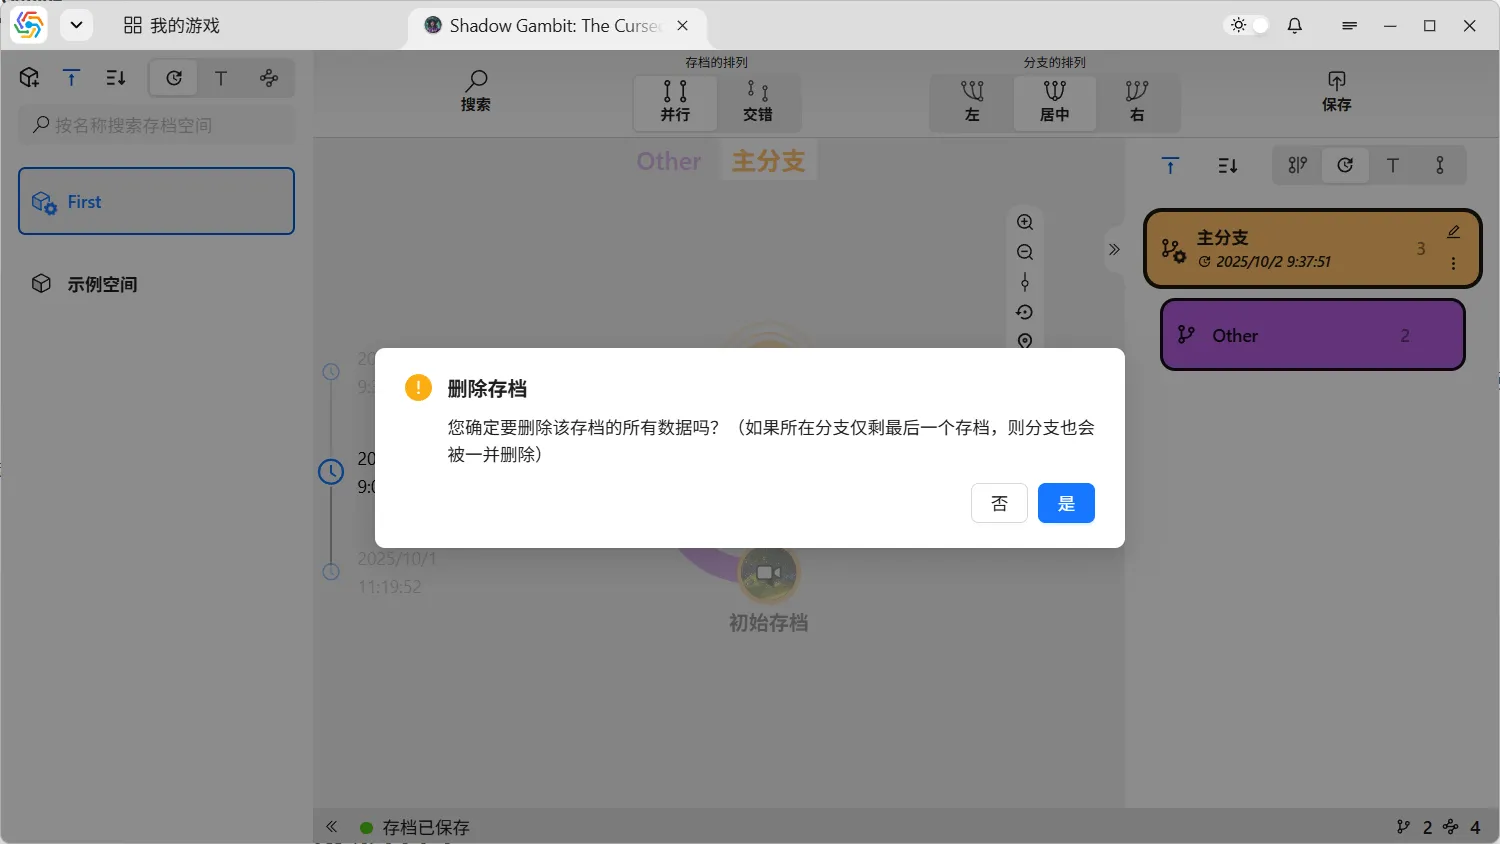
Delete Archive
Section titled “Delete Archive”The last button in the circular menu is used to delete an archive. Once an archive is deleted, its corresponding save files, preview files, description information, etc., will also be deleted. If this archive is the last one in its branch, the branch itself will also be deleted:
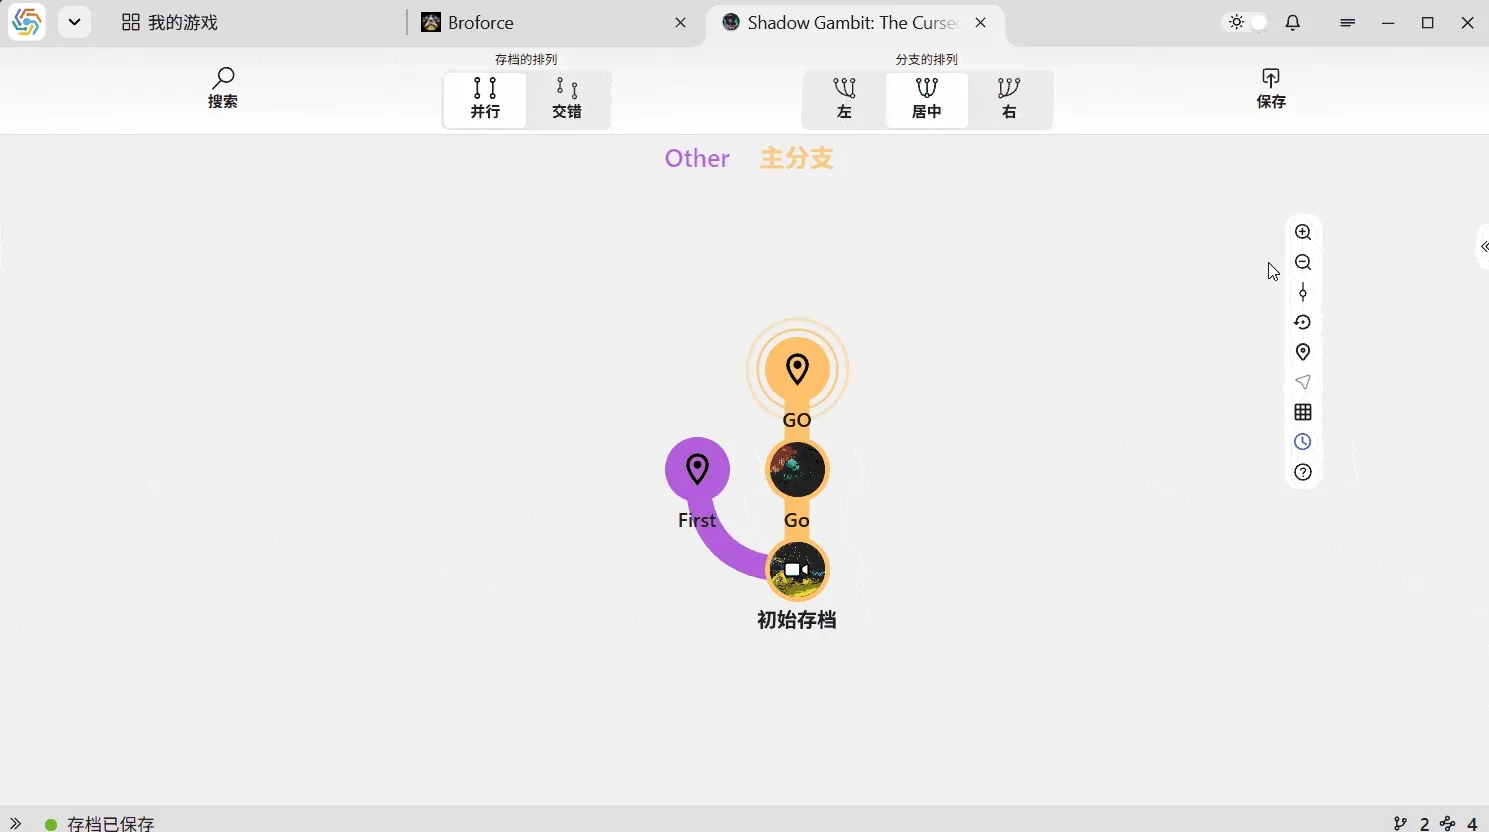
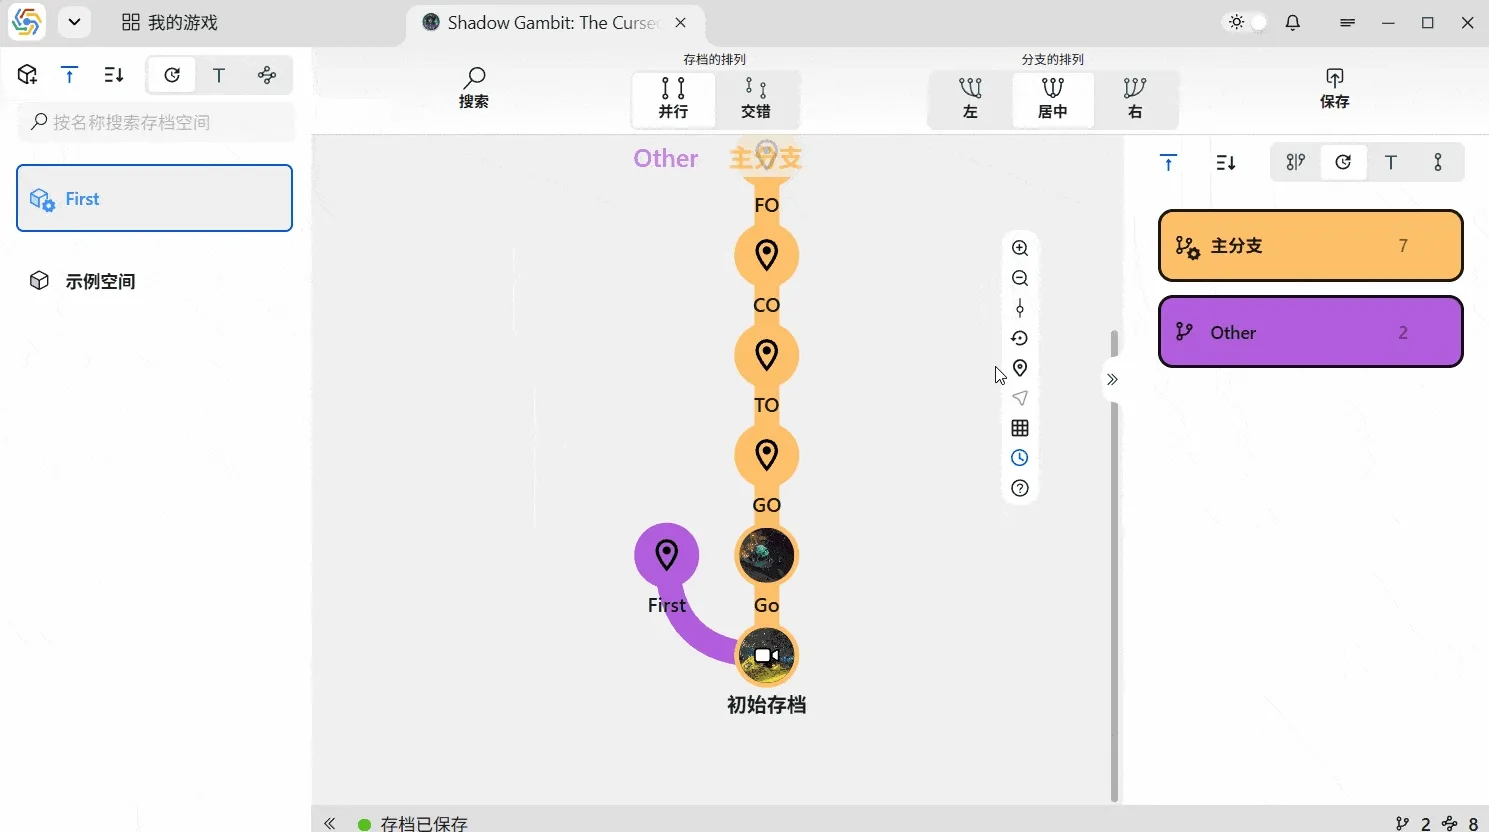
Branch Graph
Section titled “Branch Graph”The center of the save space interface is the save branch graph for the entire space. The branch graph is a typical tree structure, starting from the initial save. All branches and saves are located on this tree, making it the primary area for the software to manage saves. The top of the branch graph area displays horizontal branch identifiers; clicking a branch selects it. The far left of the branch graph area is the timeline, with time progressing from bottom to top, indicating the save time of the corresponding archives on that row. Clicking a specific time selects the archive node saved at that moment.
Toolbar
Section titled “Toolbar”The toolbar floating in the upper right corner of the branch graph area contains four buttons at the top for adjusting the size of archive nodes. From top to bottom, they are: increase size, decrease size, slider adjustment, and restore default size:
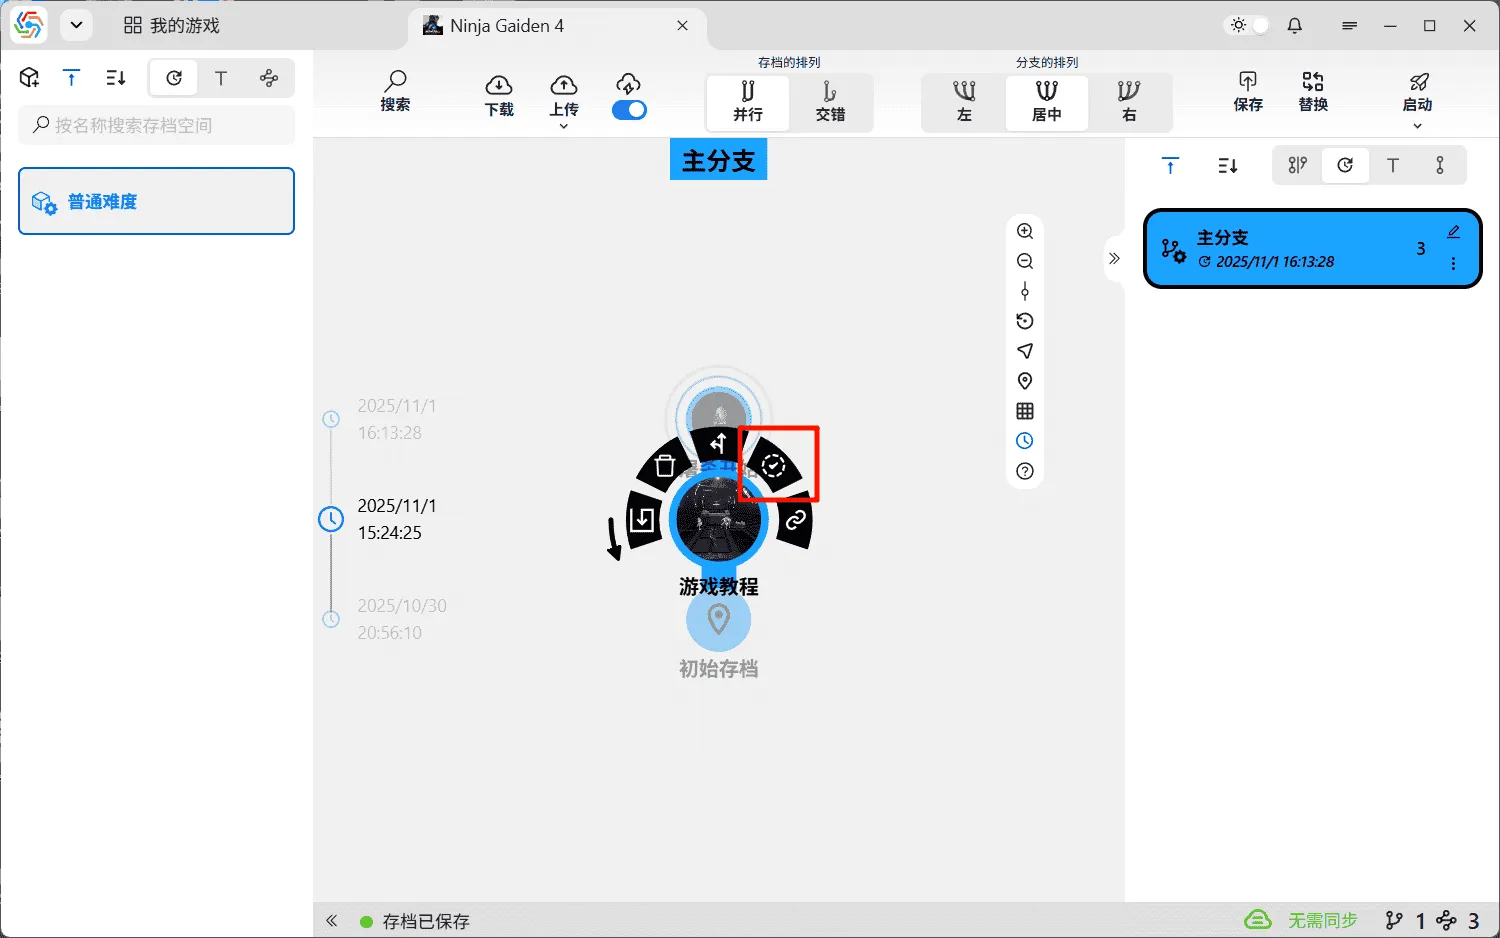
The next two buttons are for jumping to the currently used save node and the currently selected save node, respectively:
The following two buttons control the visibility of grid lines and the left-side timeline, respectively. The last button is for demonstrating branch graph operations:
Arrangement of Saves and Branches
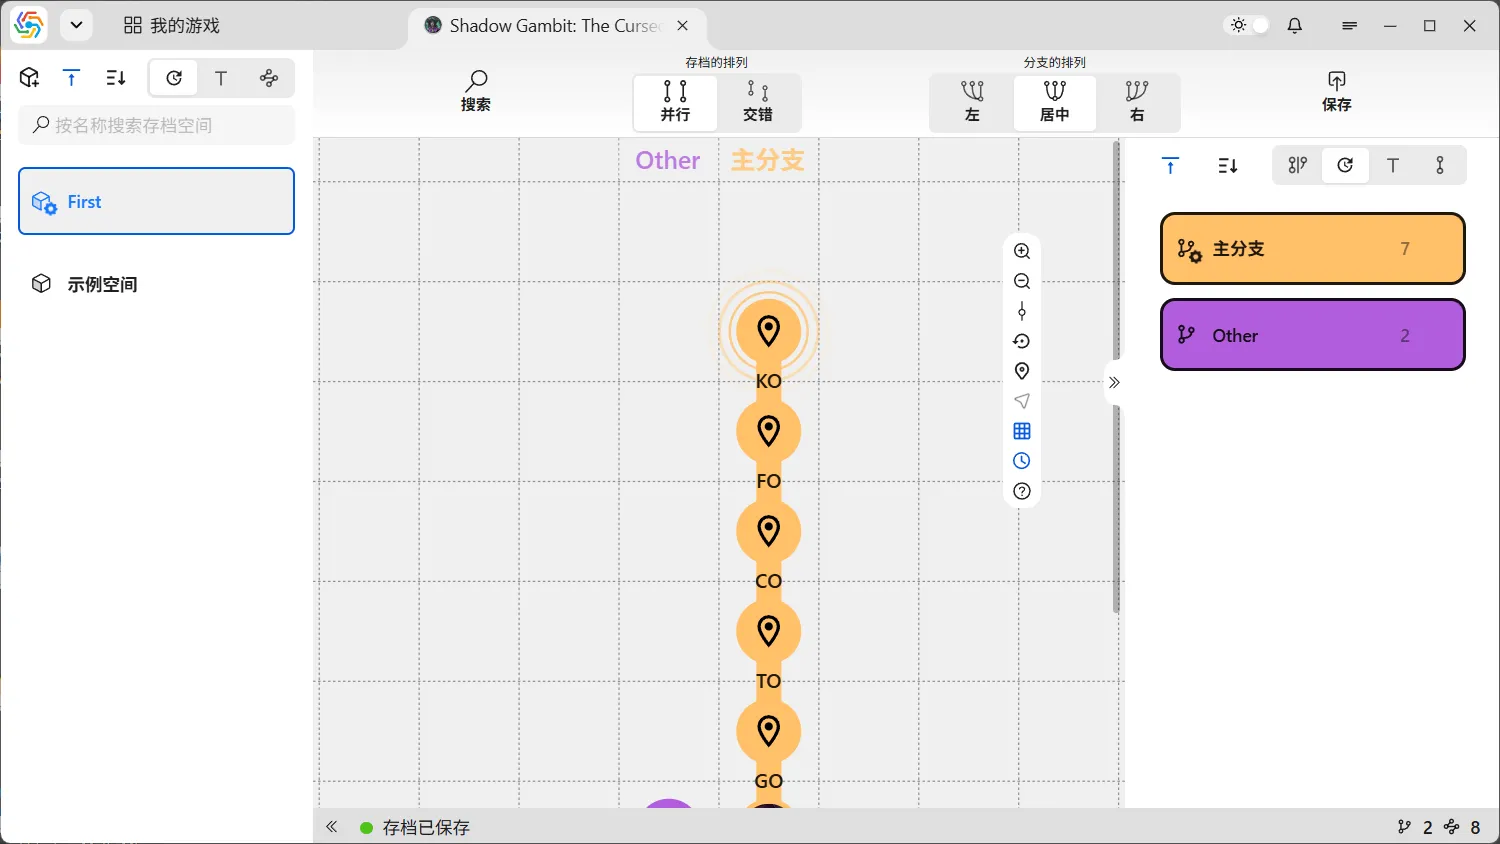
Section titled “Arrangement of Saves and Branches”The operation bar at the top of the branch graph allows you to adjust the arrangement of saves and branches. Save arrangement is divided into parallel and staggered layouts. Staggered layout means all saves are arranged sequentially by time, with only one save node per row. In this mode, the entire branch graph shares a single timeline, but the space occupied by the branch graph will significantly increase. Parallel layout means each branch has its own independent timeline, and multiple save nodes can be on the same row without interfering with each other, occupying less space:
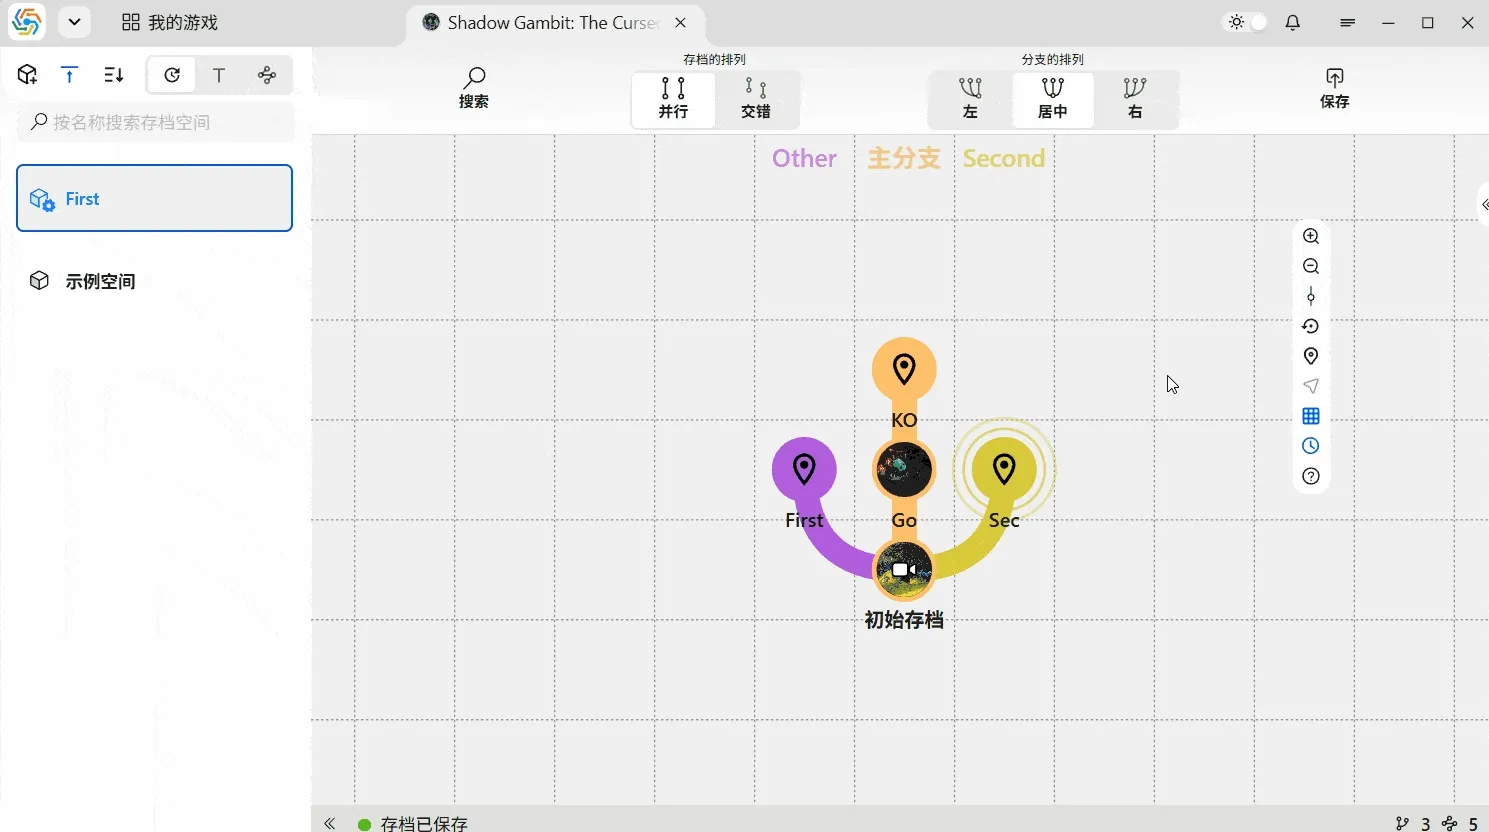
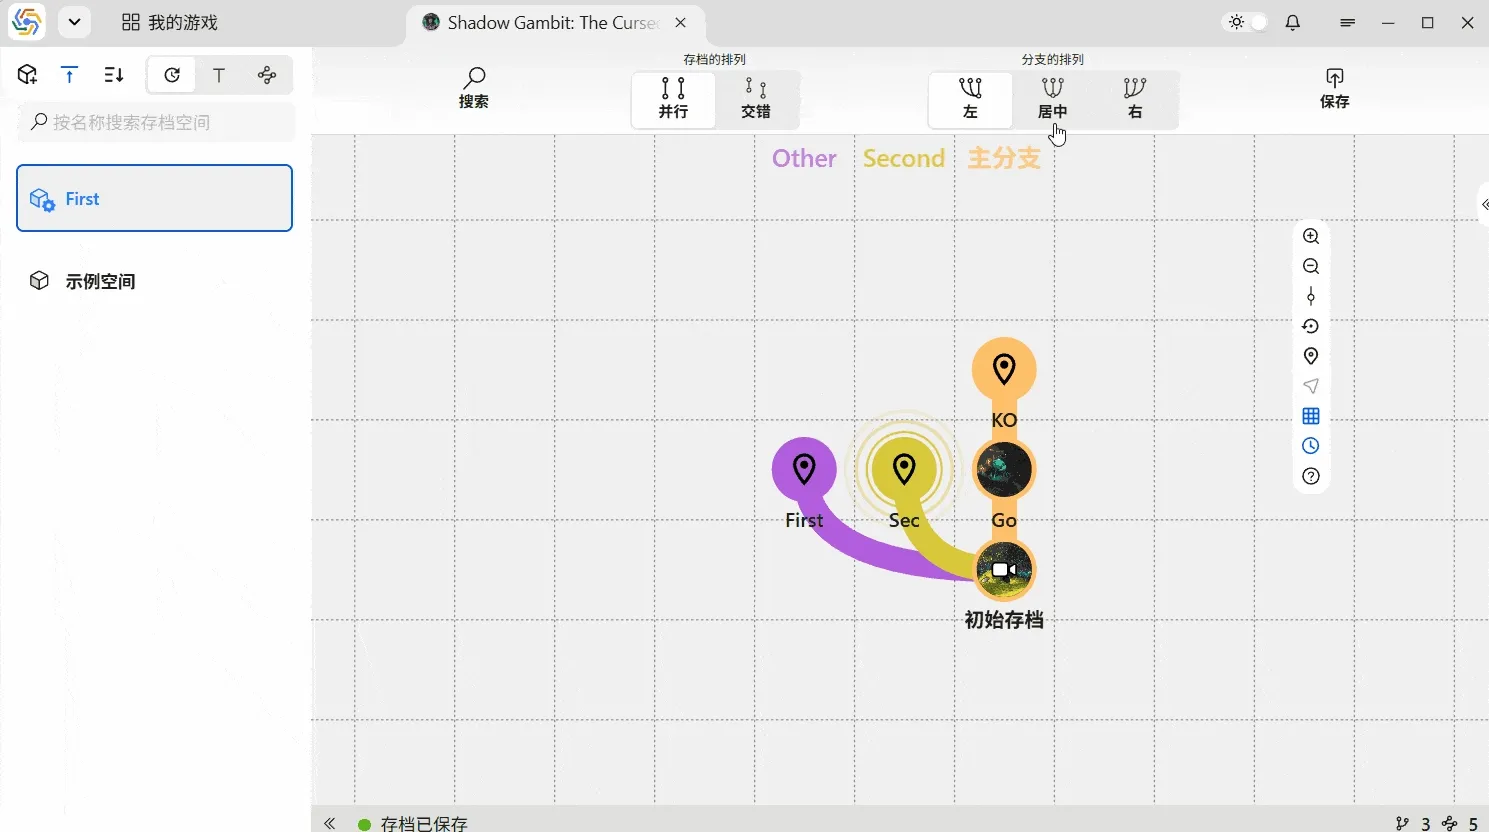
Branch arrangement refers to the direction in which child branches are arranged relative to their parent branch. Options include left, right, and center alignment. Center alignment attempts to ensure an equal number of child branches on both sides of the parent branch (absolute equality cannot be guaranteed):
Keyboard Navigation
Section titled “Keyboard Navigation”When you select an archive node or a branch, you can use keyboard shortcuts to quickly jump to adjacent archive nodes or branches. ⇦ and ⇨ can switch between selected branches left and right. ⇧ and ⇩ can switch between selected archive nodes up and down. When a branch is selected, using ⇧ and ⇩ will directly select the first and last archive nodes of that branch, respectively. When an archive node is selected, pressing ⏎ Enter will directly view the archive’s preview file, and pressing Esc will exit the preview:
Branch Management
Section titled “Branch Management”The sidebar on the right side of the branch graph area is the interface for managing all branches under the current save space. The top of the sidebar has a pin-to-top switch (to pin the currently used branch) and various sorting options. Below are the branch items representing each branch. Operations that can be performed include:
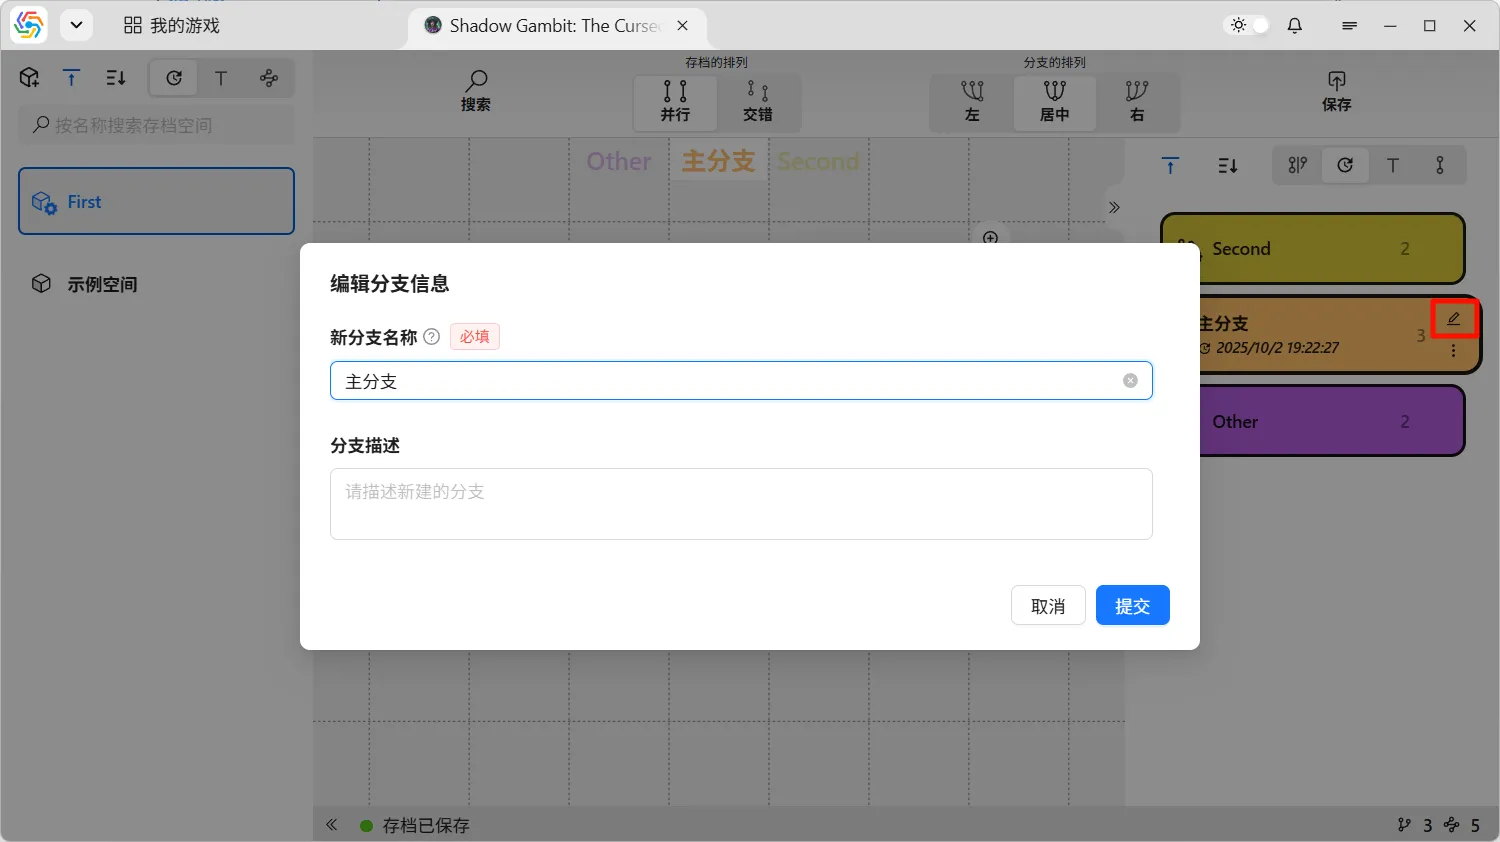
Edit Branch
Section titled “Edit Branch”Change the branch name or branch description:
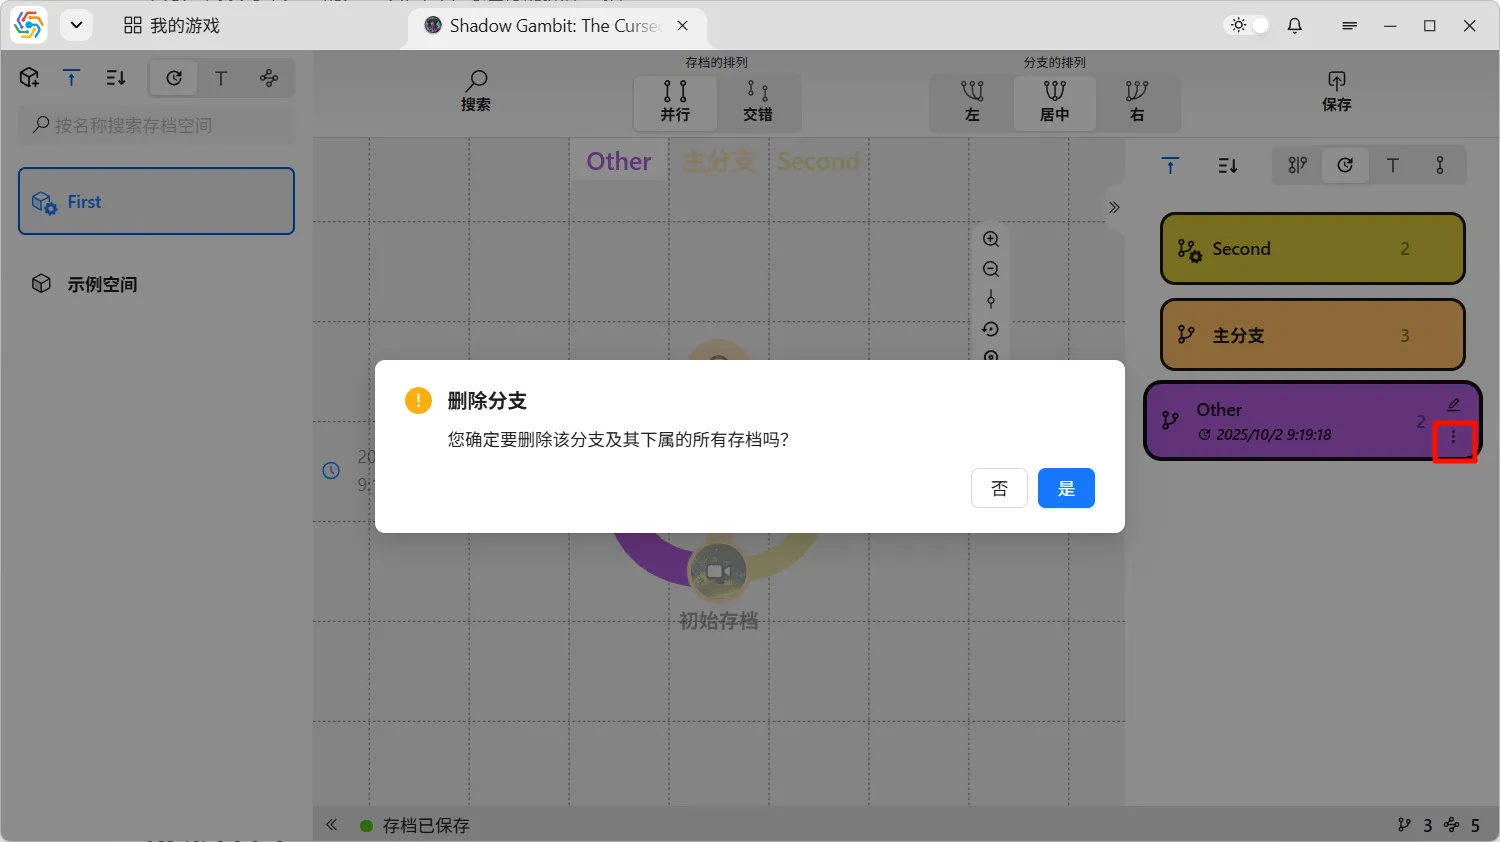
Delete Branch
Section titled “Delete Branch”Deletes a branch and all saves belonging to that branch. Its child branches will be transferred to the parent branch of the deleted branch:
Change Branch Color
Section titled “Change Branch Color”Each branch has a corresponding branch color and text color. These colors differ between light and dark themes. When a new branch is created, the software defaults to selecting a branch color for it, following a rule to try and use a different hue from adjacent branches. The text color defaults to black in light themes and white in dark themes. If you are not satisfied with the default colors, you can modify them yourself:
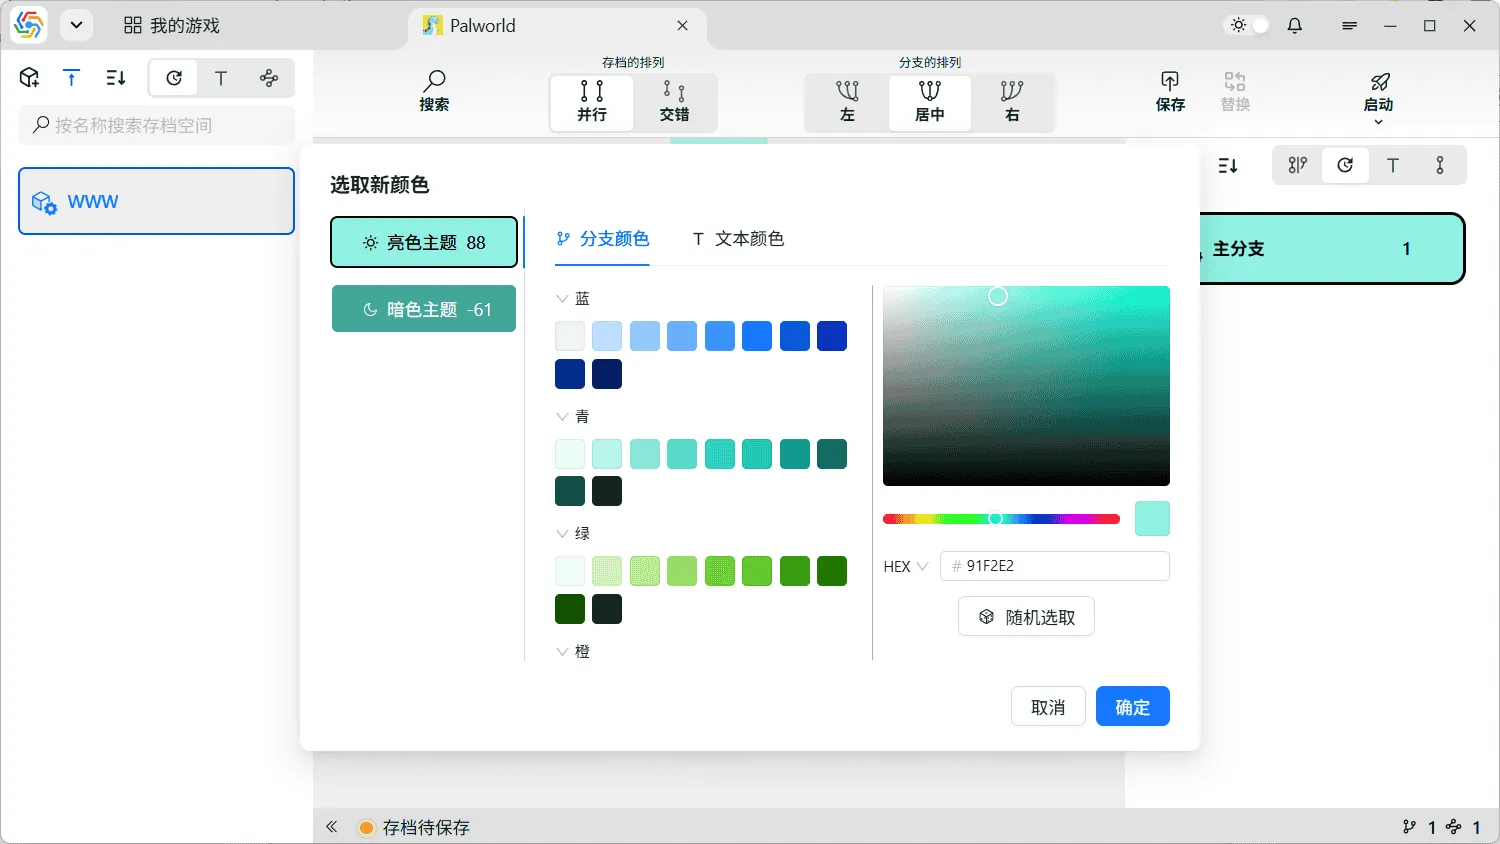
The changed colors can be previewed directly in the left tab bar. The number after the tab title represents the APCA contrast ratio between the branch color and the text color. This value measures whether the combination of branch color and text color has sufficient readability. The higher the absolute value, the better the readability.
Promote Branch
Section titled “Promote Branch”The “Promote Branch” operation allows the current branch to replace its parent branch’s position. The promoted branch will be closer to the main branch and can eventually become the new main branch:
Split Branch
Section titled “Split Branch”Branch splitting allows you to separate a new child branch from an existing branch. First, select an archive point on the original branch, then choose the “Split Branch” operation from its circular menu. This will separate all archives after that archive point (excluding the archive point itself) into a new child branch. Compared to the special case of branch merging in “Promote Branch,” “Split Branch” can be considered its inverse operation.
Search Archives
Section titled “Search Archives”The leftmost button in the operation bar at the top of the branch graph area is the search button. Clicking it opens a search bar that can be used to search for branches and archives. The button at the bottom of the search bar expands or collapses the search bar. Clicking the search button in the operation bar again will close the search bar:
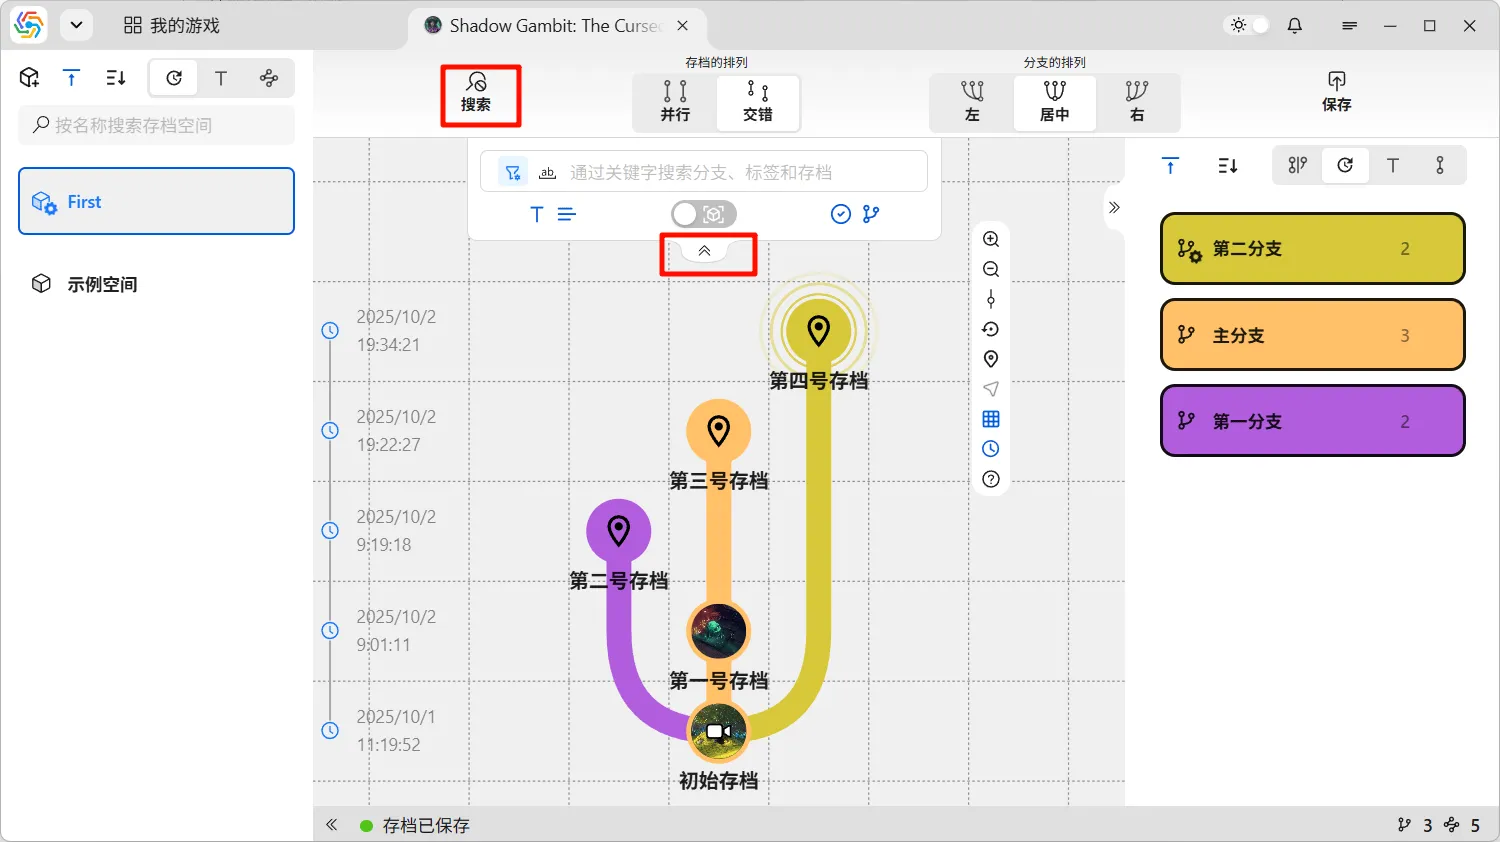
Search Scope
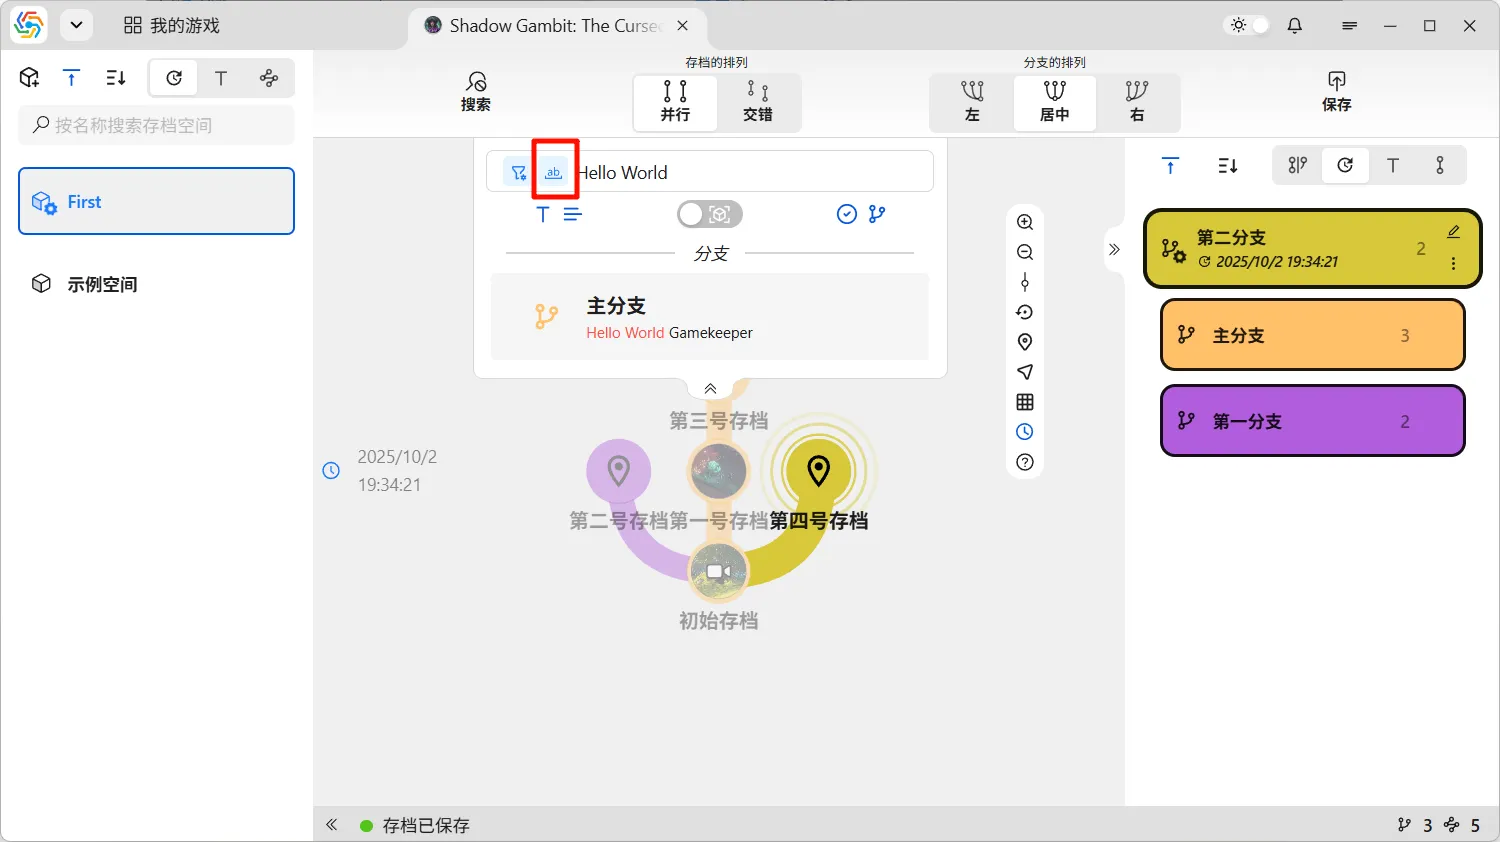
Section titled “Search Scope”The main search targets of the search bar are branches and archives, based on their names and descriptions. The theoretical search scope can encompass the entire game. The toolbar below the search bar controls the current search scope. The leftmost control determines whether the search is based on name or description. The rightmost control determines whether the search targets branches or archives. The switch in the middle controls whether to search only within the current save space or across all save spaces:
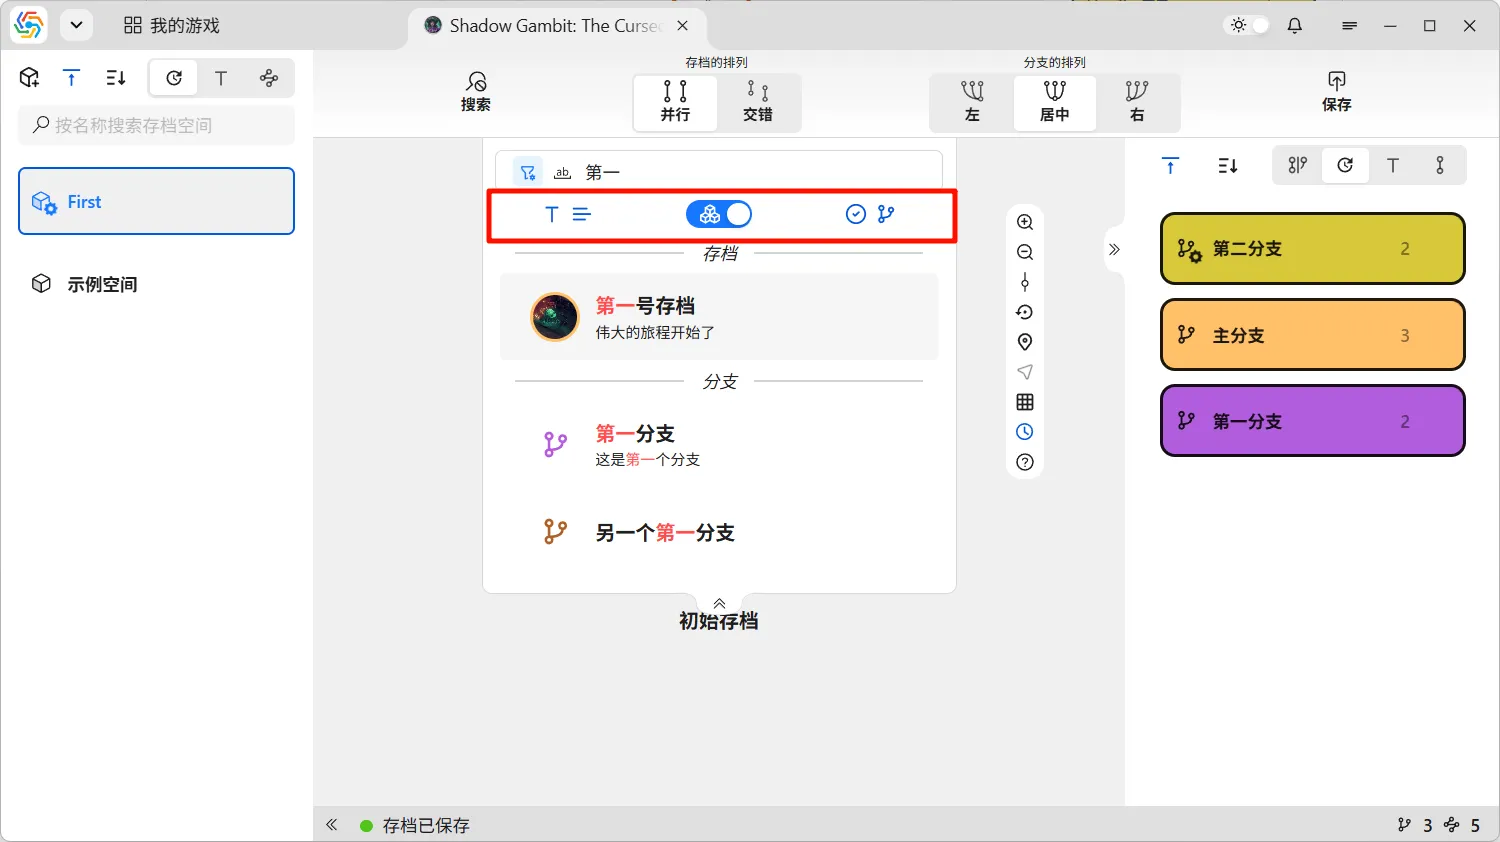
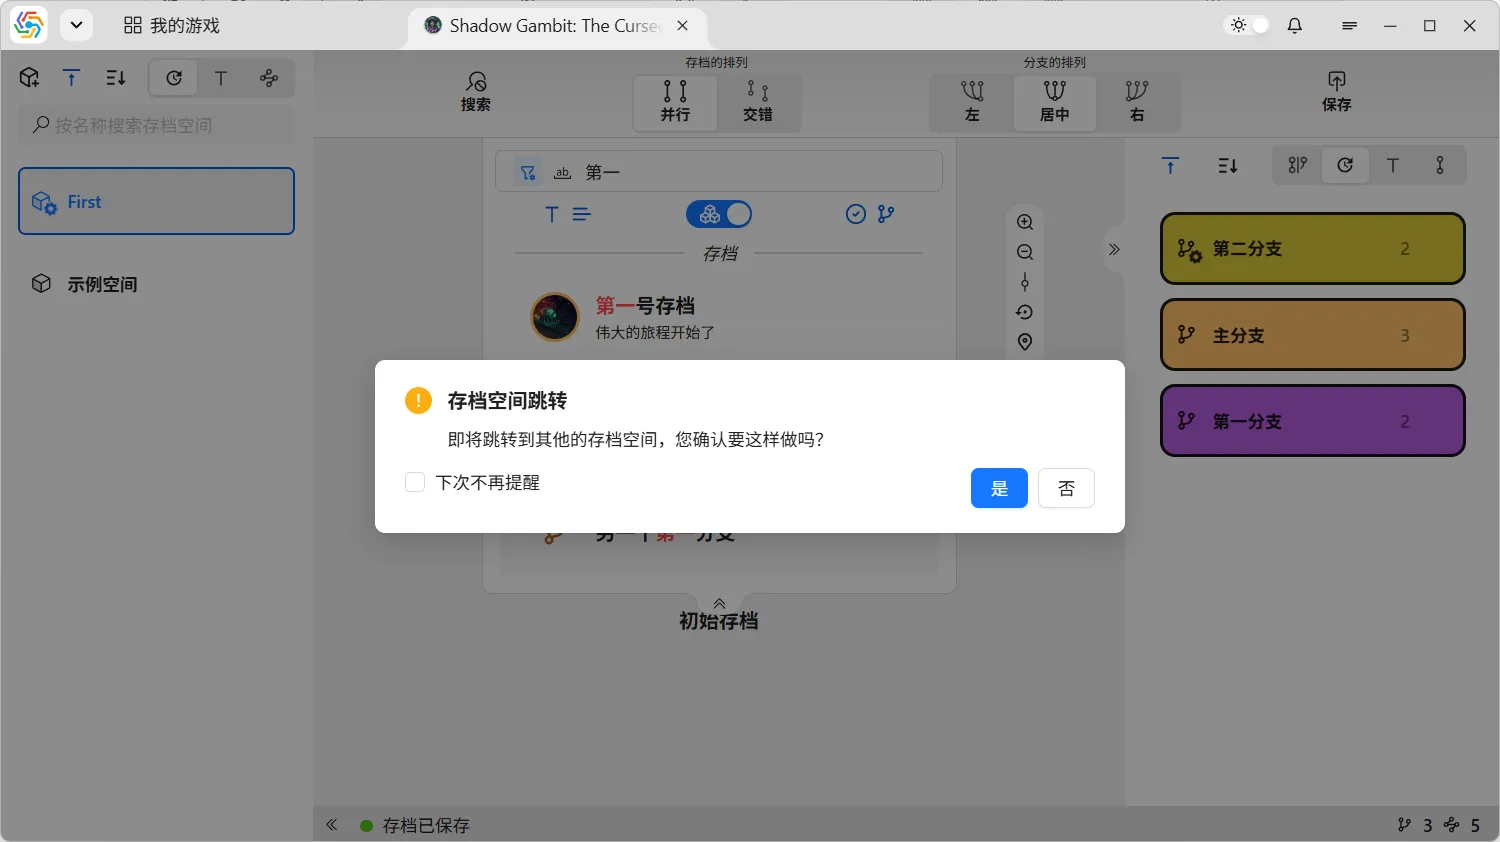
Clicking a search result directly selects the corresponding archive node or branch. If the archive node or branch is in another space, a prompt will appear asking if you wish to jump to that other space:
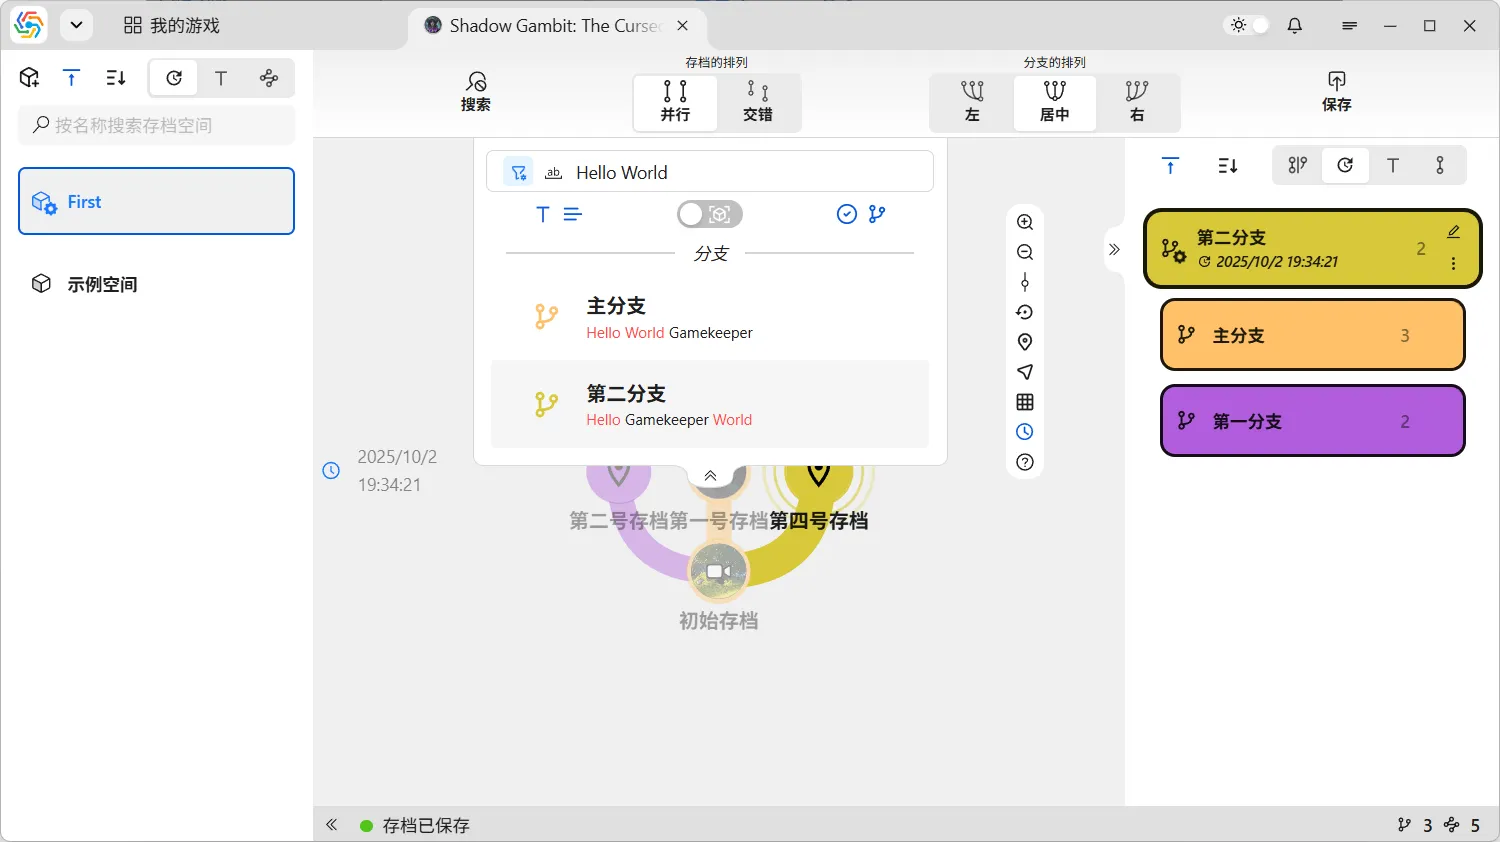
Serial Match Mode
Section titled “Serial Match Mode”Serial match is primarily used for languages like English that use spaces to separate words. When serial match mode is enabled, the order of words in the text must match the order of words in the search text. For example, “Hello World” in serial match mode can only match “Hello World Gamekeeper,” but not “Hello Gamekeeper World”: