Quick Save
Basic Usage Instructions
Section titled “Basic Usage Instructions”The Quick Save feature can promptly save the latest archive data during gameplay. The software offers four Quick Save methods to choose from:
- Hotkey Save: Users can trigger the software to automatically save the latest archive data via a hotkey at any time during gameplay.
- Timed Save: By setting a specific time interval, the software will periodically and automatically save the latest archive data.
- Real-time Save: When the archive data changes, the software automatically saves the latest archive data at the first moment.
- Process Monitoring Save: By monitoring the game process, the software automatically saves the latest archive data when the game starts or exits.
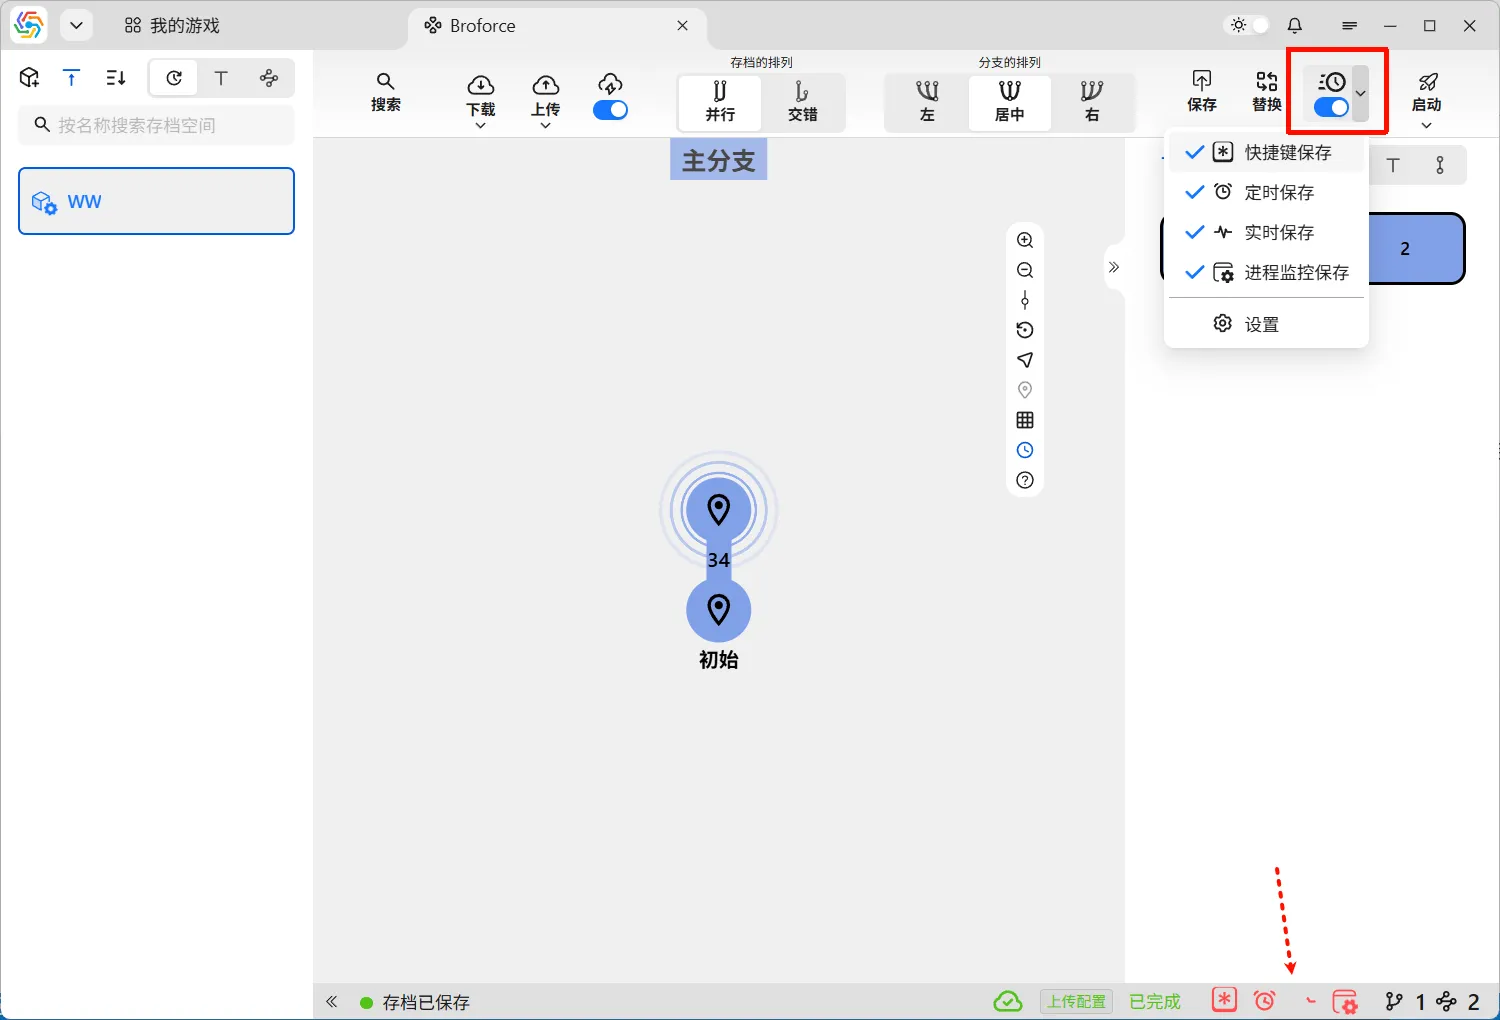
In the upper right corner of the game archive management interface, there is a Quick Save switch. Clicking its dropdown menu will reveal the four Quick Save methods mentioned above. After selecting the desired Quick Save method, turn on the Quick Save switch to enable them simultaneously. The active Quick Save methods will be displayed in the status bar in the lower right corner:
Auto Enable or Disable Quick Save
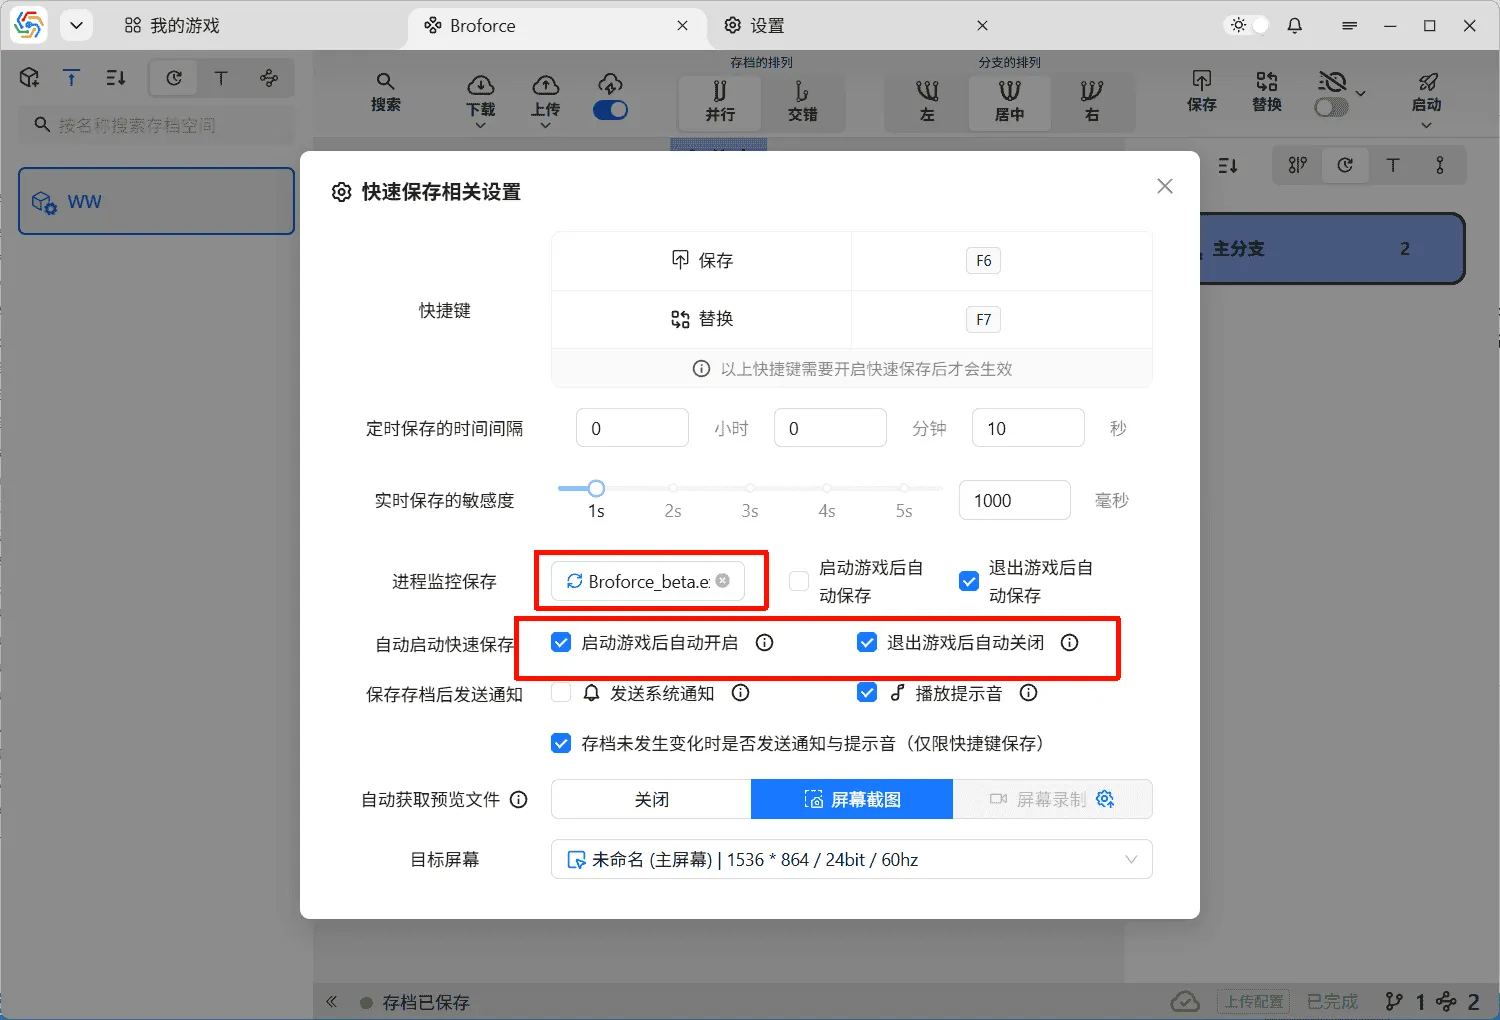
Section titled “Auto Enable or Disable Quick Save”The Quick Save activation switch can be linked with the game process. Quick Save will automatically enable when the game starts and automatically disable when the game exits. Starting the game requires using the software’s Launch Game feature; launching the game outside the software will not automatically enable Quick Save. However, exiting the game is achieved by monitoring the game process, so you only need to set the correct game process name.
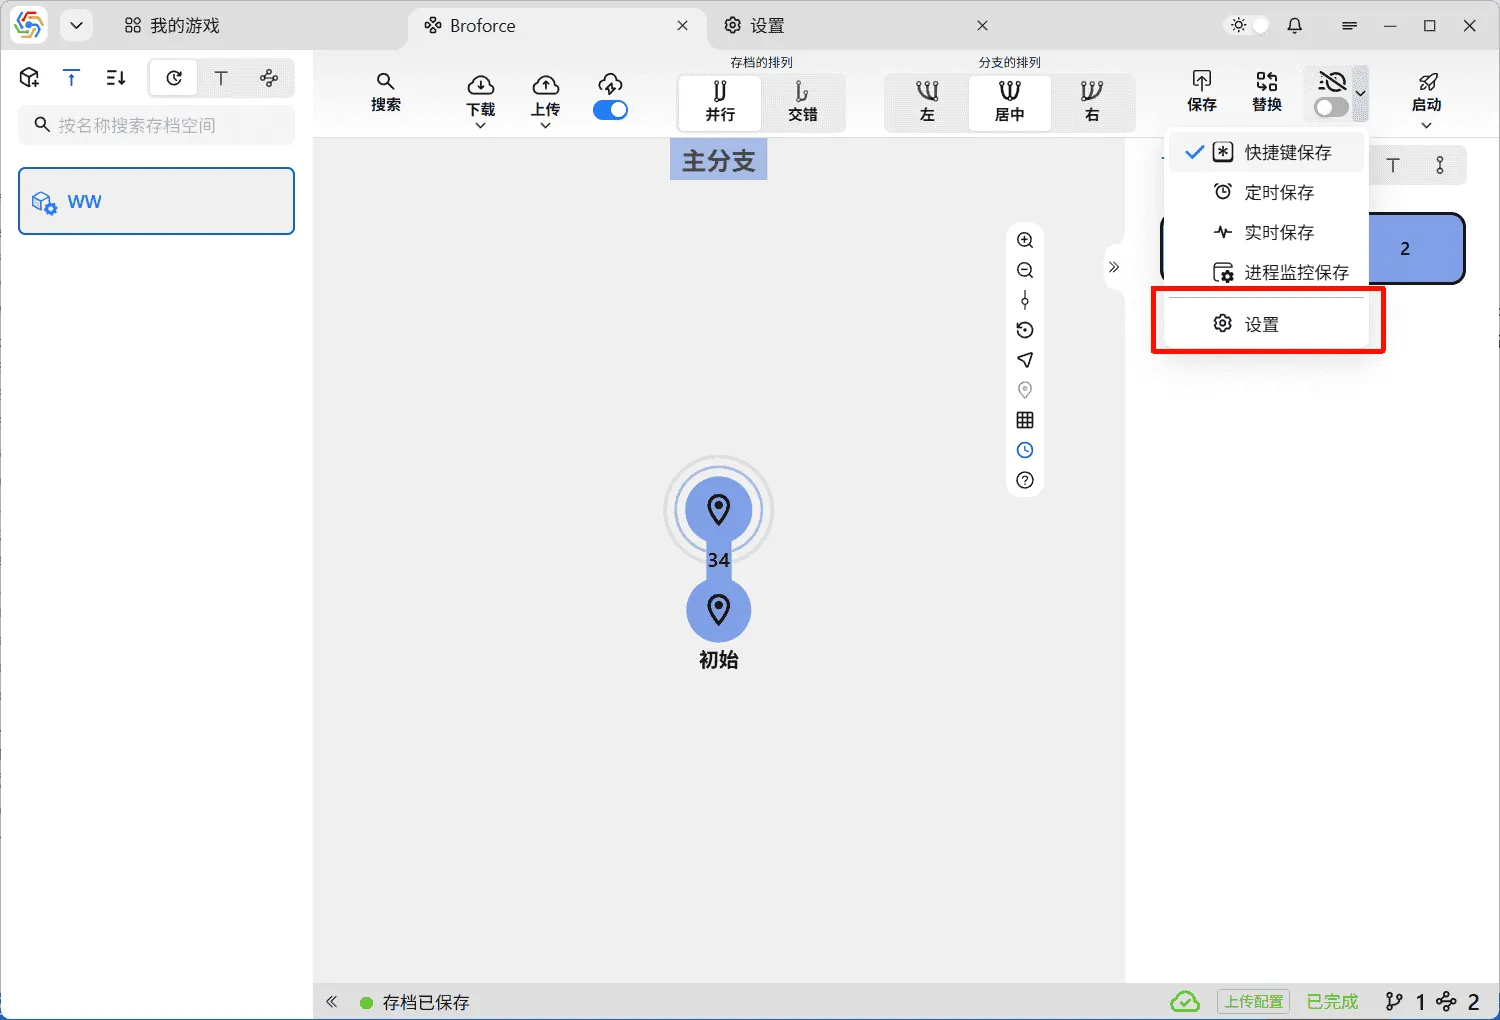
From the Quick Save switch’s dropdown menu, you can access the Quick Save settings page, which contains relevant options:
Quick Save Methods
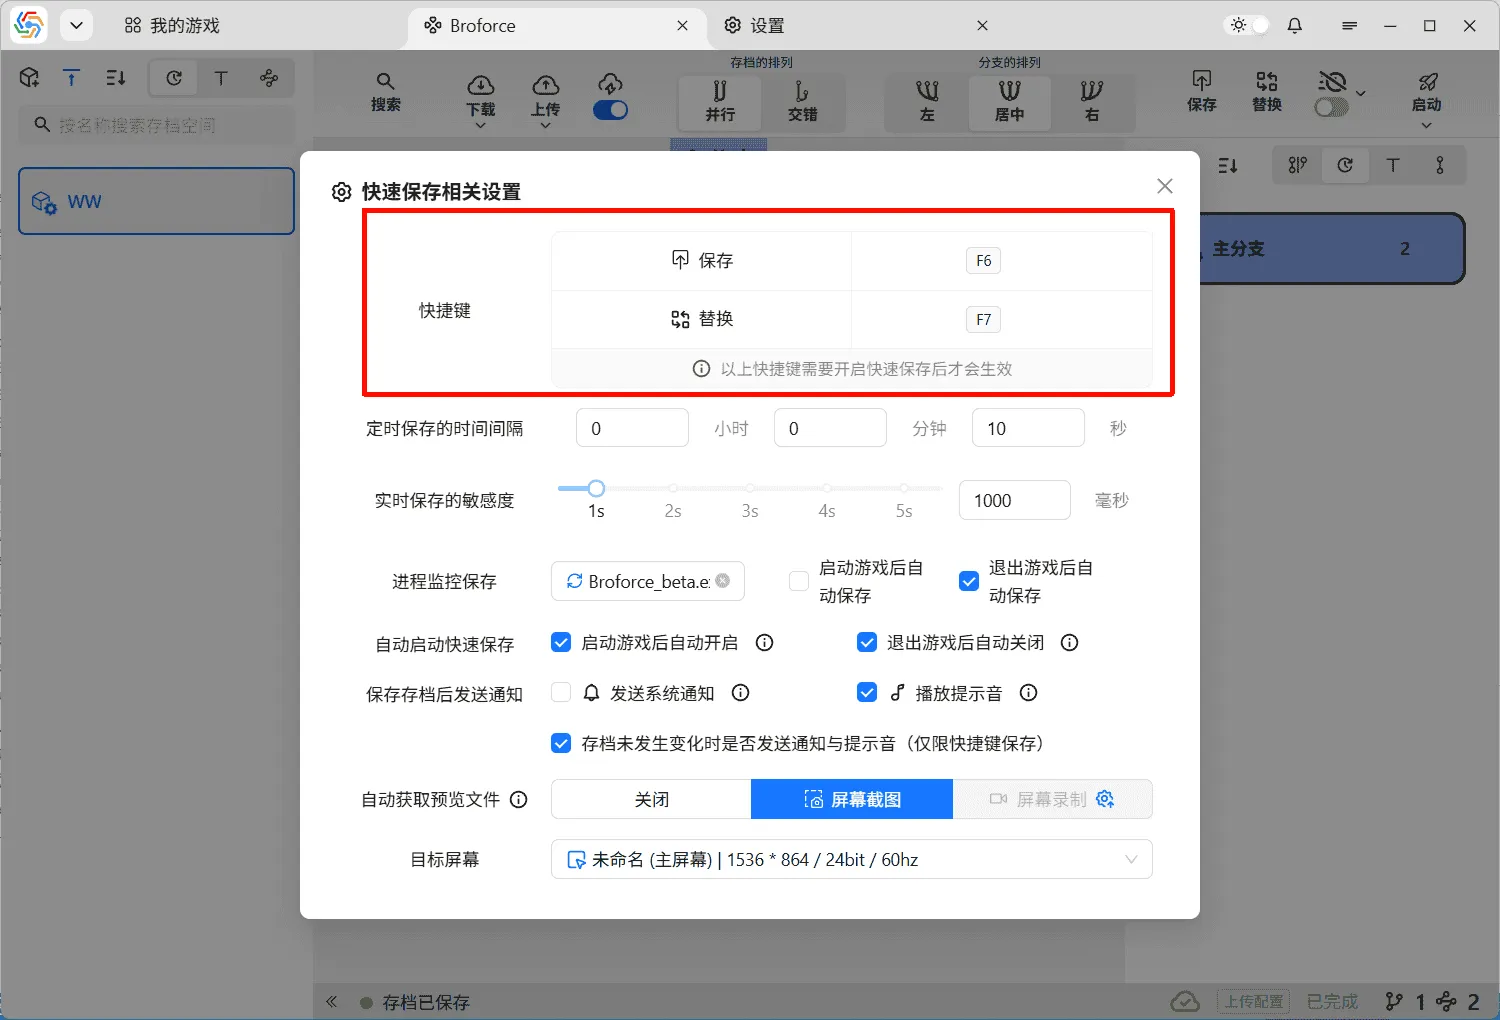
Section titled “Quick Save Methods”Hotkey Save
Section titled “Hotkey Save”When Hotkey Save is enabled, users can automatically save archives by pressing the corresponding hotkey. The specific hotkey can be set in the Quick Save settings interface. “Save” corresponds to the save archive function, while “Replace” corresponds to the replace archive function:
Timed Save
Section titled “Timed Save”When Timed Save is enabled, the software will automatically trigger an auto-save at regular intervals. The time interval can be set in the Quick Save settings interface, with the shortest interval being 10 seconds:

Real-time Save
Section titled “Real-time Save”When Real-time Save is enabled, the software automatically monitors changes in archive data and triggers an automatic save at the first moment a change occurs. Real-time Save has a sensitivity setting, which is a time threshold. The duration set depends on the single archive save time within the game. If the sensitivity is too low, a single save in the game might be recognized as multiple saves, resulting in incomplete or unusable final saved data. If the sensitivity is too high, multiple consecutive saves in a short period might be recognized as a single save, resulting in only the last save being automatically stored. In most cases, it is recommended to set a longer sensitivity, as saving only the last archive data in a short period is far better than having incomplete or unusable archive data.

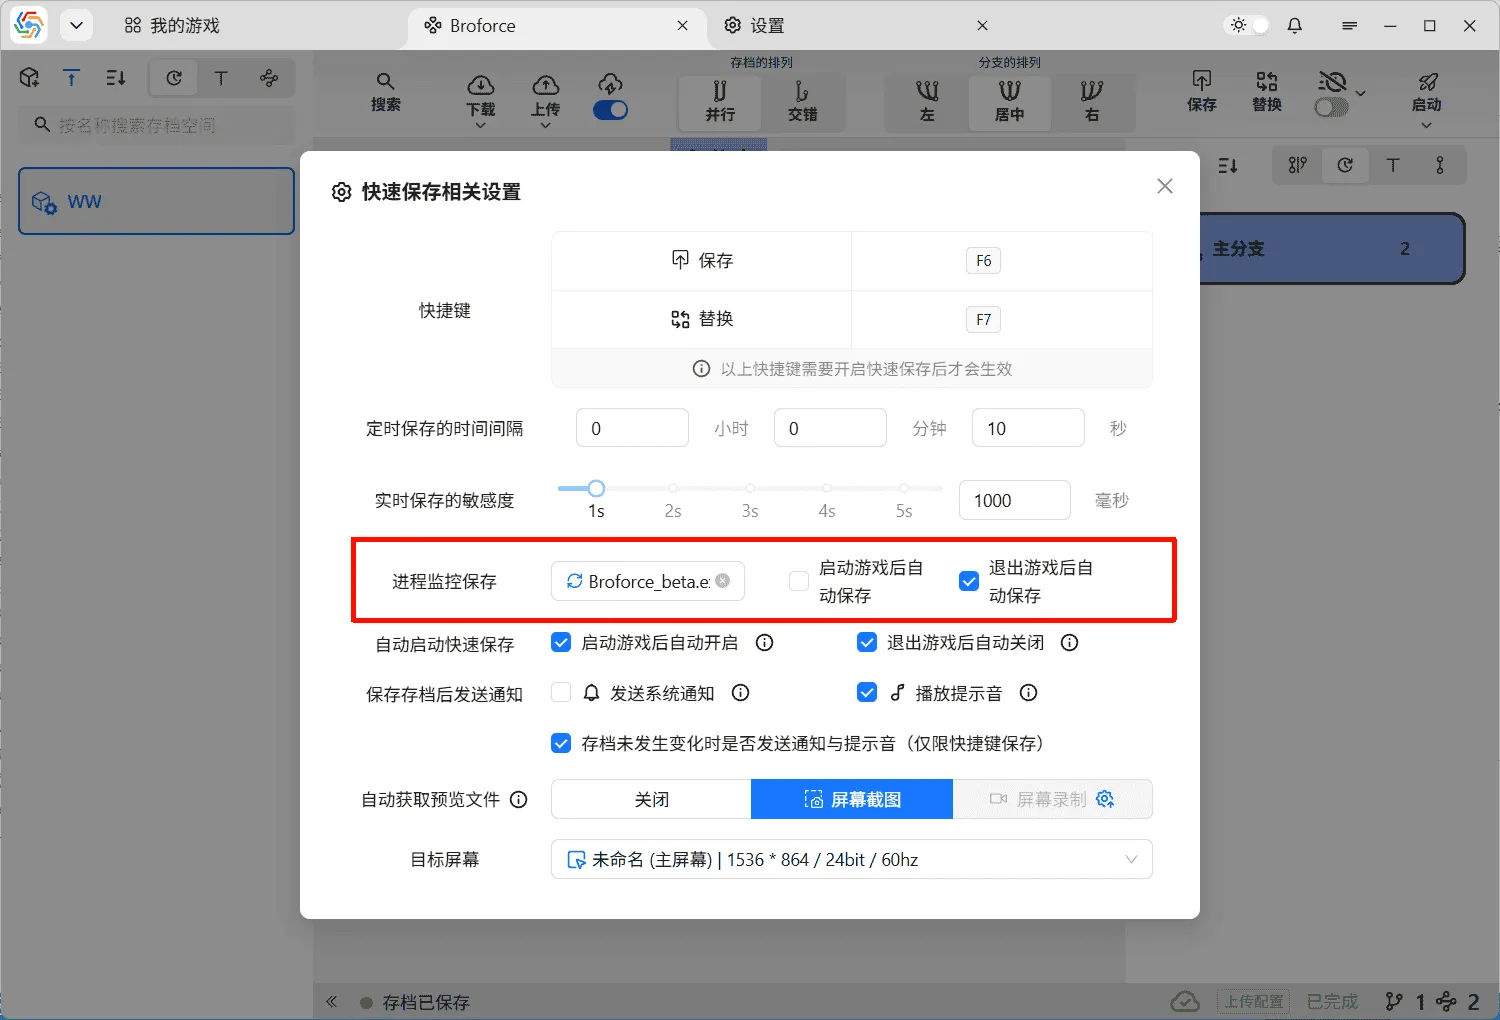
Process Monitoring Save
Section titled “Process Monitoring Save”Process Monitoring Save triggers automatic saves by monitoring the game process’s startup and shutdown. It relies on the game’s process name to function correctly. The software can automatically retrieve the process name from the game’s startup file. If the name is incorrect, you will need to manually correct it in the settings interface:
Notifications and Reminders
Section titled “Notifications and Reminders”When Quick Save is enabled, if the latest archive data is successfully saved, you can choose to send system notifications and play alert sounds. This allows users to know if the archive has been saved successfully without exiting the game interface. You can enable related options in the Quick Save settings interface. The ability to send system notifications is subject to the operating system’s notification mechanism. For details, refer to Notifications & Do Not Disturb in Windows. There are three types of system notifications and alert sounds that can be sent:
- Save Successful: The latest archive data was saved successfully, and the screenshot or screen recording task was completed smoothly.
- Save Successful but Warning: The latest archive data was saved successfully, but the screenshot or screen recording task failed, or the archive data did not change when triggered by a hotkey.
- Save Failed: An error occurred during the archive data save process, and the save failed.

Auto Generate Preview Files
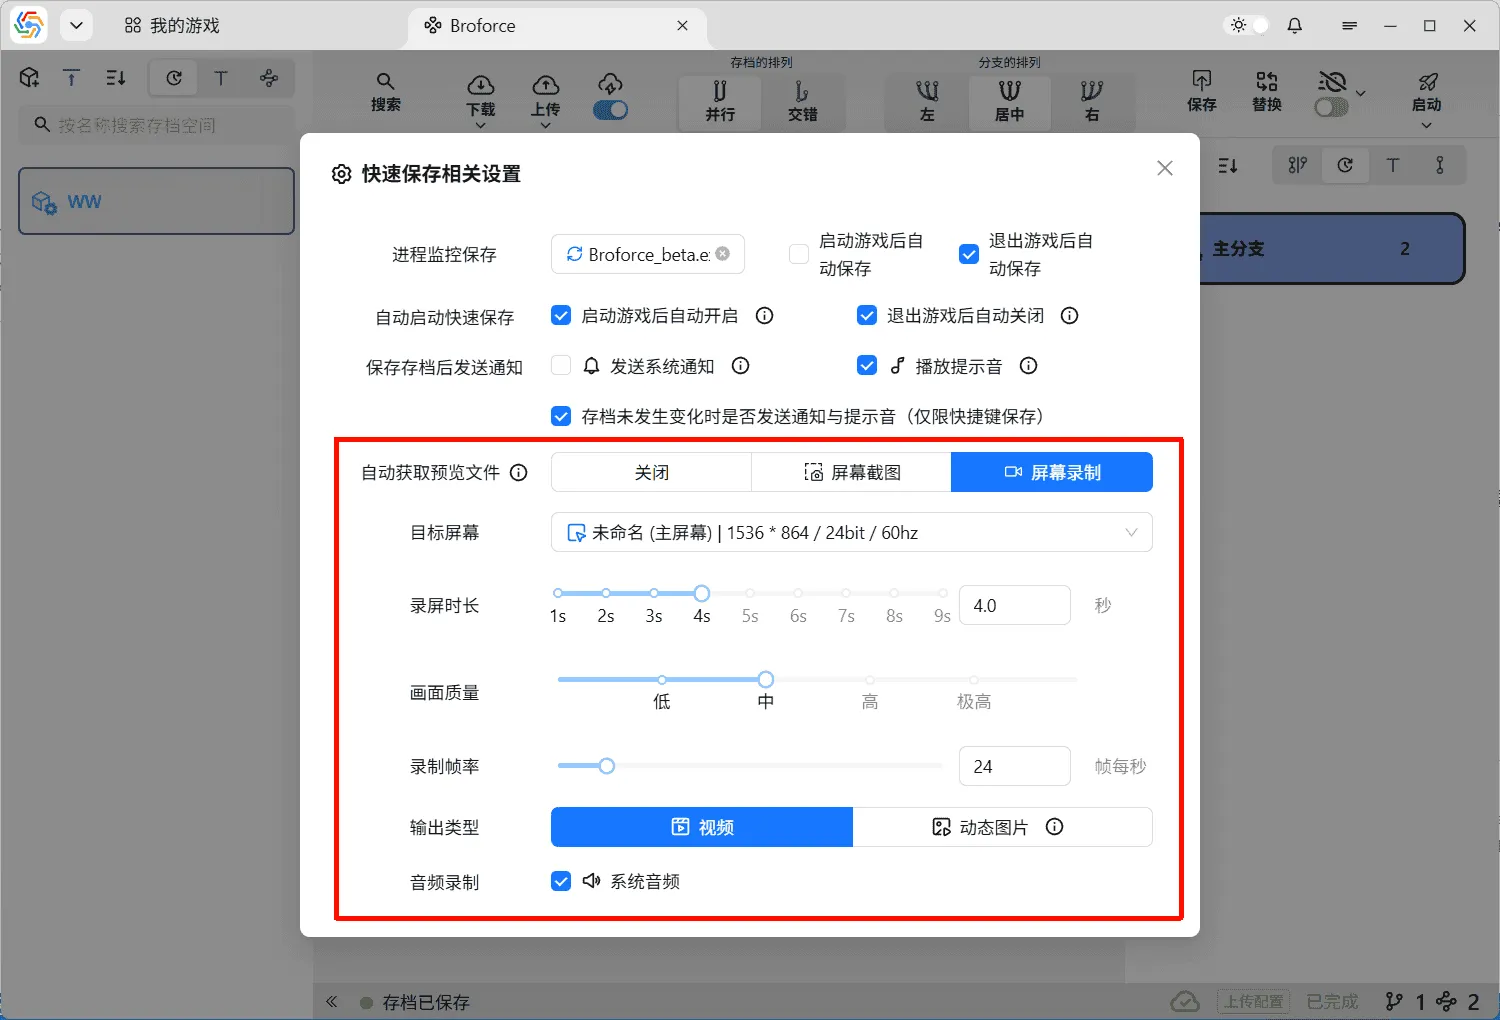
Section titled “Auto Generate Preview Files”When the software saves game archives, it can attach a preview file. This file is generally recommended to be a screenshot or screen recording of the game during the archive save, allowing users to directly understand the current game progress by viewing this file. When using the Quick Save feature to automatically save archives, the software can capture the screen or record the screen to automatically generate a preview file.
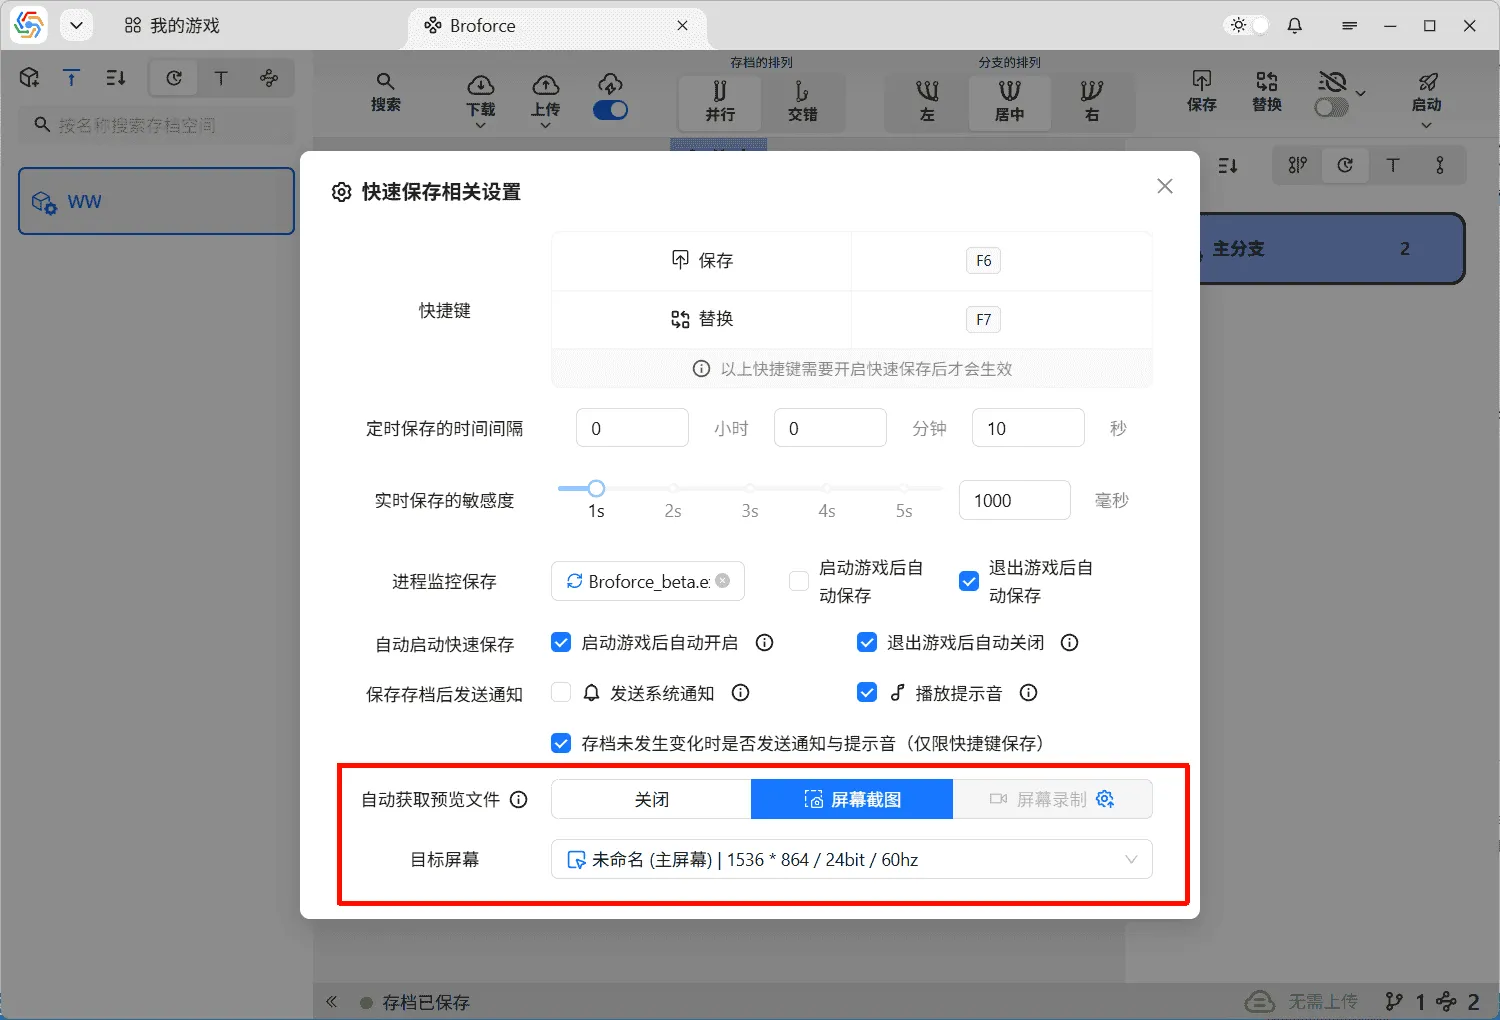
Screen Capture
Section titled “Screen Capture”In the Quick Save settings interface, select the screen capture method to automatically generate preview files and choose the target screen for the screenshot:

Screen Recording
Section titled “Screen Recording”If you choose the screen recording method to automatically generate preview files, it relies on the third-party component FFmpeg. If you have not installed FFmpeg locally, please jump to Setting the Path to the FFmpeg Executable to complete the installation and setup of this component.
Similar to screen capture, screen recording requires selecting the target screen first. However, in addition to the target screen, there are many other options available:
- Recording Duration: The duration of the screen recording.
- Video Quality: The quality of the recorded video.
- Frame Rate: The frame rate of the recording.
- Output Type: Whether the final output is a video or an animated GIF preview file. It is recommended to choose video, as GIF processing takes longer and GIF quality is lower; use it only when a small file size is required.
- Audio Recording: Whether to synchronize system audio recording. This option is only available when the output type is video.
Setting the Path to the FFmpeg Executable
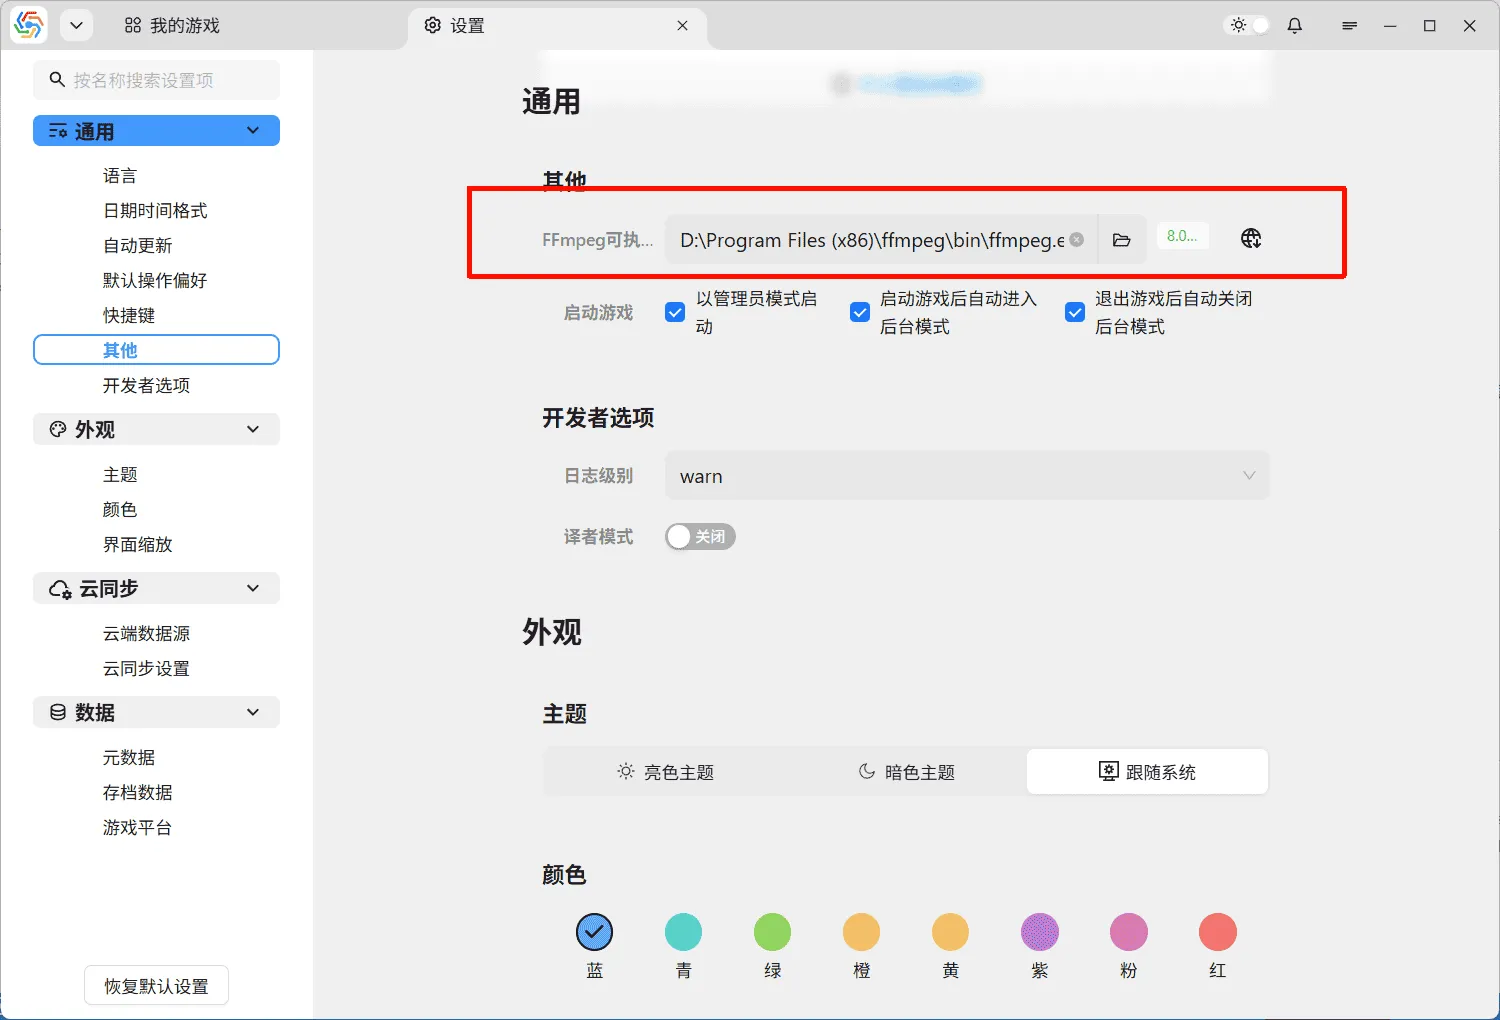
Section titled “Setting the Path to the FFmpeg Executable”FFmpeg is a powerful audio and video processing tool. The software’s screen recording function requires FFmpeg to operate. Therefore, before using the screen recording function, you need to set the path to the FFmpeg executable file (ffmpeg.exe).
First, open the download page on the FFmpeg official website and select the corresponding operating system:
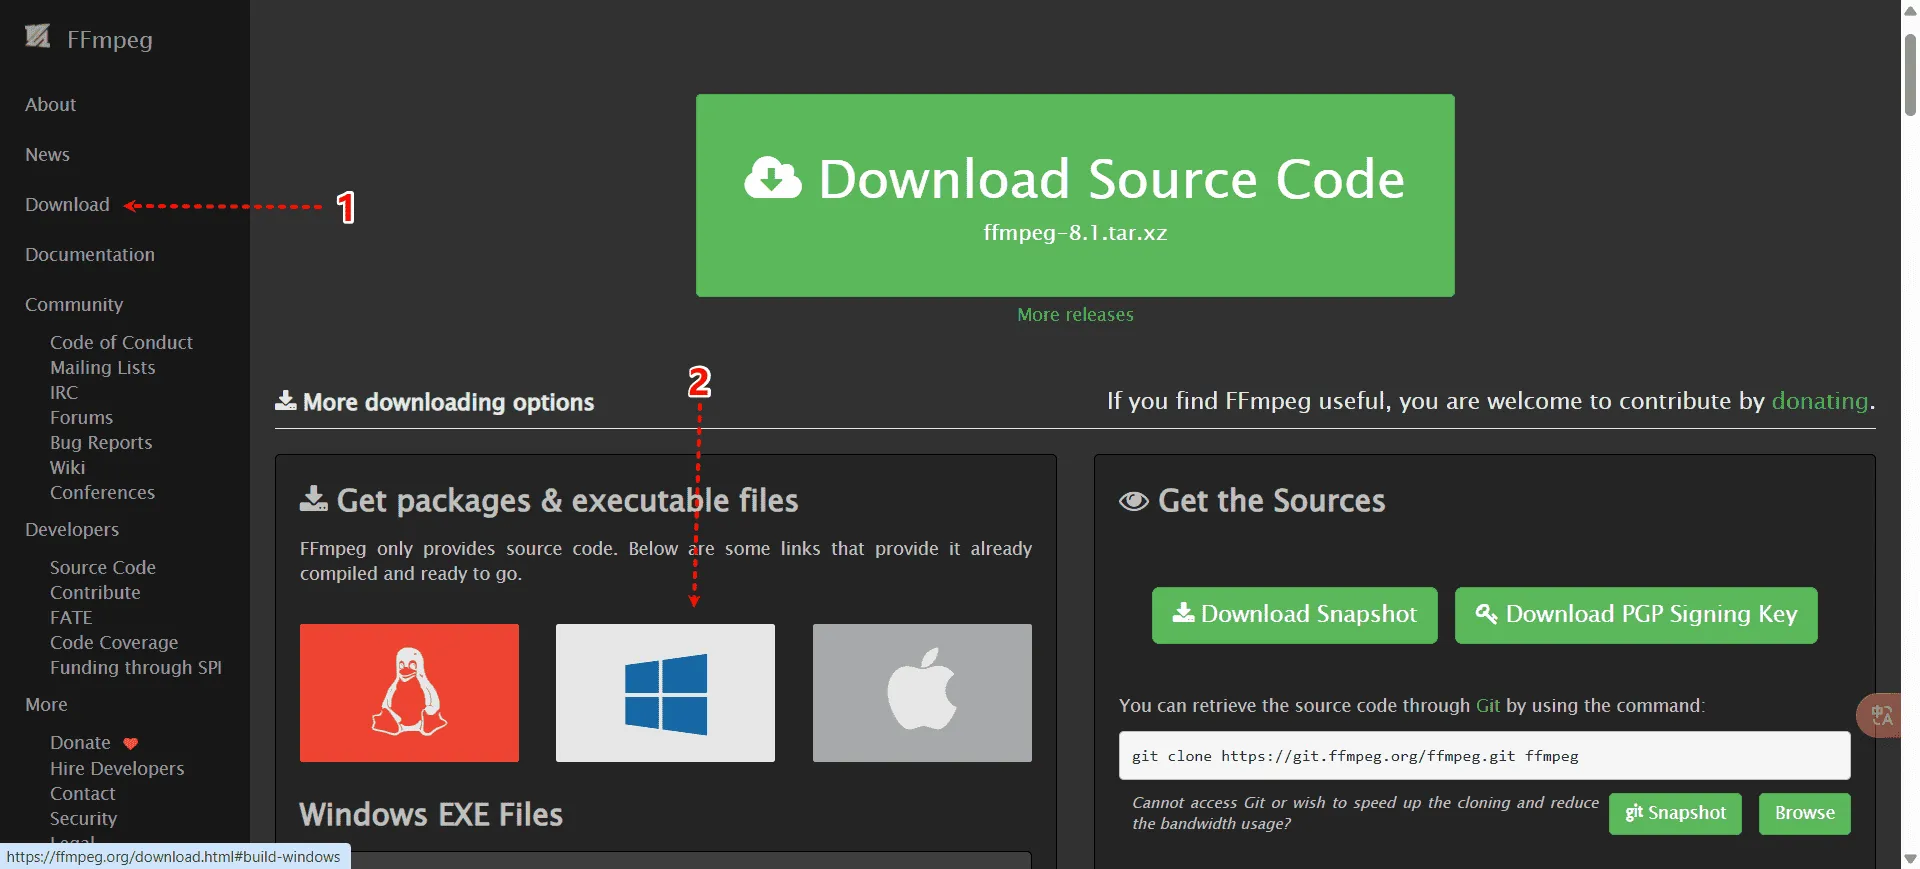
Next, you will have two download sources to choose from. We will select the first address (gyan.dev):
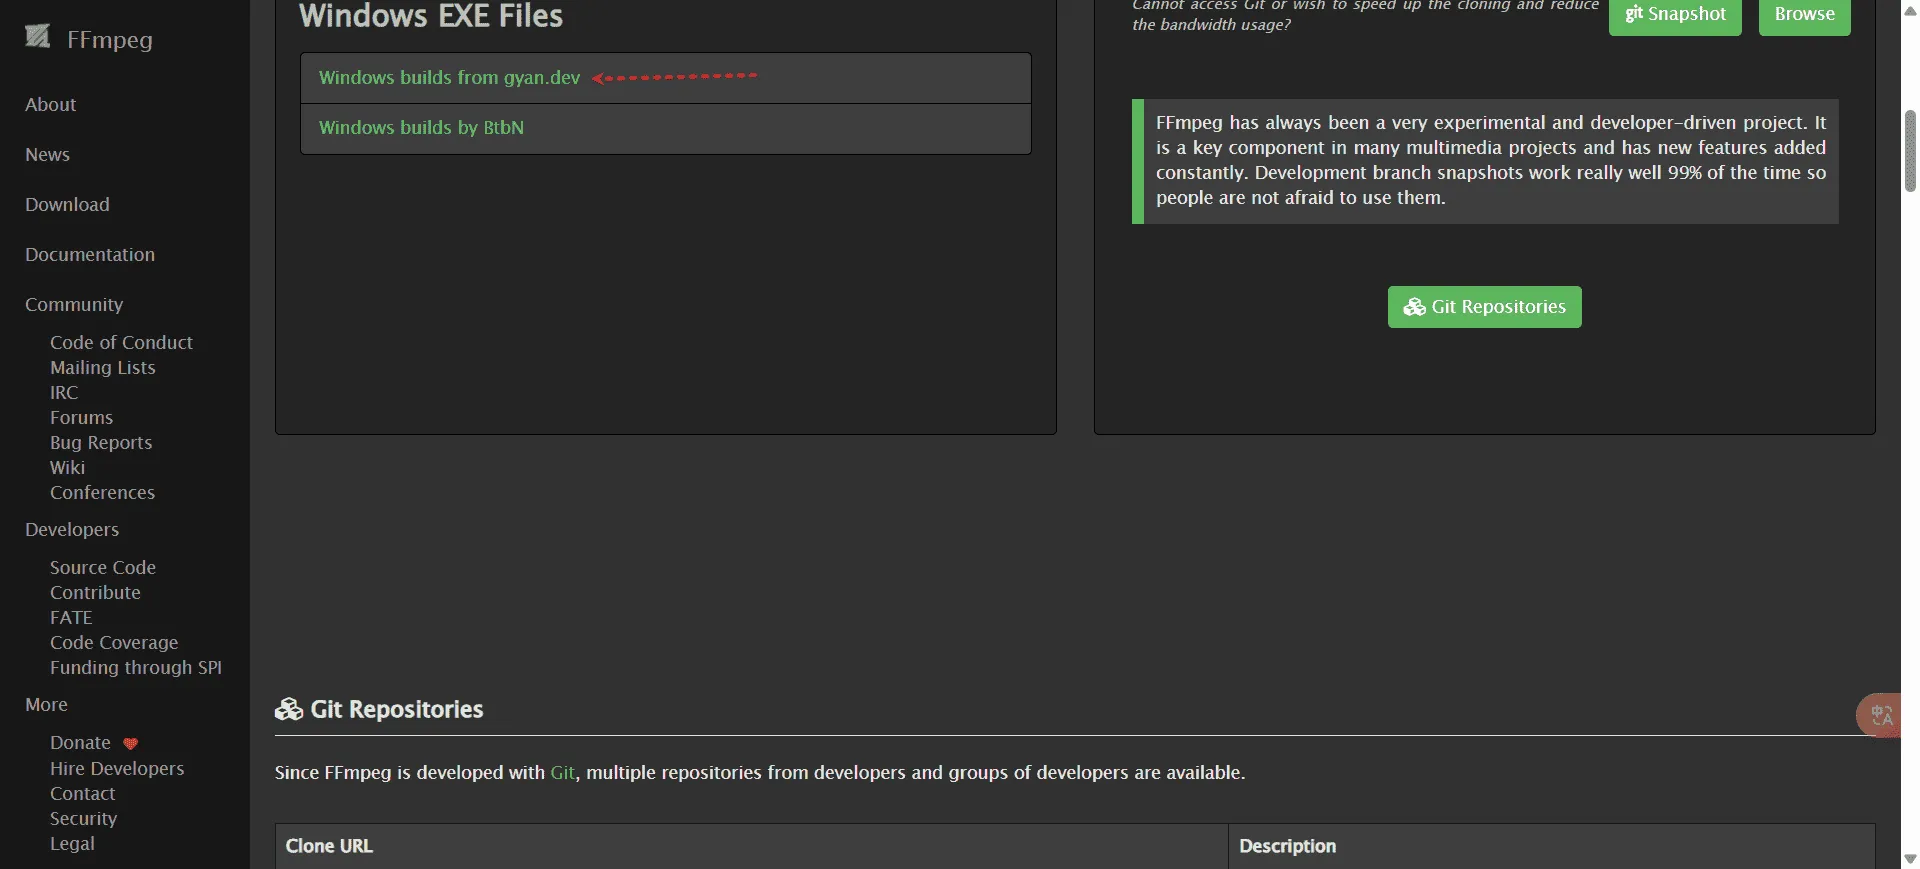
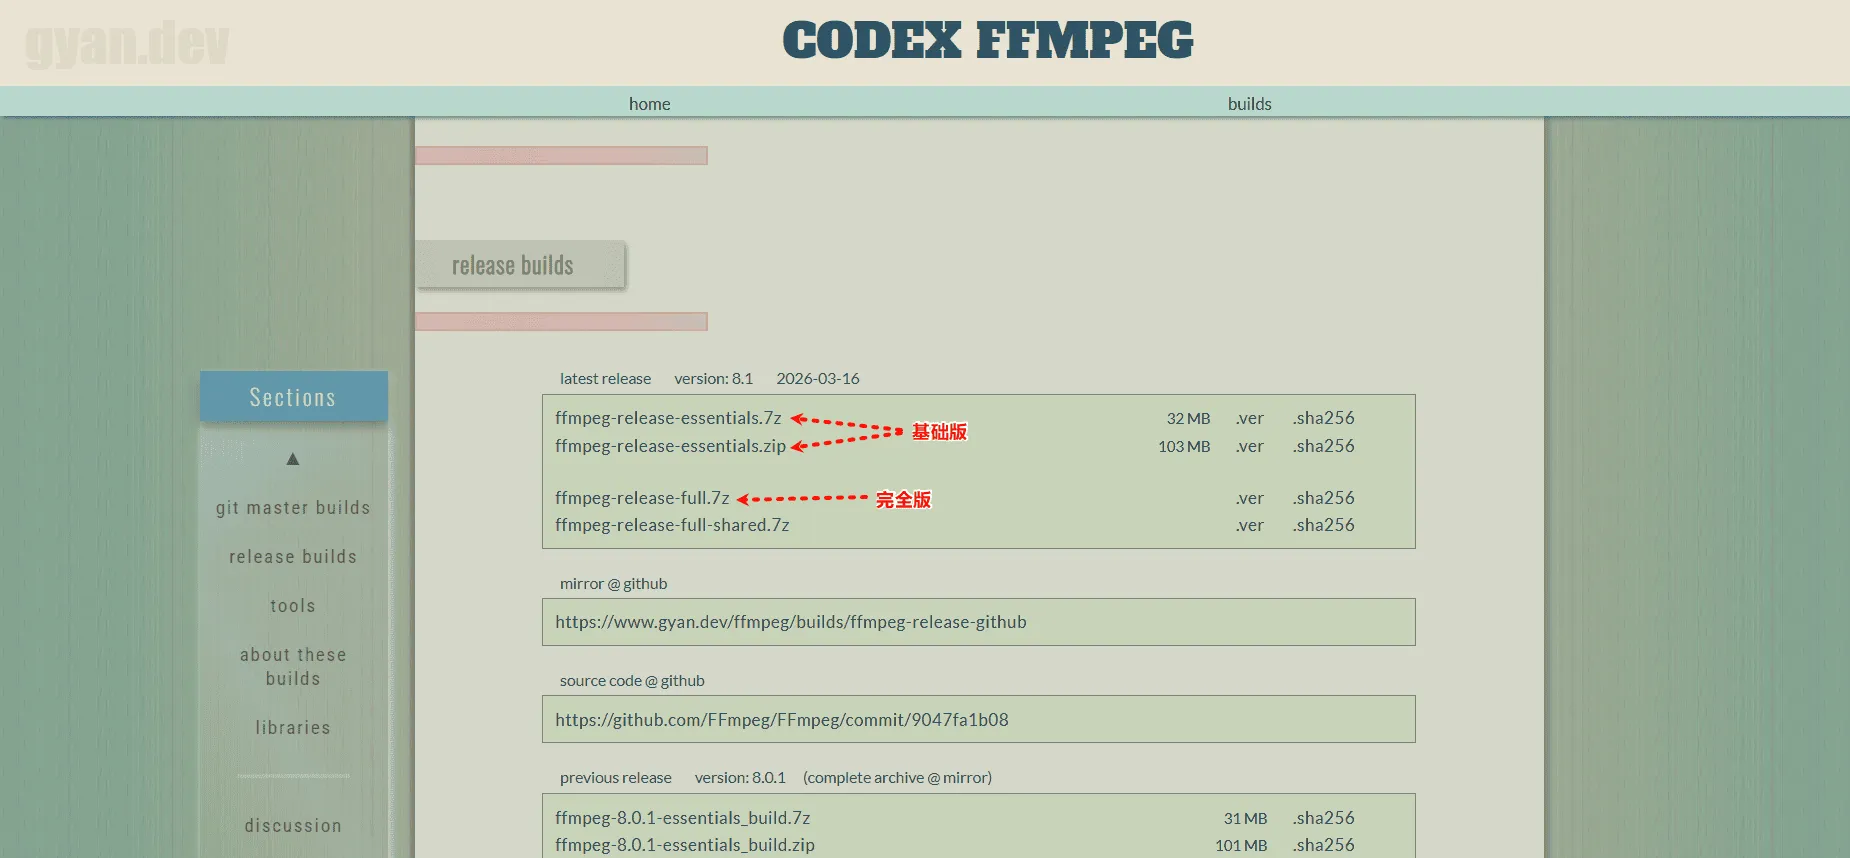
Scroll down the download page to find the “release builds” section, followed by the download link for the latest FFmpeg version. The ones ending with “essentials” indicate the basic version, and those ending with “full” indicate the complete version. You can choose any of them to download. However, be careful not to download versions ending with “shared” (shared versions require self-configuration of the runtime environment and are generally for developers):
Finally, extract the downloaded compressed file. You will find the ffmpeg.exe file in the bin directory. Set the path to the ffmpeg.exe file in the software’s settings under the Other —> FFmpeg Executable Path option. If the setting is successful, the FFmpeg version number will appear on the right: